My thought update ghost cms are very tricky for a new person. Like me, you are a new or beginner in google cloud and deploy your ghost cms website help of bitnami.
That time you face lots of trouble. You don't not under how to update my ghost cms without any error or problem. WordPress cms update with just one click, but you use the command-line tool to update ghost cms in Ghost CMS.
If you beginner person, you face some afraid to run commands. Sometimes you run the wrong command, lose your blog article data, and face another issue in your ghost blog.
Bitnami and Ghost CMS documentation are excellent. But you are a beginner person you do not understand documentation.
so in this article, I guide you step by step. How to update your ghost CMS without any Error. Just follow me.
You deploy Ghost CMS on Google cloud and AWS help of bitnami, all the steps same. But I recommended the following official documentation.
Steps
- Upgrade Ghost 1.X Onwards
- Upgrade Ghost From 0.X To 1.X
Upgrade Ghost 1.X Onwards
If your ghost CMS version above into 1.x. then follow these steps
- Change User
- Create Backup
- Update The Ghost-CLI
- Finally, update Ghost CMS
Change User
Firstly, go to the google cloud console, open the instance secure ssh shell, and log in as a bitnami user in ghost CMS.
sudo su bitnami
Create Backup
In ghost CMS two ways to create a backup.
- Using Dashboard
- Using Command-line ( Recommended ways)
Using Dashboard
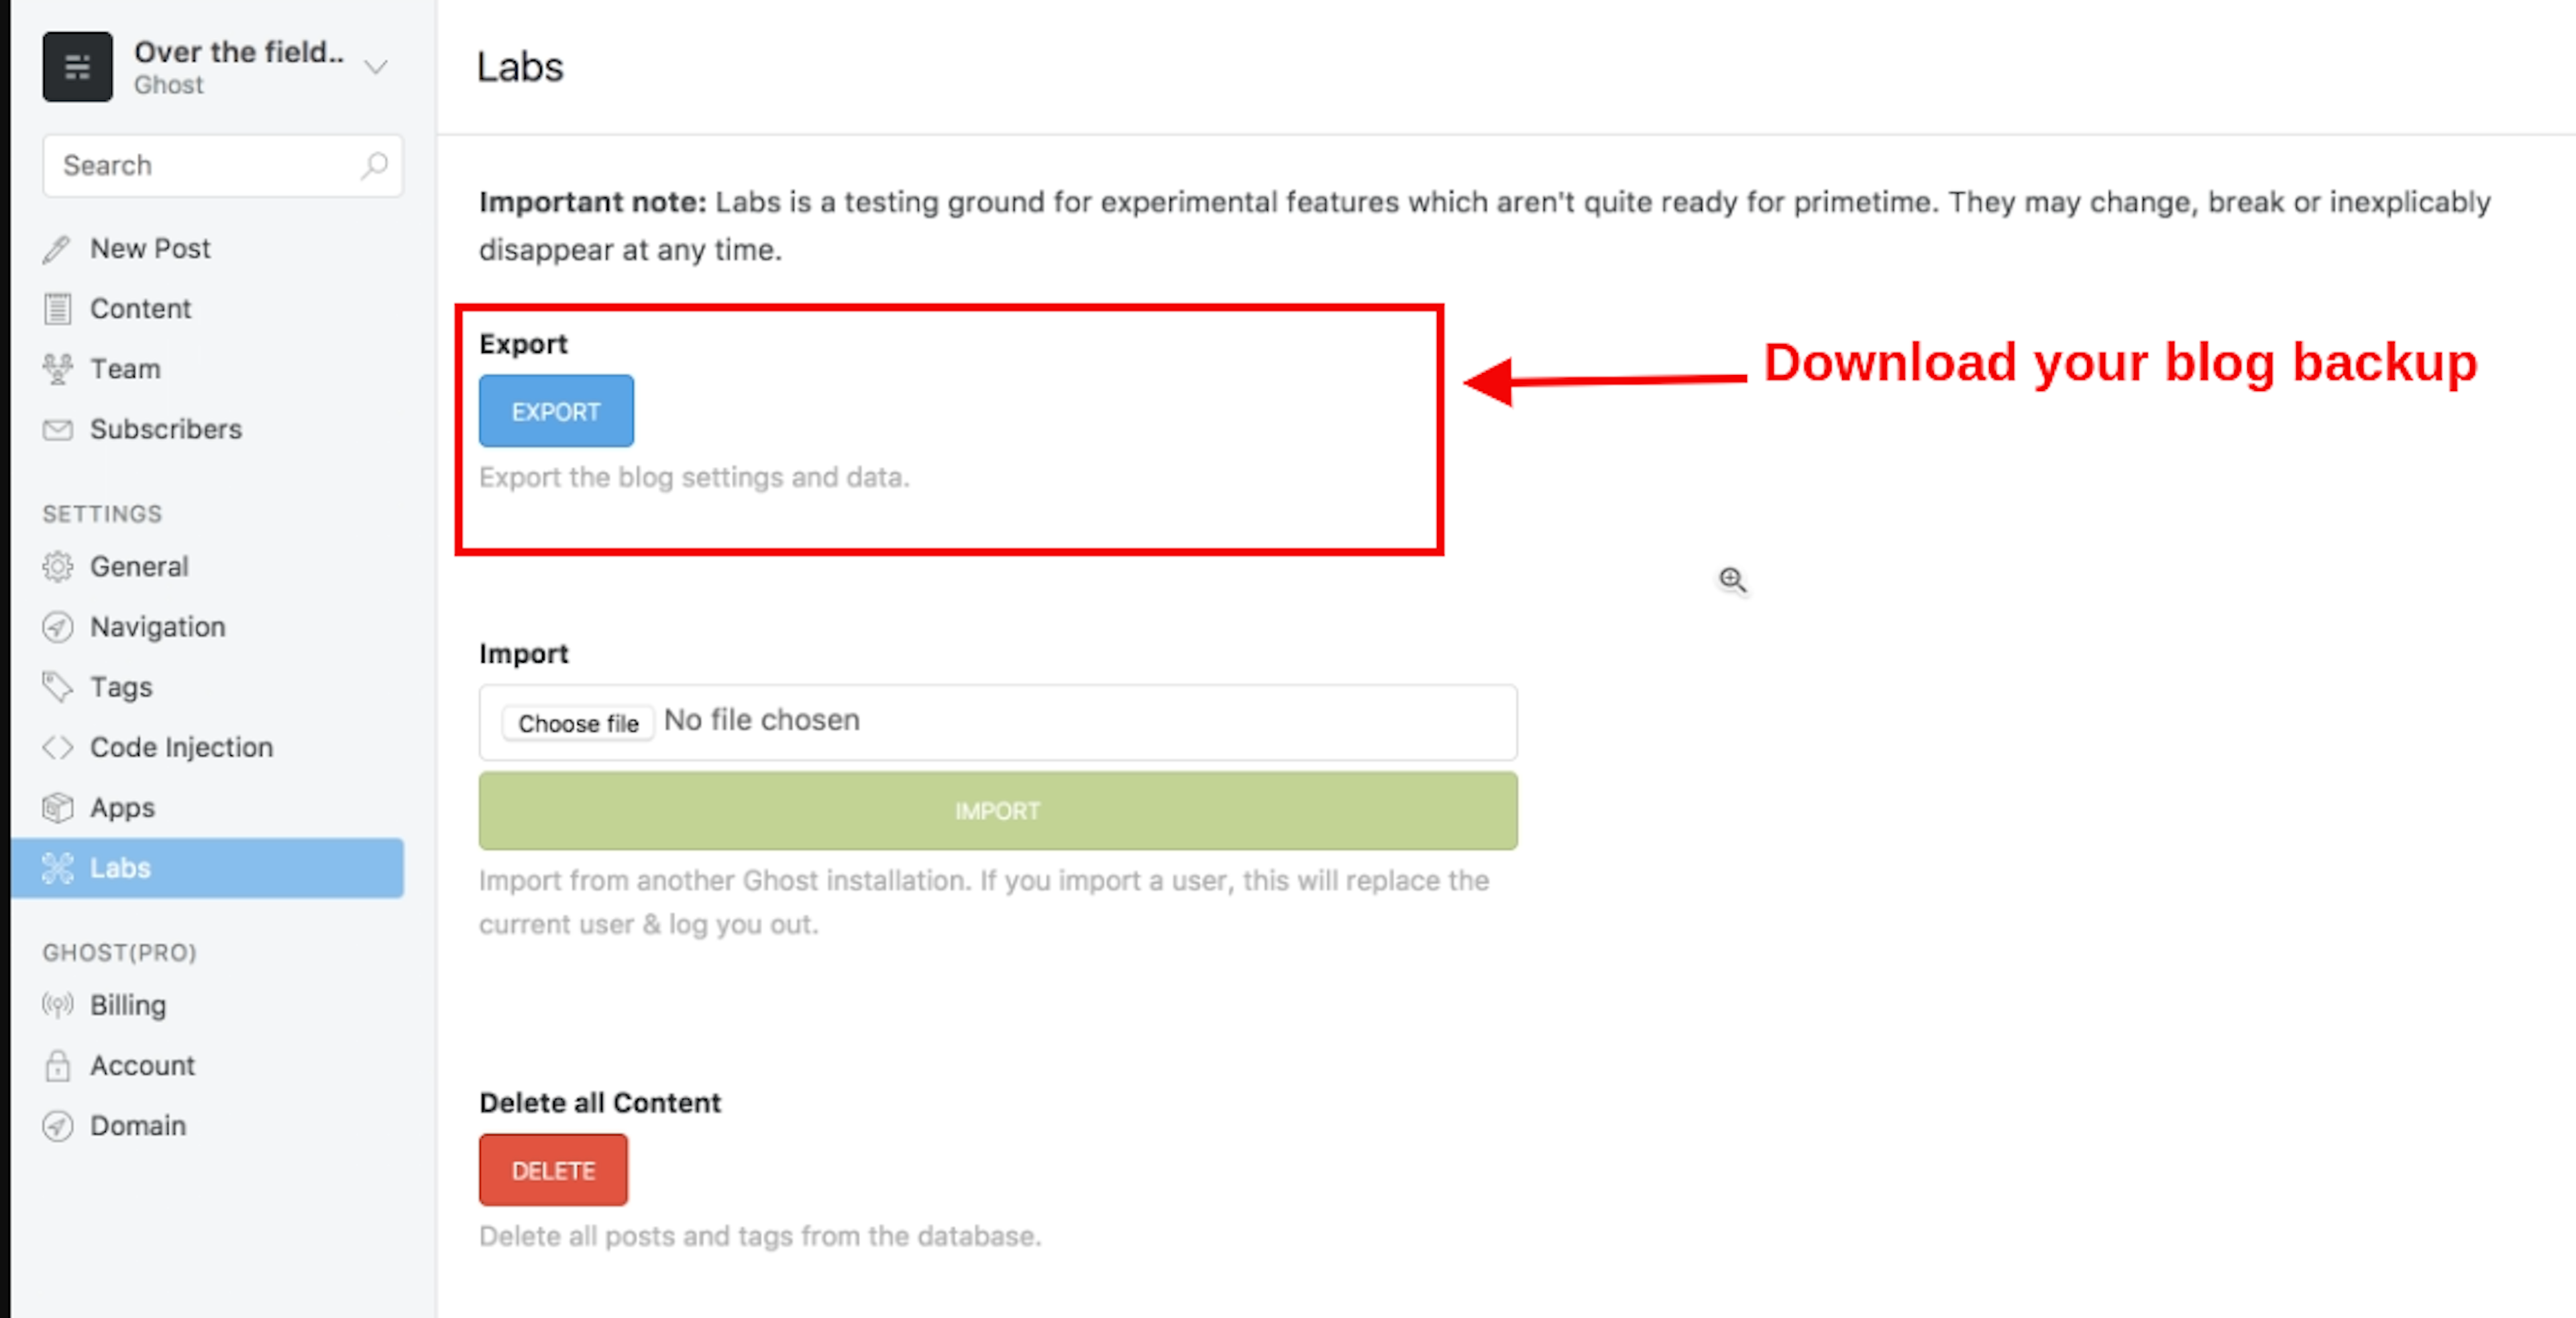
Login to your ghost CMS dashboard after navigating the “Settings" page and select the " Labs " section and click on the “Export” button. After a few seconds, your backup is starting to download locally.
This backup image not be included. You take image backup also separately. You follow this path and take backup.
installdir/apps/ghost/htdocs/content/imagesYou copy or move the images folder/directory to a new instance directory for complete backup.
Using Command-line
Create your backup in ghost using the command line. Follow this article. Choose your operating system and paste commands one by one your backup is created successfully.
I'm recommended to use the command-line ways to create your backup. which is a straightforward way to create a backup. This backup does not need to download files locally. You save the backup on your GCP system.
Take backup using Dashboard, and your backup is incomplete. in this backup image not be downloaded.
Update The Ghost-CLI
In ghost, you update ghost cms firstly, update your Ghost CLI in your project.
Firstly go to the lib folder in ghost using the cd command.
cd installdir/apps/ghost/lib
sudo npm install ghost-cli- Replace the install dir placeholder with the full installation directory path of your Bitnami stack.
- Only use sudo if the stack was installed as root.

When you face any warnings related to the package.json file during the update process. these warnings can safely be ignored
That time your npm command fails. You paste the command, and your problem was solved.
sudo mv package.json package.json.back
sudo npm install ghost-cli
sudo mv package.json.back package.json- Only use sudo if the stack was installed as root. Ether wish you run the command without sudo.
Finally, update Ghost CMS
Finally, go to the ghost installation directory and execute the ghost update command.
Follow this steps
Step 1
In the step first, you got to the htdoc directory. following this command
cd installdir/apps/ghost/htdocs/
Step 2
You go htdoc folder/directory run the ghost update command.
ghost update- Replace the install dir placeholder with the full installation directory path of your Bitnami stack.

Step 3
Your ghost installation finished. now modify file permissions
cd installdir/apps/ghost
sudo chown bitnami:daemon -R ./htdocs ./conf/ ./bin/
sudo find ./htdocs -type f -exec chmod 664 {} \;
sudo find ./htdocs -type d -exec chmod 775 {} \;
sudo chmod 640 ./htdocs/config.production.json
Only use sudo if the stack was installed as root.
- Replace the install dir placeholder with the full installation directory path of your Bitnami stack.
 Congratulations! Now your ghost cms update.
Suppose you face this type of error. Don't worry, I'm also facing this error, and I give you a solution.
Error 1 Ghost update Error
bitnami@officialrajjdeepsinghblog-vm:/home/radewala_2/apps/ghost/htdocs$ ghost update
    ✔ Checking system Node.js version
    ℹ Ensuring user is not logged in as ghost user [skipped]
    ℹ Checking if logged in user is directory owner [skipped]
    ✔ Checking current folder permissions
    ✔ Checking memory availability
    ✔ Checking free space
    ✔ Checking for available migrations
    ✖ Checking for latest Ghost version
    A CliError occurred.
    Message: Unable to update Ghost directly to v4.2.0. You must be on the latest v3.x to update across major versions.
    Help: Run "ghost update v3" to get the latest v3.x version, then run "ghost update" to get to v4.
    Debug Information:
    OS: Debian GNU/Linux, v10
    Node Version: v12.19.0
    Ghost Version: 3.40.2
    Ghost-CLI Version: 1.16.3
    Environment: production
    Command: 'ghost update'
    Additional log info available in: /home/bitnami/.ghost/logs/ghost-cli-debug-2021-04-11T08_49_03_257Z.log
    Try running ghost doctor to check your system for known issues.
    You can always refer to https://ghost.org/docs/ghost-cli/ for troubleshooting.
You face the same error as me. You paste the ghost update v3 command in the terminal. Your error was resolved.
https://forum.ghost.org/t/update-ghost-cms-in-google-cloud-use-bitnam-now-i-face-error/21763/4
Error 2

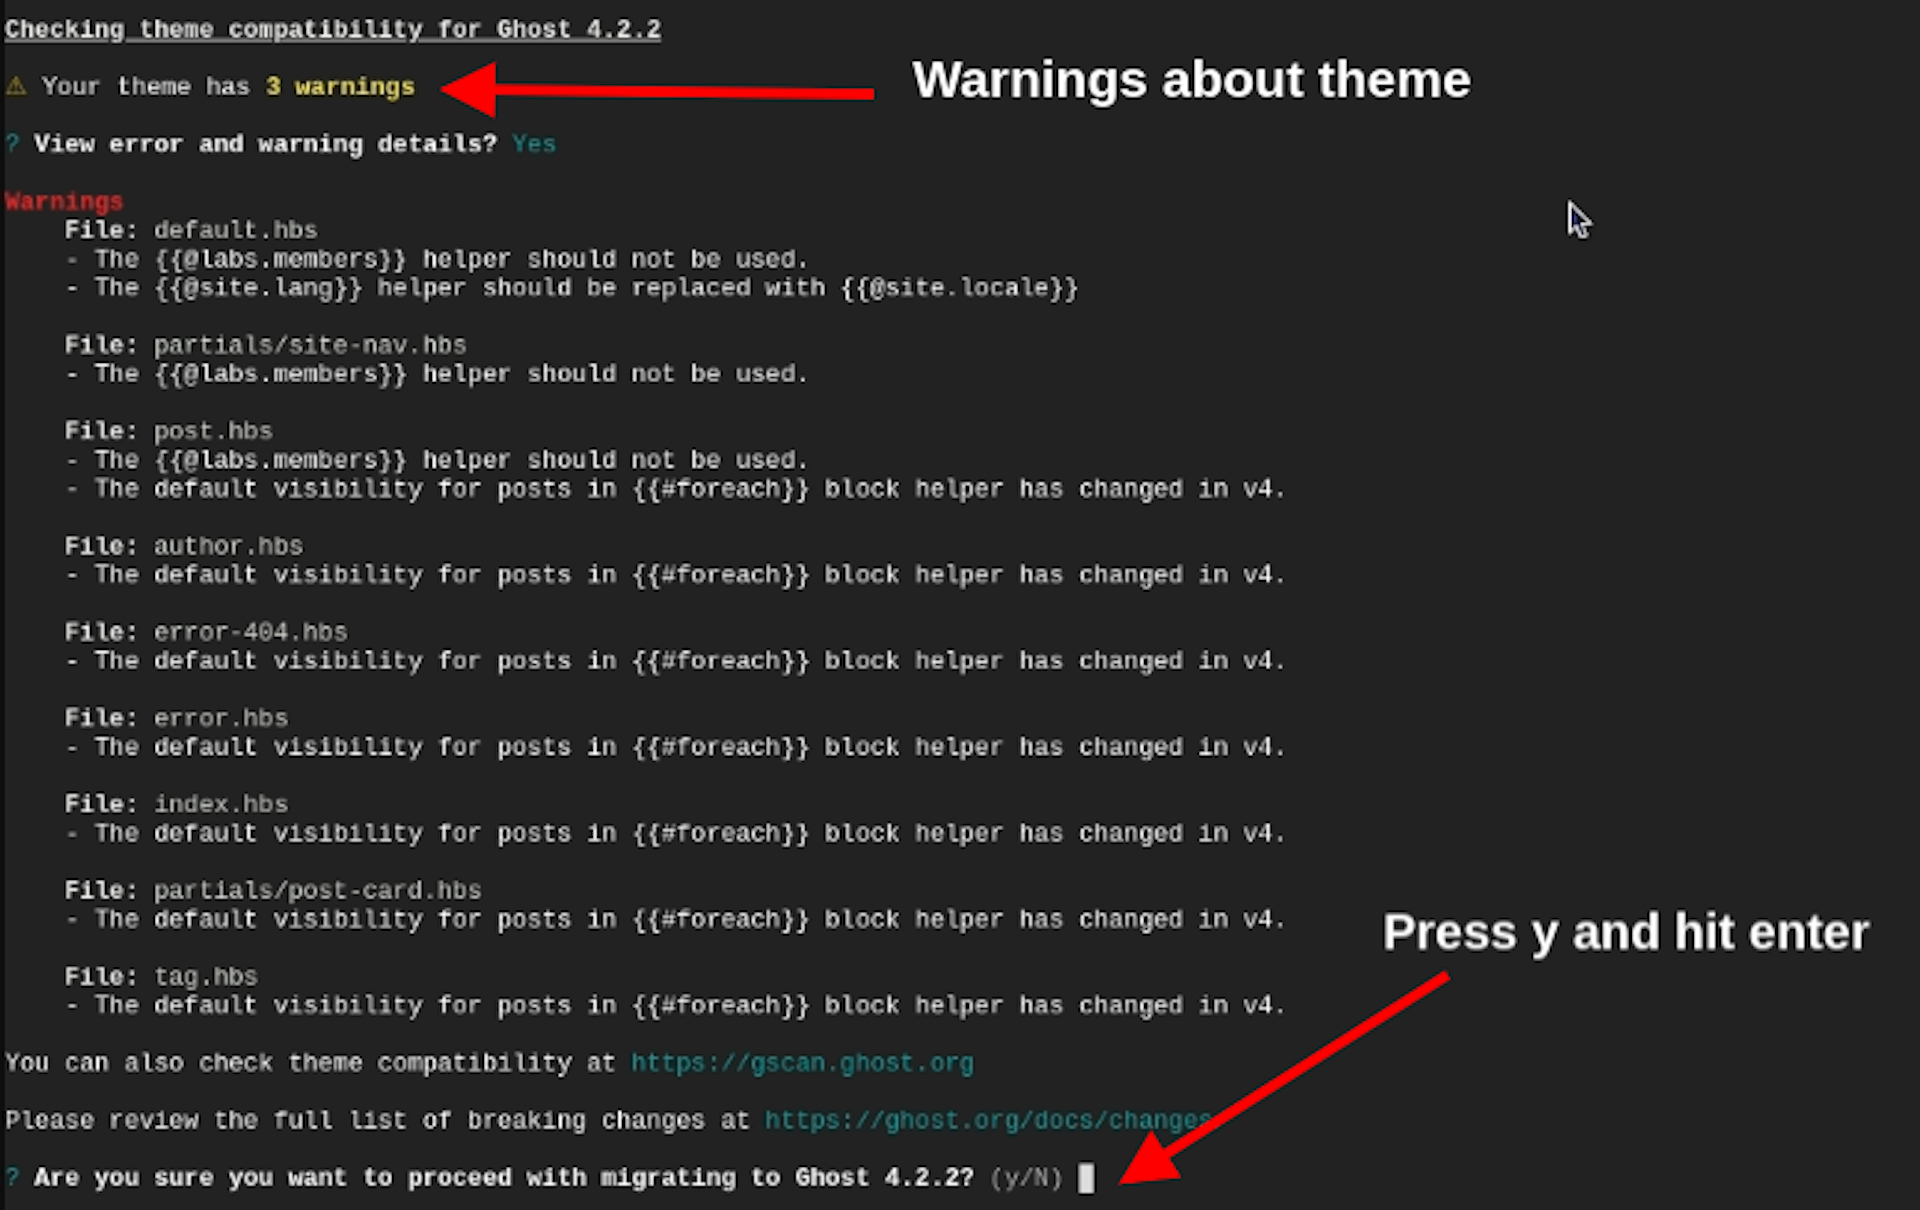
Ghost update time. You face a theme warning message in your terminal. You write y and hit enter. After your ghost installs successfully in GCP. after installing completely. You update the ghost CMS theme manually. Now your error was removed successfully.
If you face any error related to ghost cms, you ask on the ghost official forum. Ghost team and community of people guide you very easily.
Upgrade Ghost From 0.X To 1.X
Suppose you run an ancient 0.x to 1.x version of ghost cms. Now you update ghost cms very easily.
Follow my steps to update your ghost blog with the latest version.
Step 1
In this step, you create a backup using ghost dashboard UI.
Login to your ghost CMS dashboard after navigating the Settings page and select the " Labs " section and click on the “Export” button. After few seconds, your backup is starting to download locally.
Your image or theme was not downloaded in your JSON backup file. If you download your image, follow my step 4.

Step 2
Launch a brand new Bitnami ghost instance in GCP.
Step 3
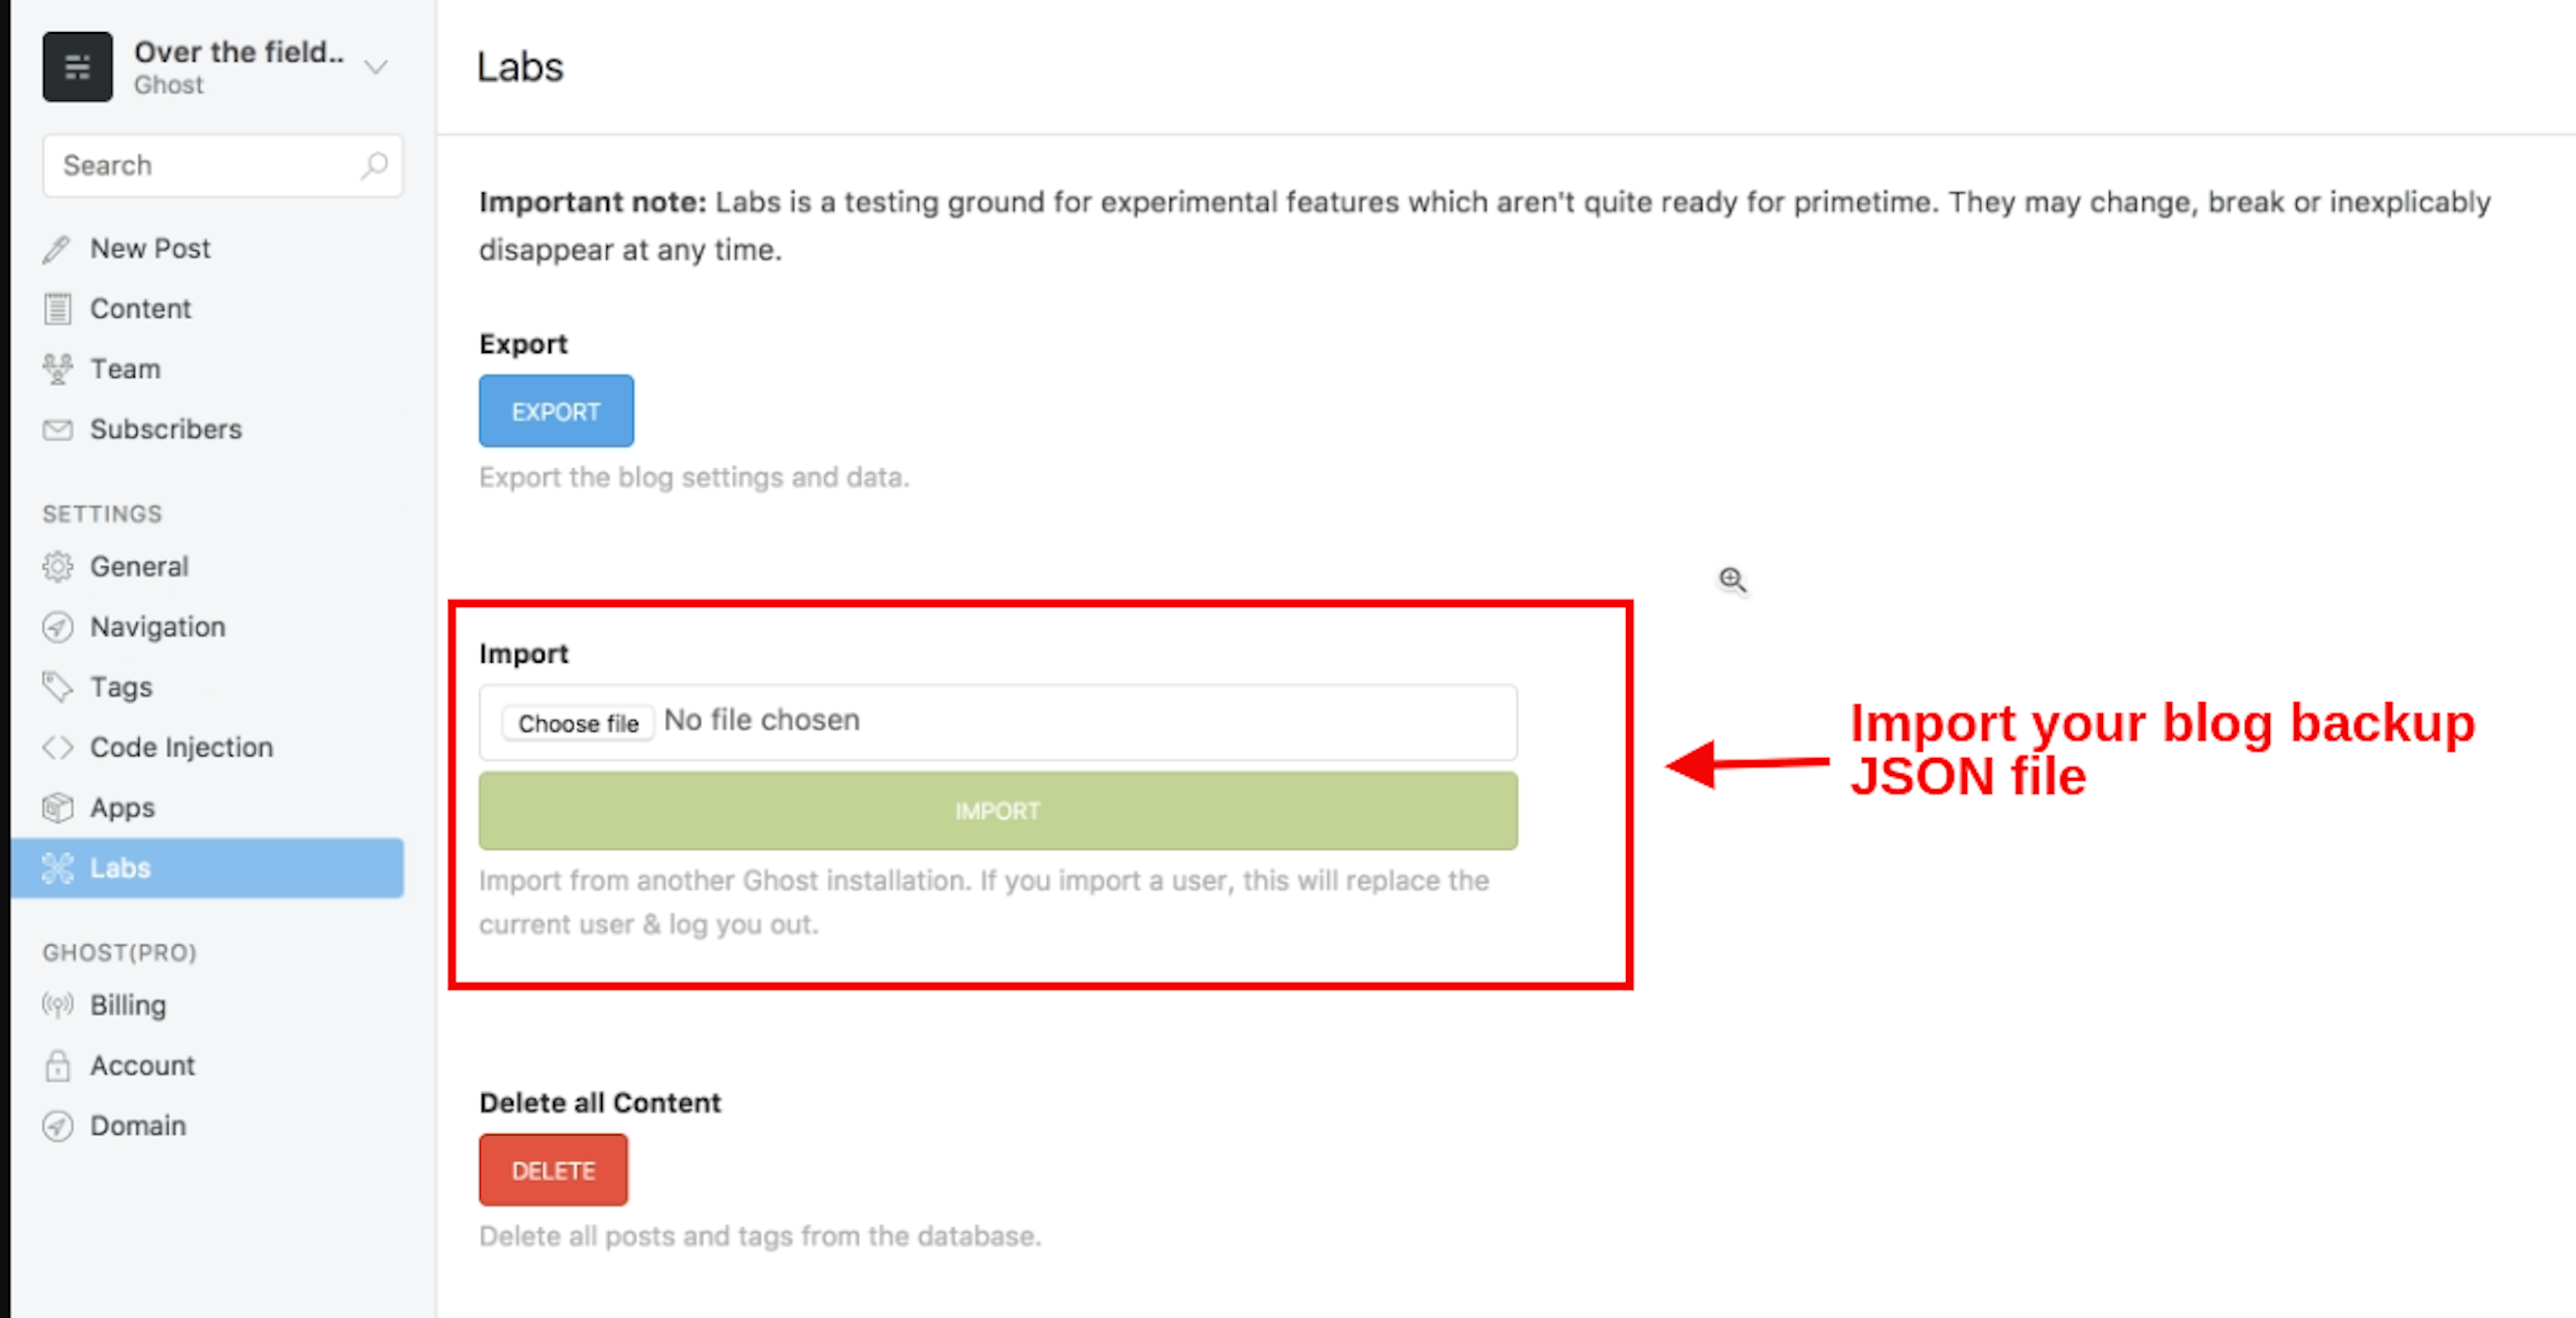
Import your backup JSON file in your ghost dashboard.
Go to the settings page. Click to the lab section and click to choose file. After selecting your ghost JSON backup file from your system. then click to import button.

Step 4
Copy your image from the old Ghost instance directory to the brand new launch directory.
Your all image save in this directory path
installdir/apps/ghost/htdocs/content/imagesYou move the images folder/directory to a new instance directory.
installdir/apps/ghost/htdocs/current/content/images
Step 5
Upload your theme in new ghost cms. You just got to the setting page, clicked on the Design tab, and clicked to upload the theme button. Drag your file and click to update. By default, ghost cms provide a Casper theme. Now your ghost CMS fully migrated to the new Ghost Version. Congratulation
Reference
https://ghost.org/docs/update/
Conclusion
The ghost Cms update process is challenging for a beginner person. All ways run these commands. You make sure to take backup of your Ghost CMS using command-line. You take backup use ghost dashboard.
You do not take an image backup. In this backup, you save only post data, and ghost CMS settings and images not be included.