Recently, I Purchase Domain On Google Domains. Google Domains Provide Services Like Godaddy. You Easily Purchase Domain With Googles Domains.
Most Important When You Purchase Domain with Google. You Are Verify On Webmaster, Adsense, Google Tag Manager, and Google Analytics. Because Google Verify Your Domain Automatic make Sure Your Email Account Same
Simple Follow This Steps
- Copy Instances IP
- Add Domain
- Name Server
Copy Instances IP
Go to Working Project Dashboard.
https://console.cloud.google.com/
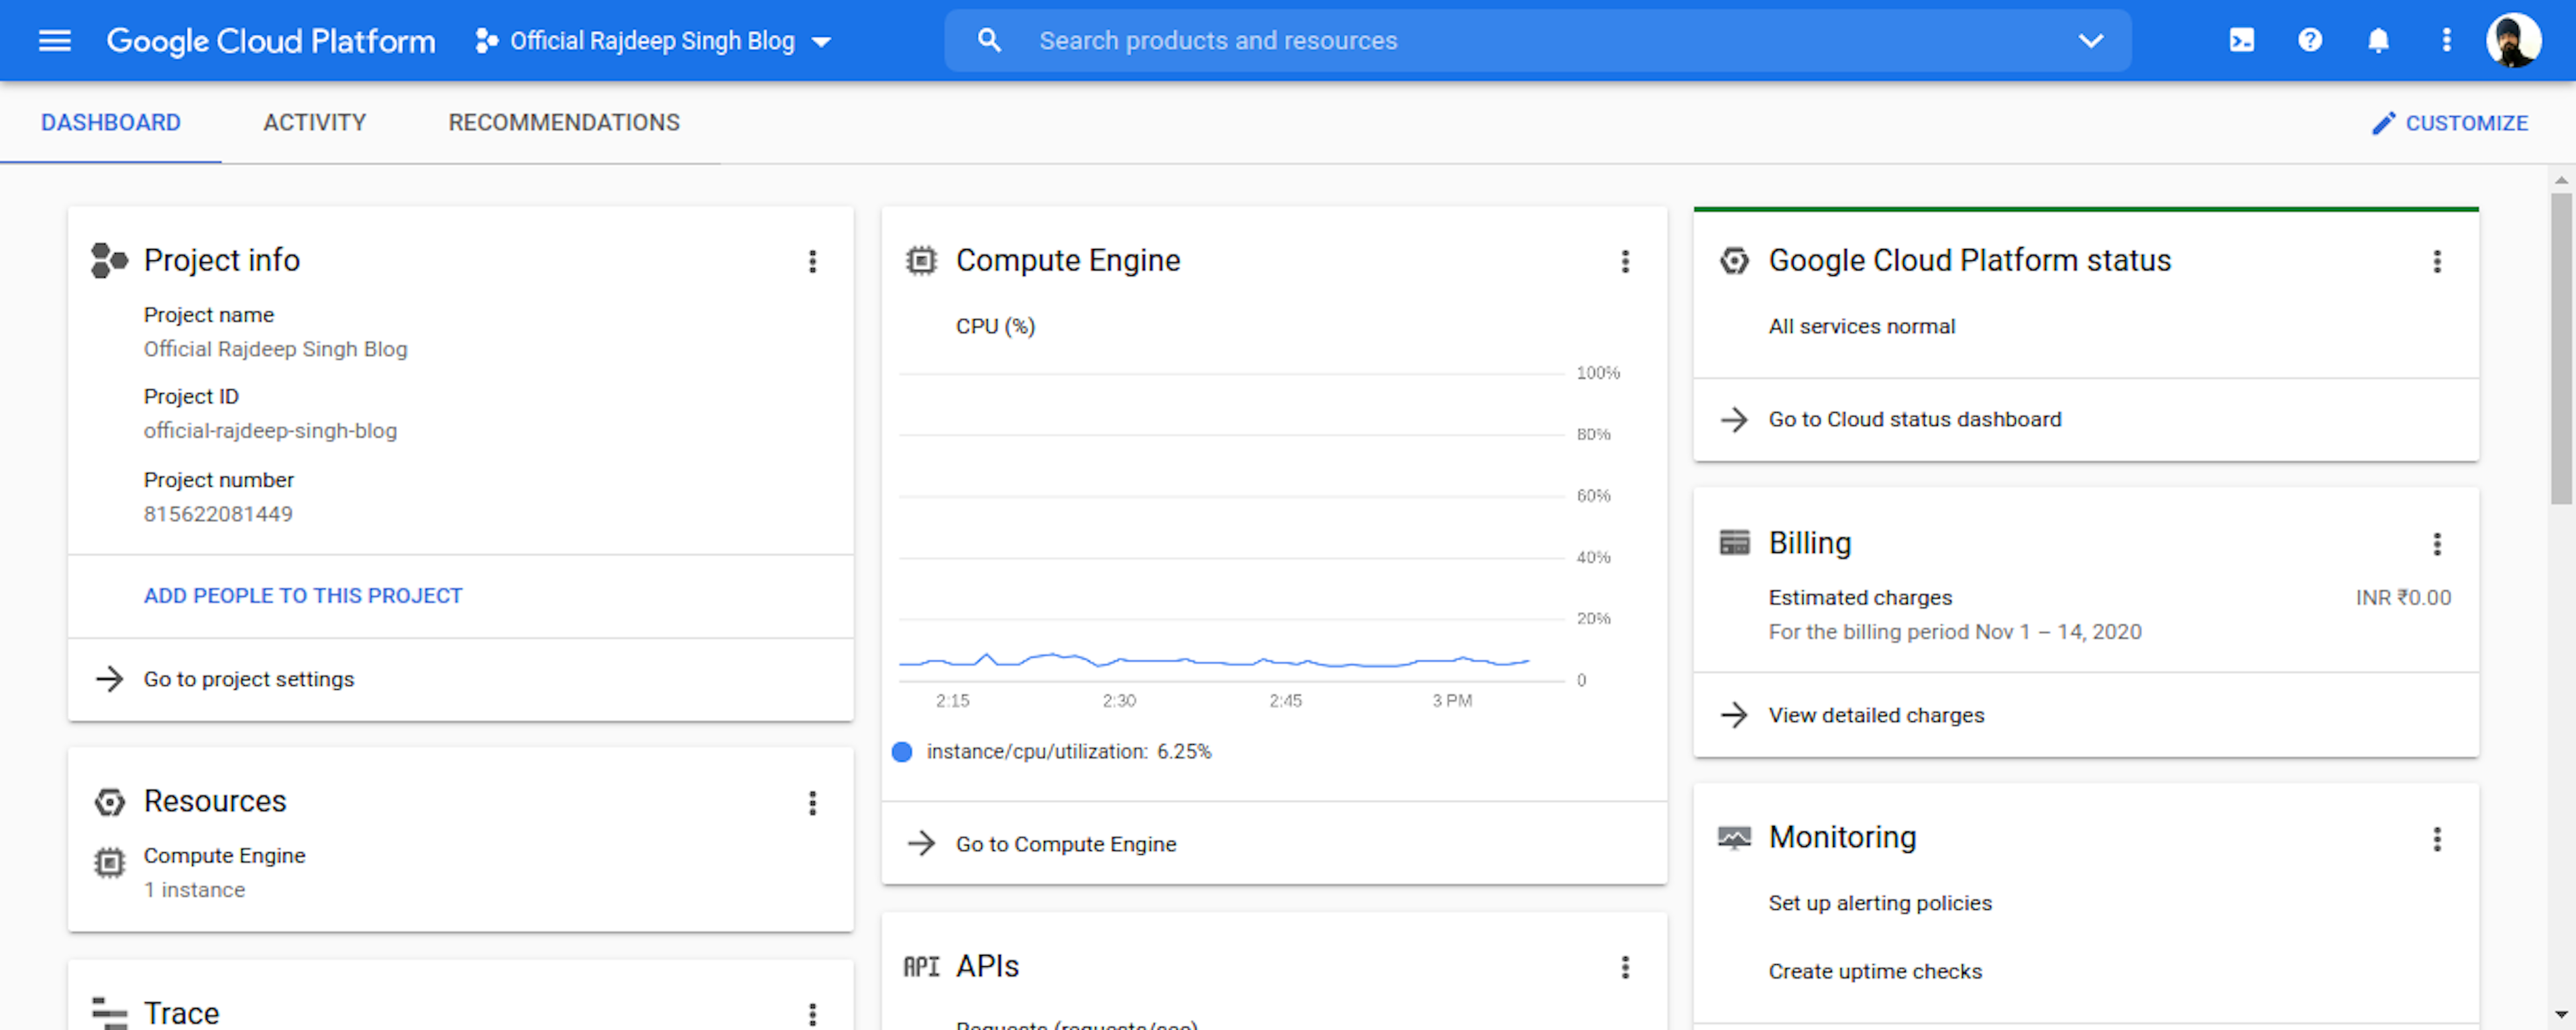
Your Dashboard Look Like.
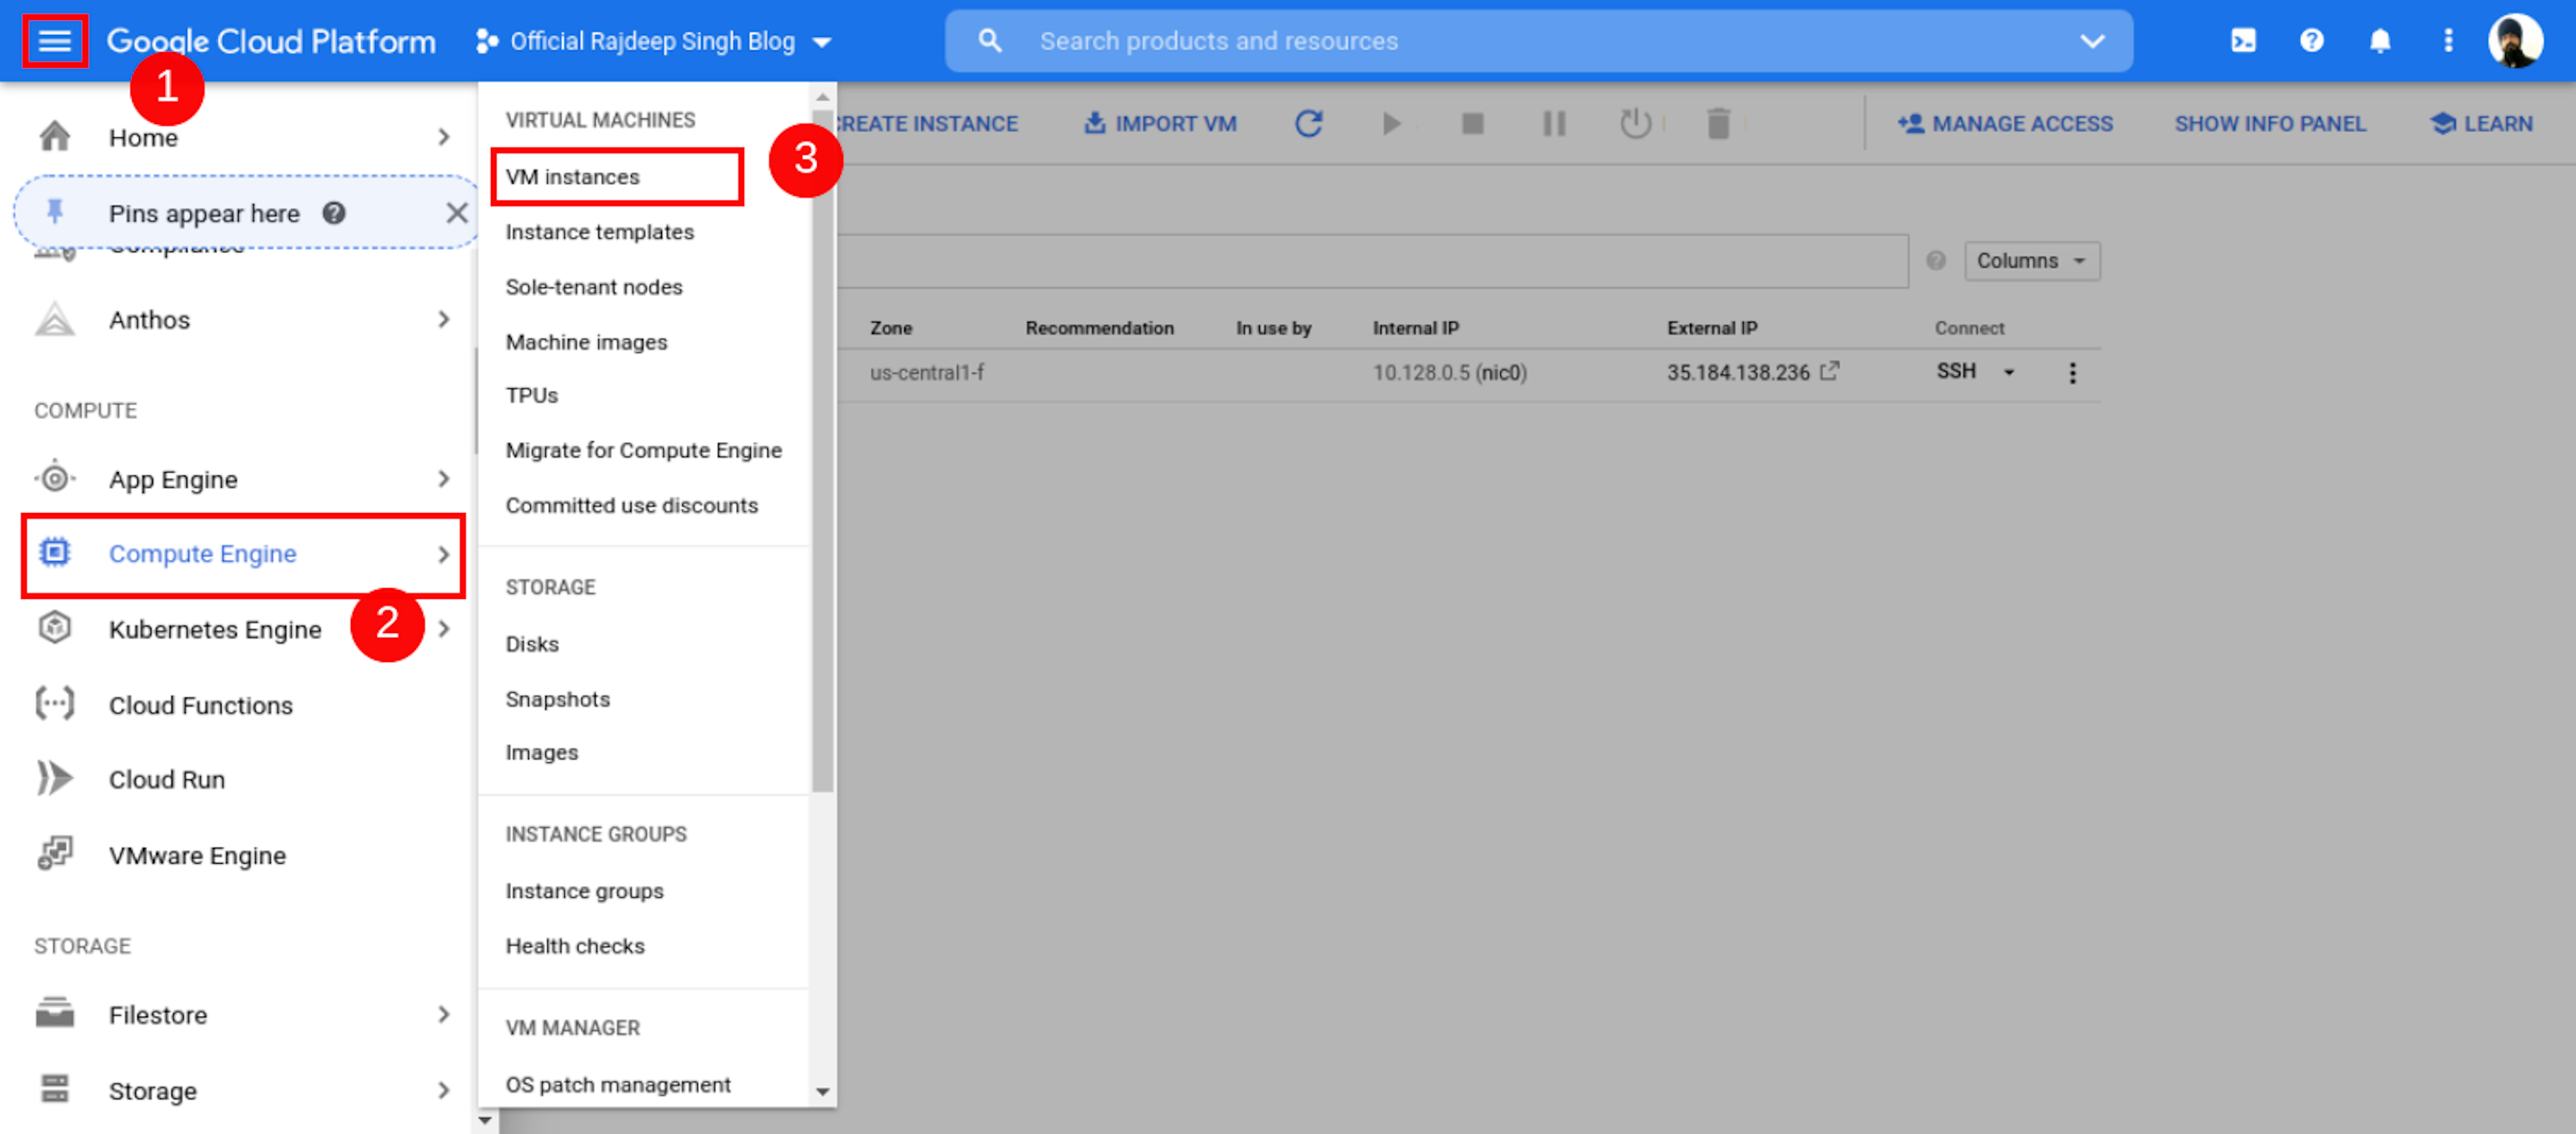
- Open Your Project Dashboard Click To Left Top Conner Navbar Icon After Scroll Down Find Compute Engine.
- Click Compute Engine Icon After Select VM Instances.
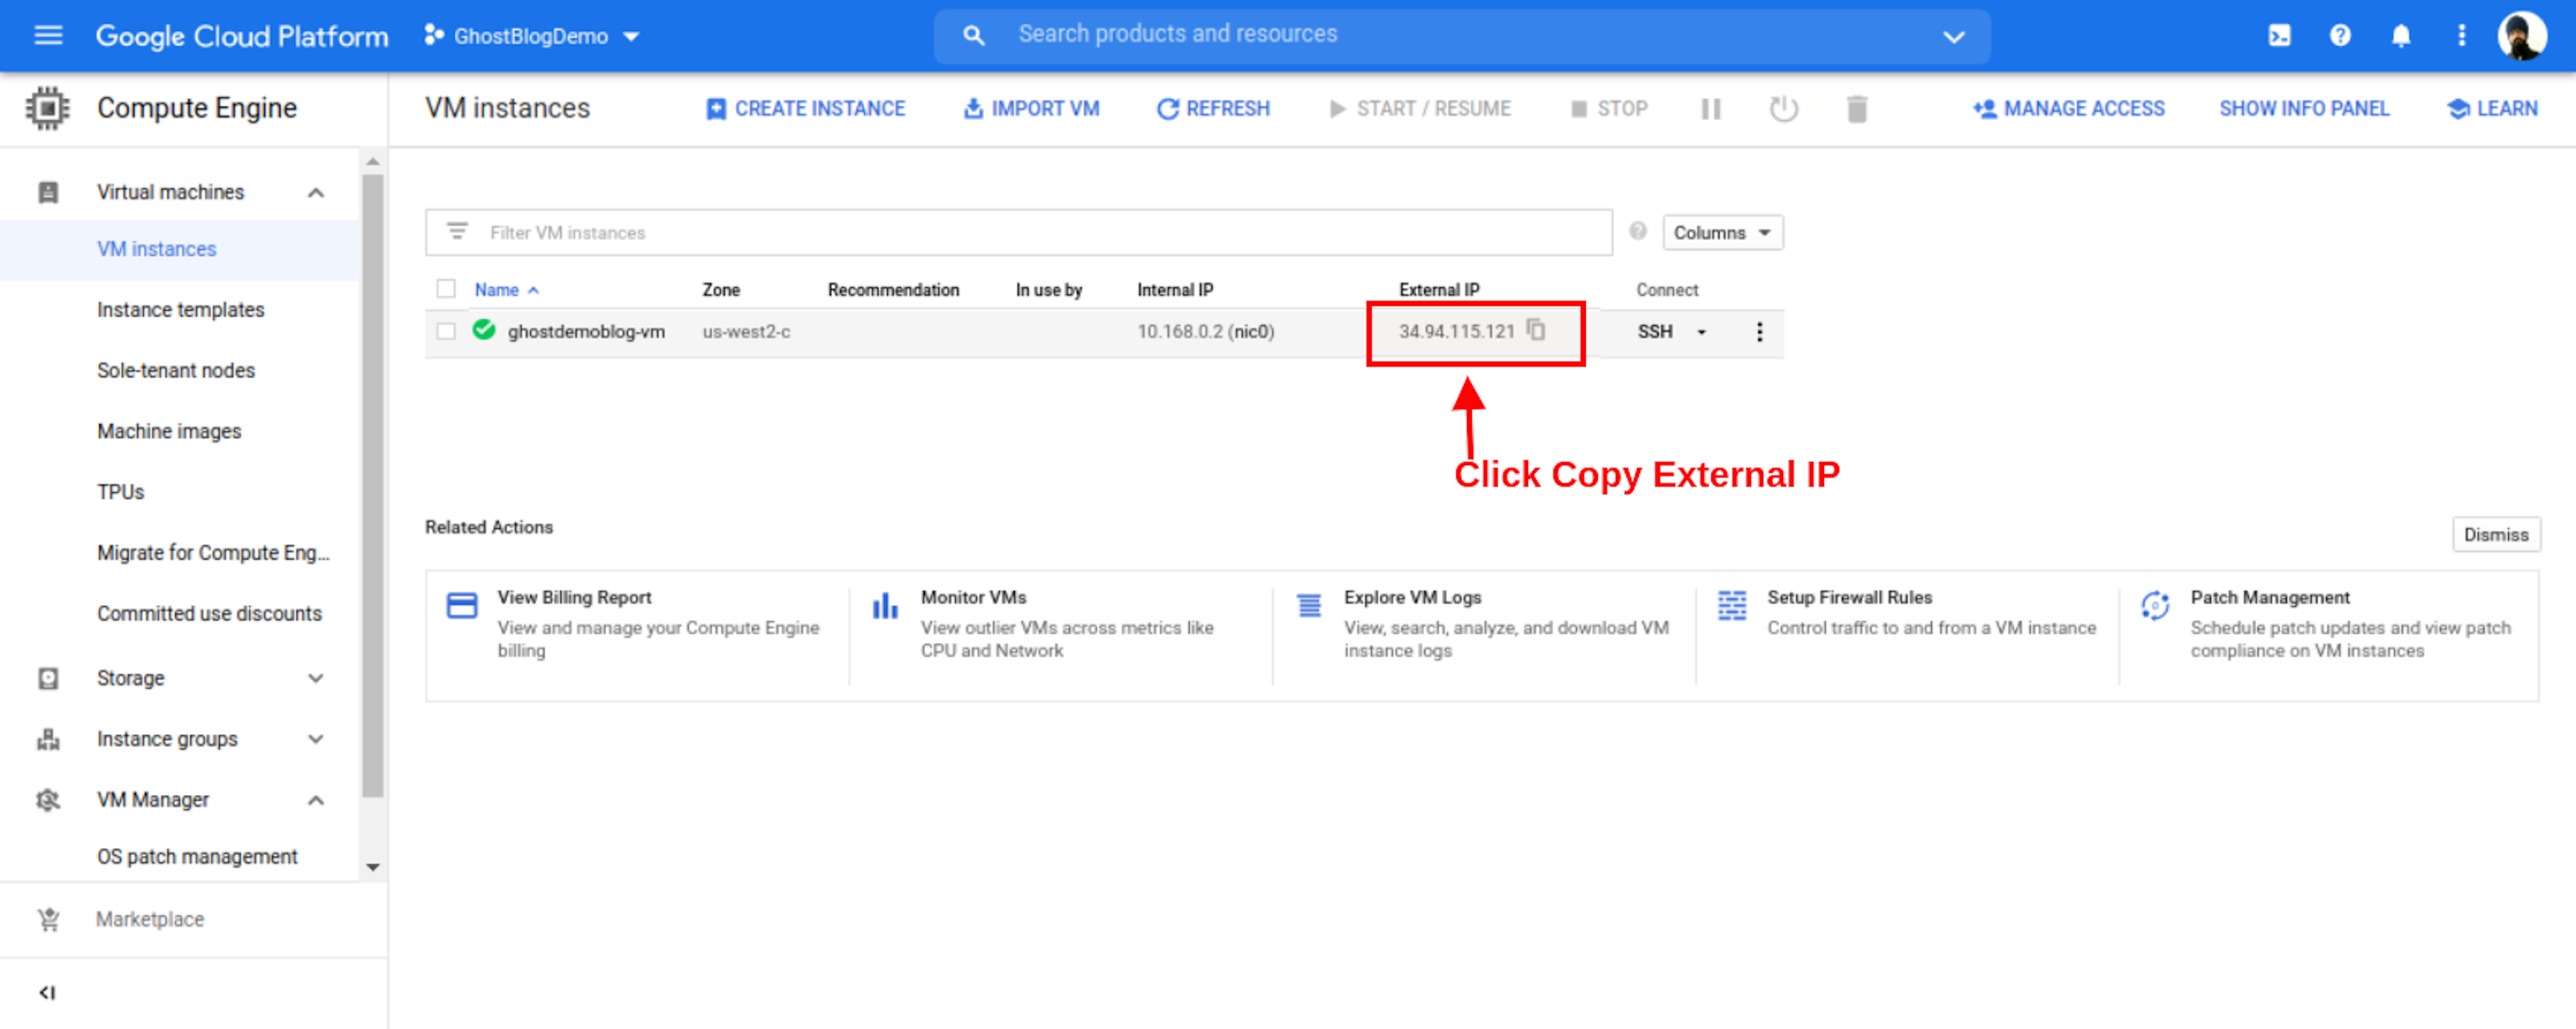
Make Sure Copy your External Ip Address.
Add Domain
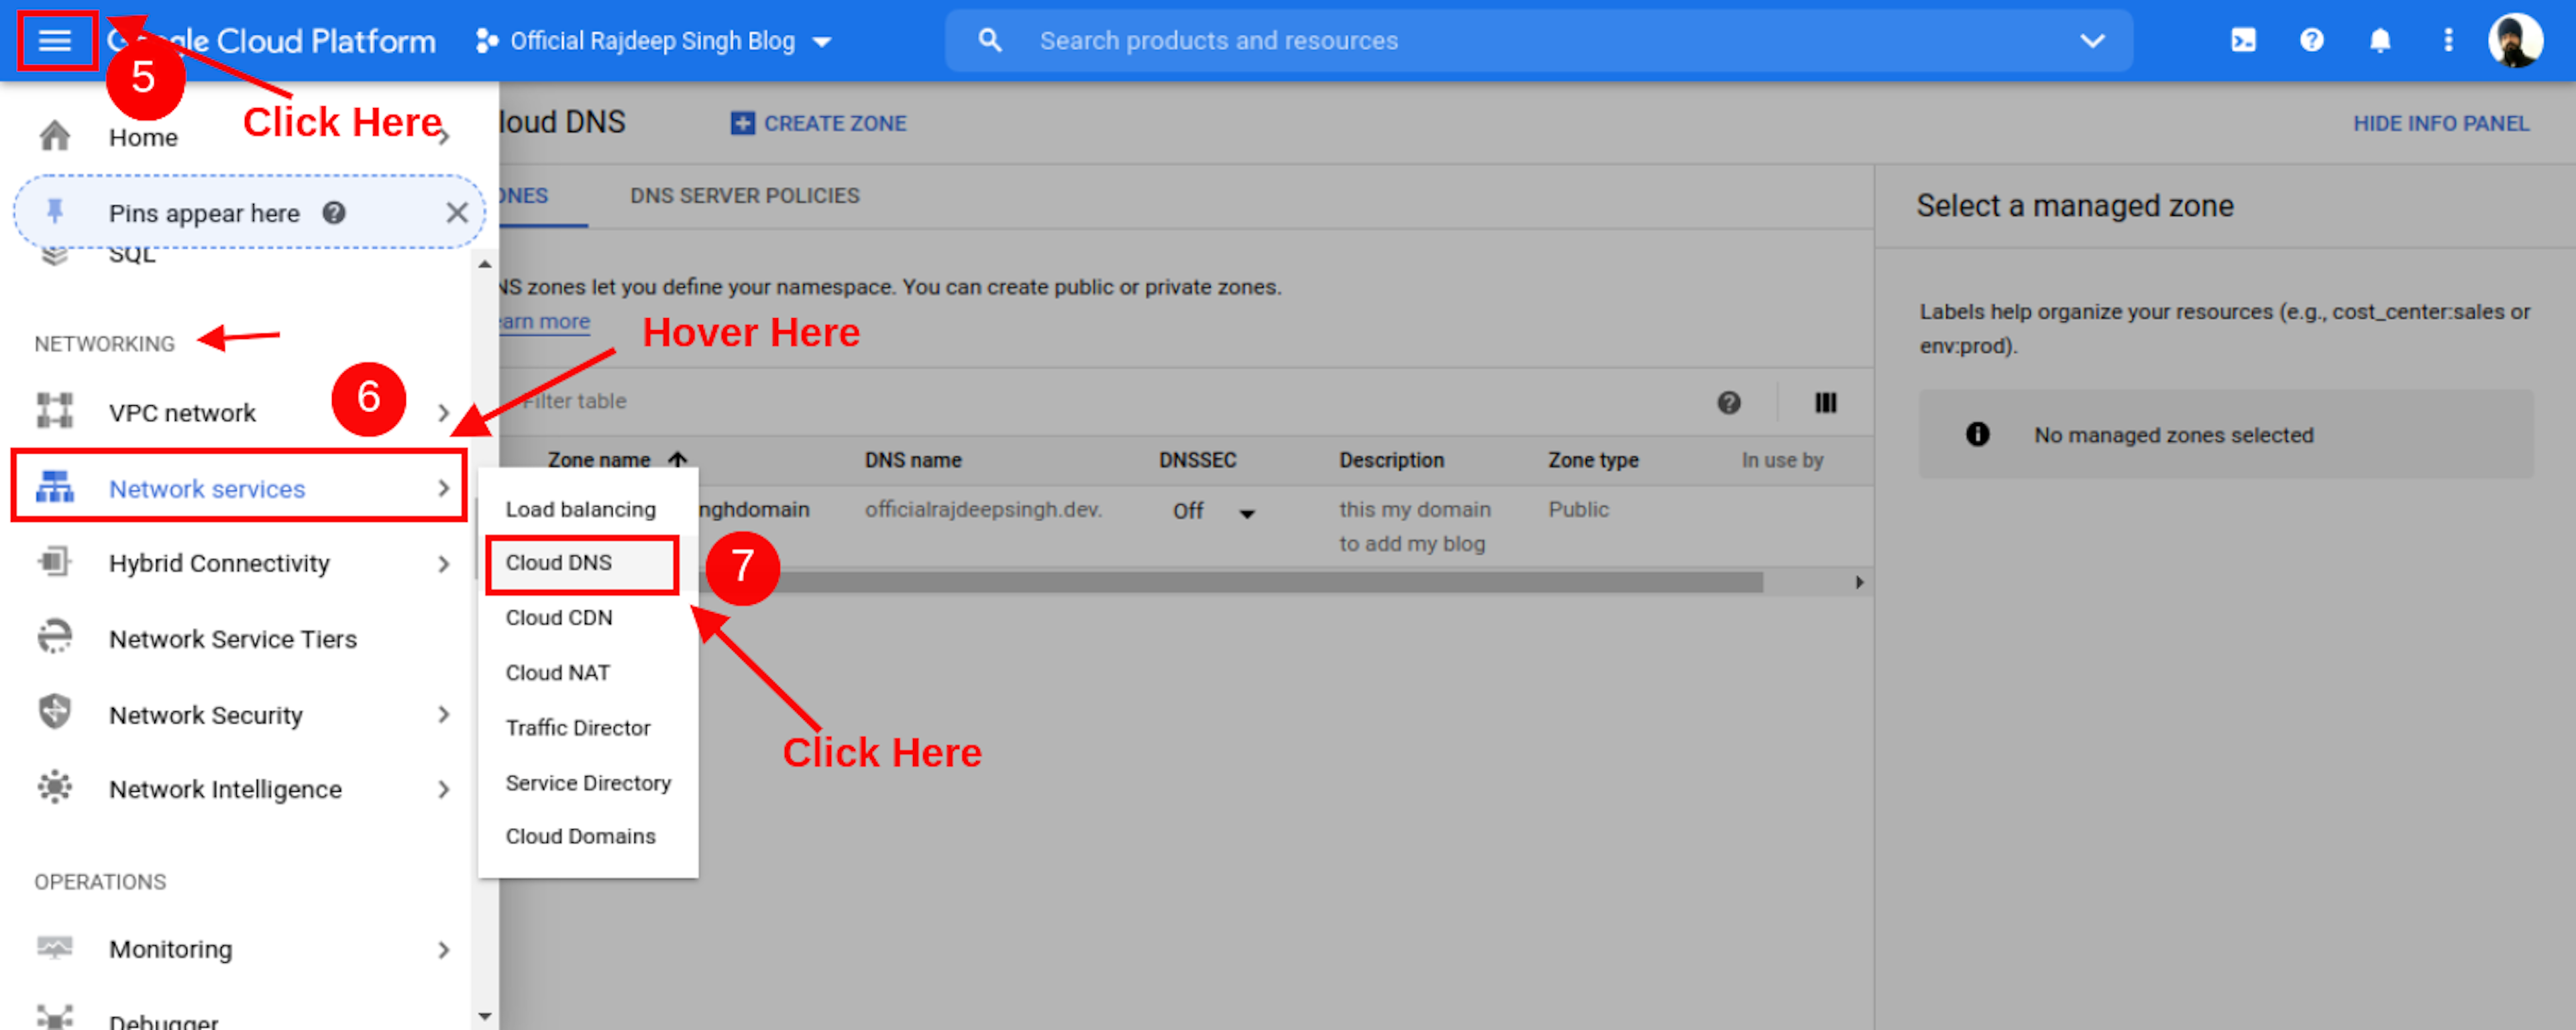
- Firstly Copy IP Address Correctly and Go To Left Top Conner Navbar Icon. After Scroll Down, Find Cloud DNS
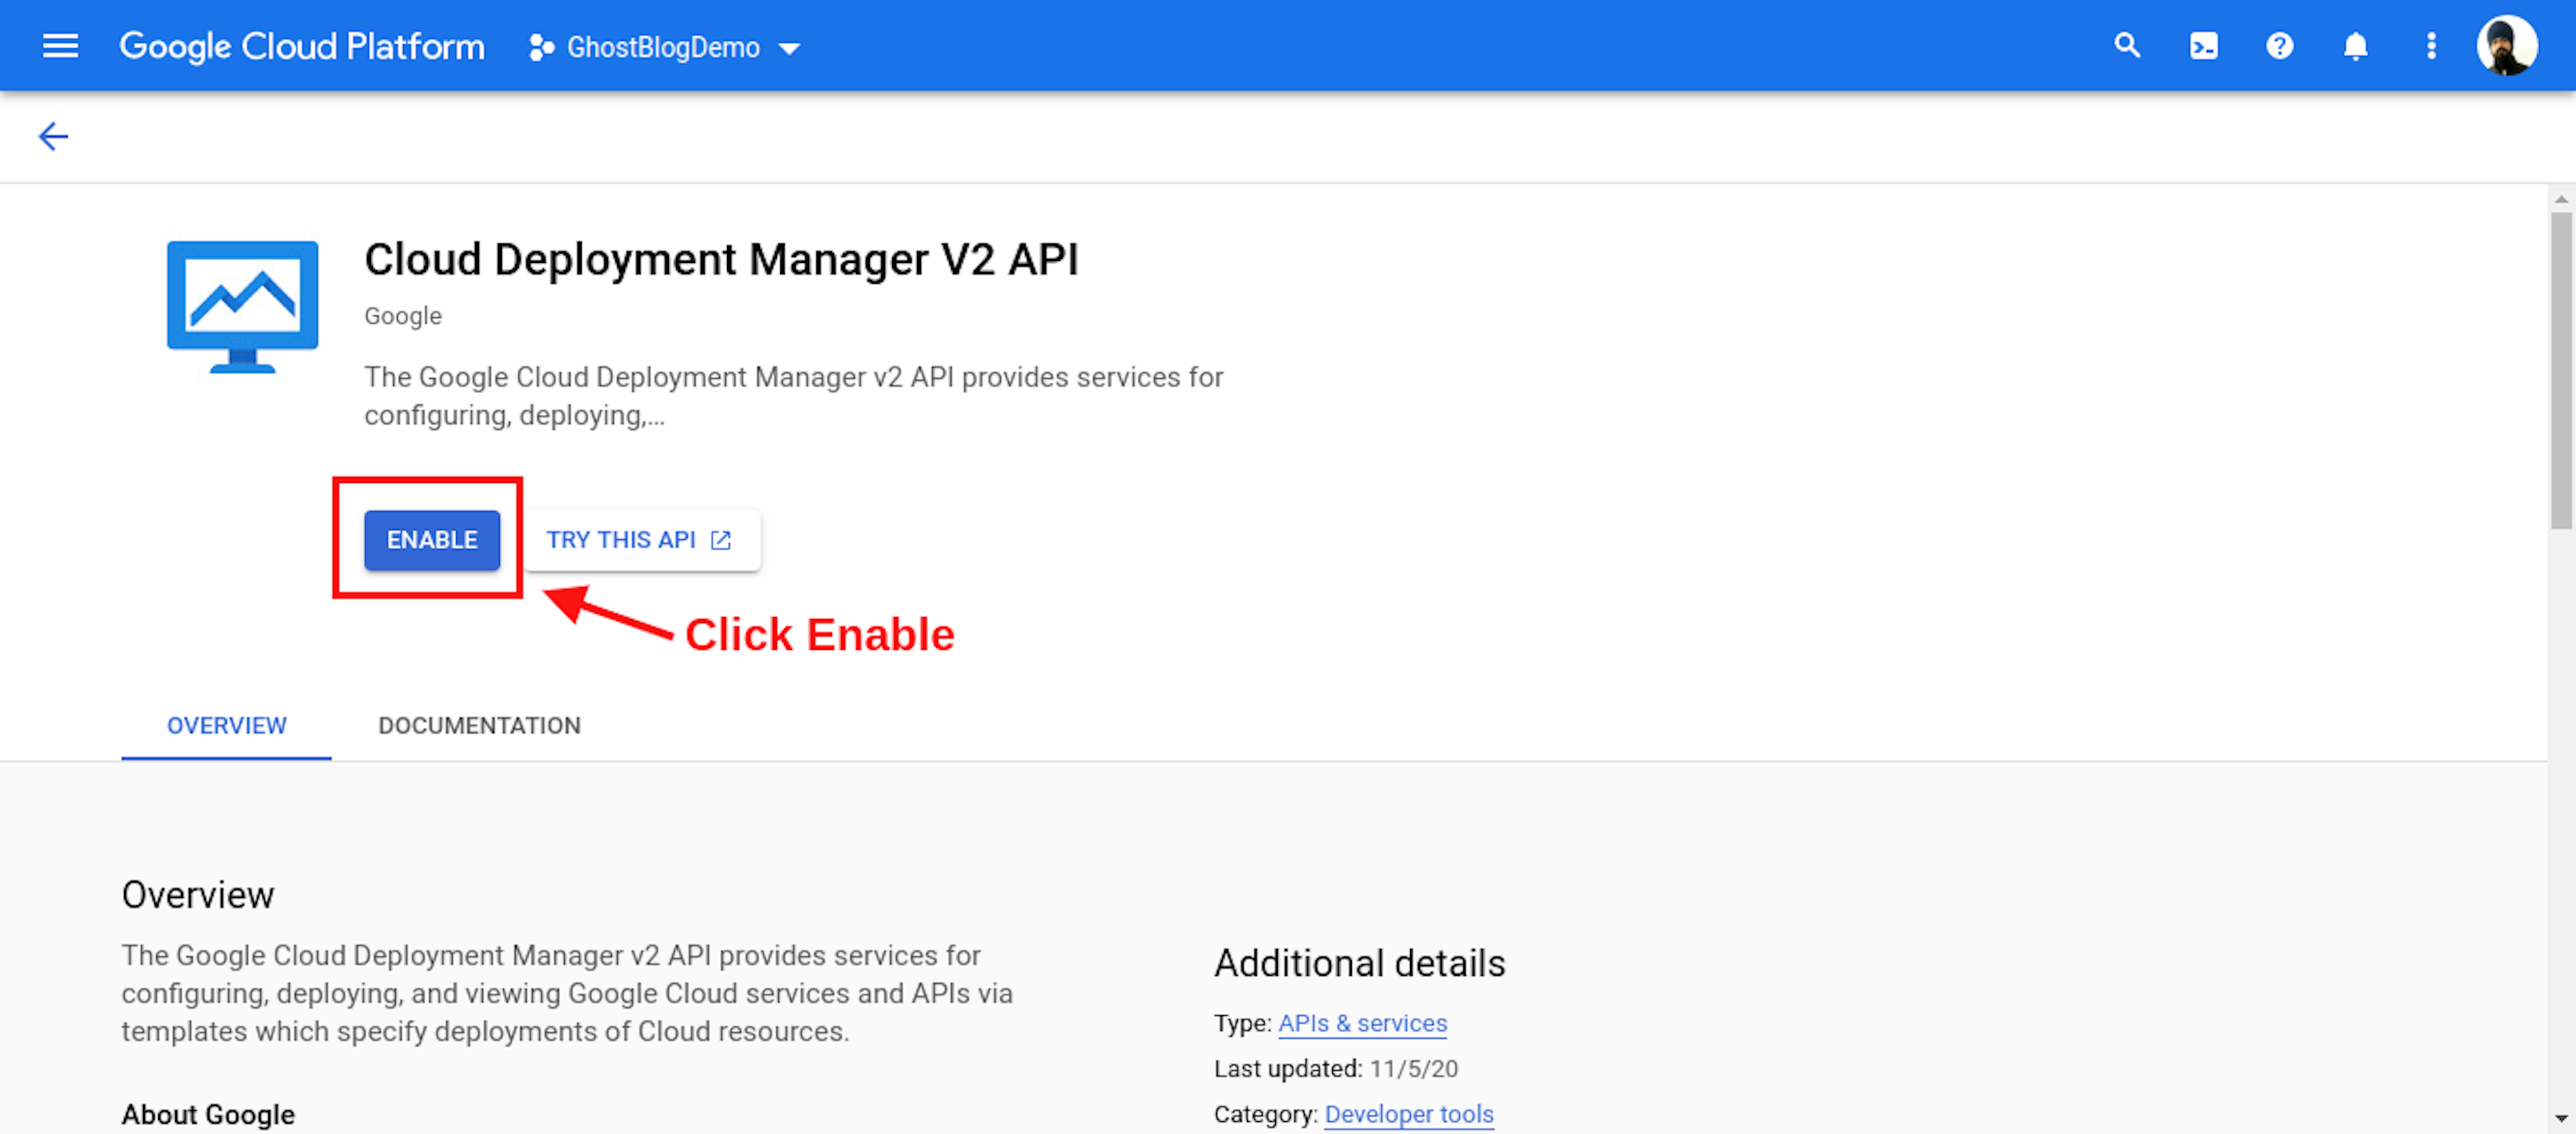
- First Time Open Cloud DNS Then You See Enable Ip Address Page. You Click Enable Button.
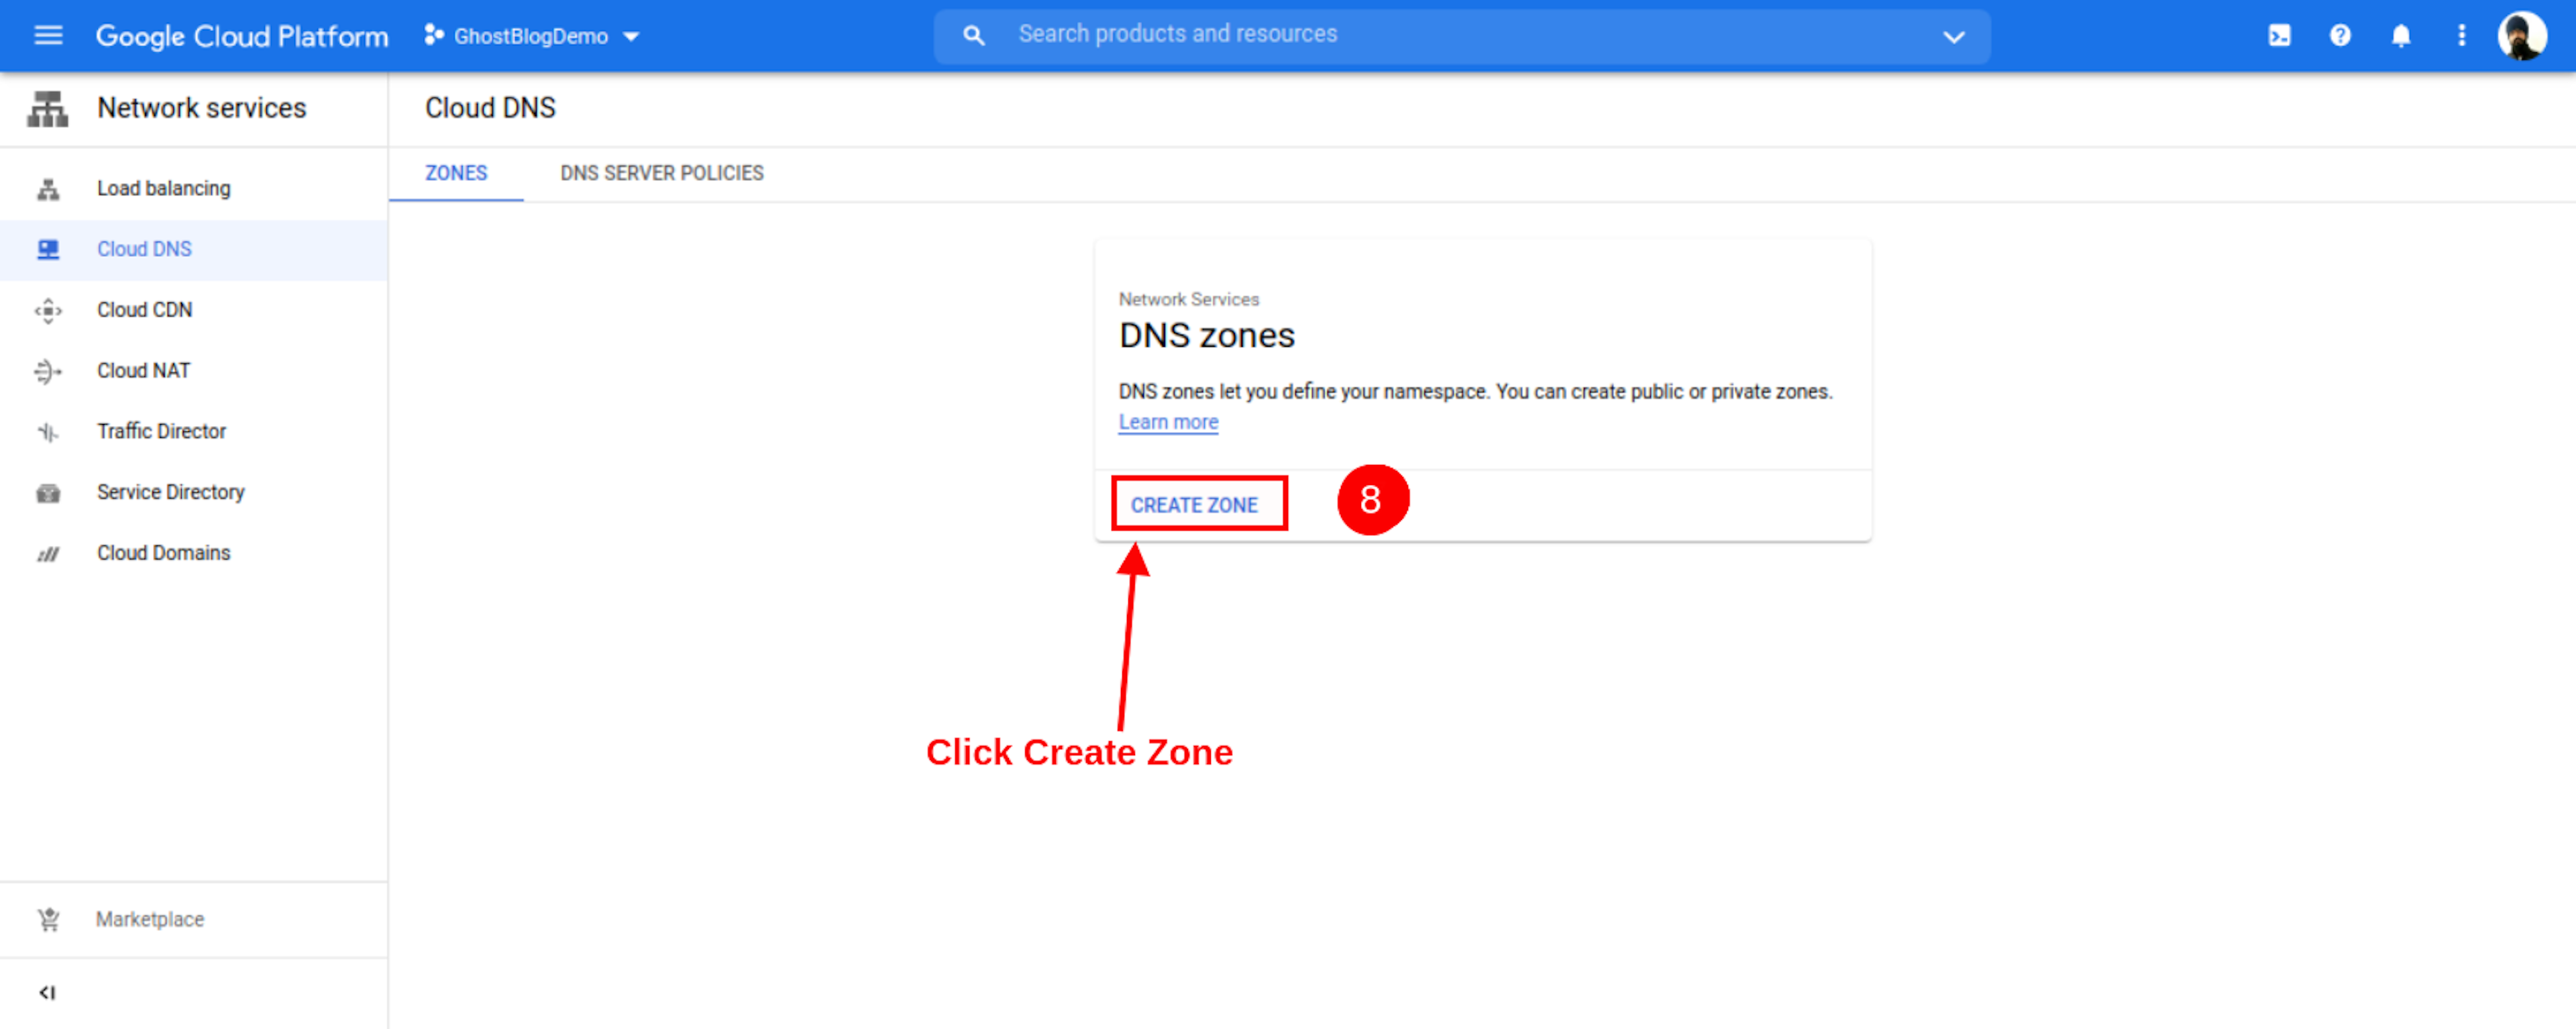
- First Time Open Cloud DNS Page. Your Page Look Like.
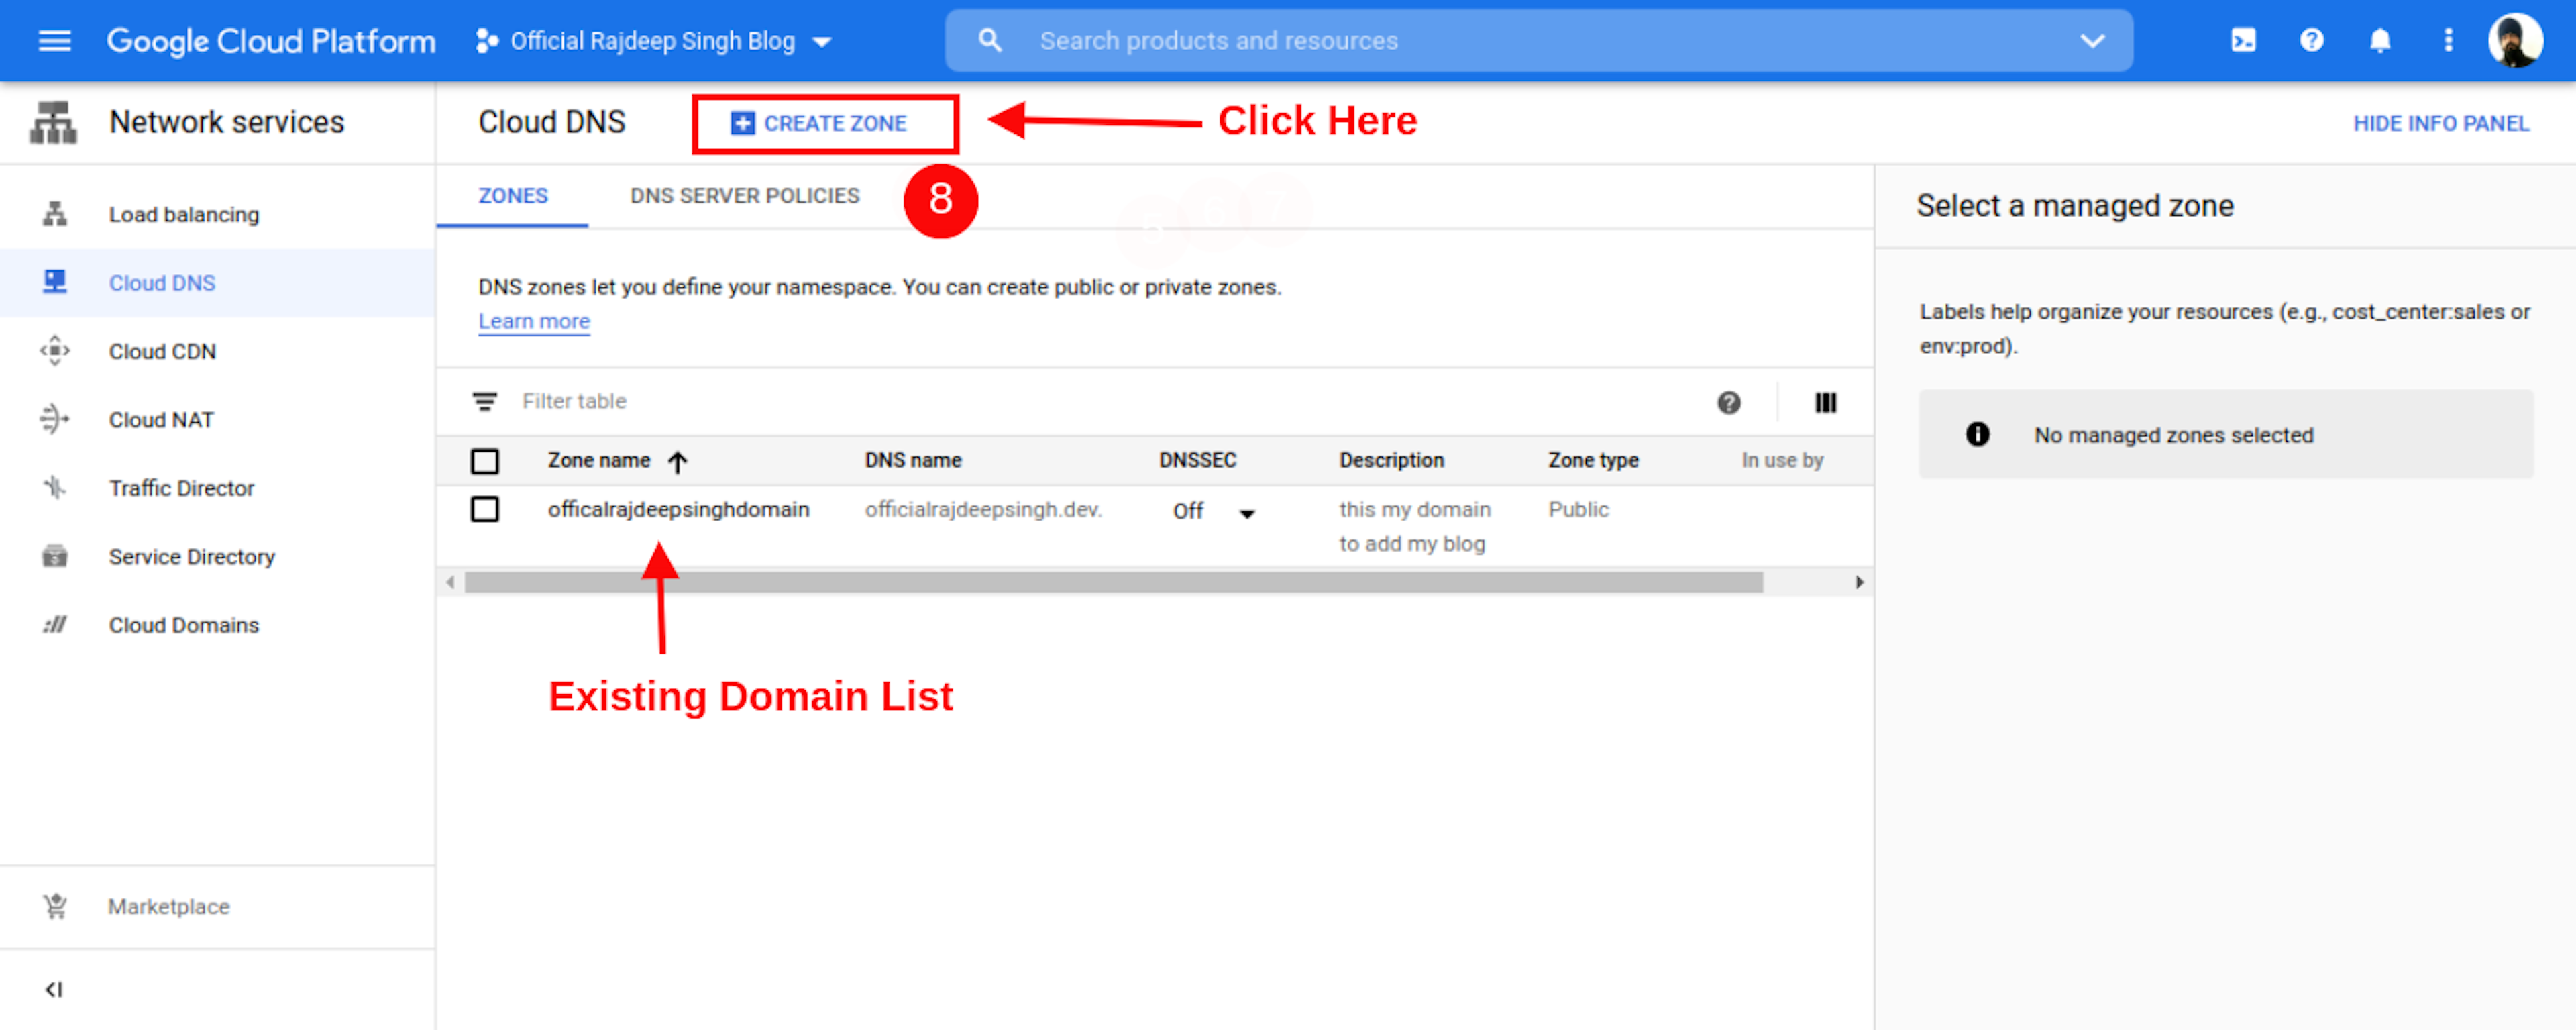
- Your Exiting user or Add Other Domain. Your Cloud DNS Page Look Like. Click Create Zone Page.
- after Open New Page Enter Your Domain Information
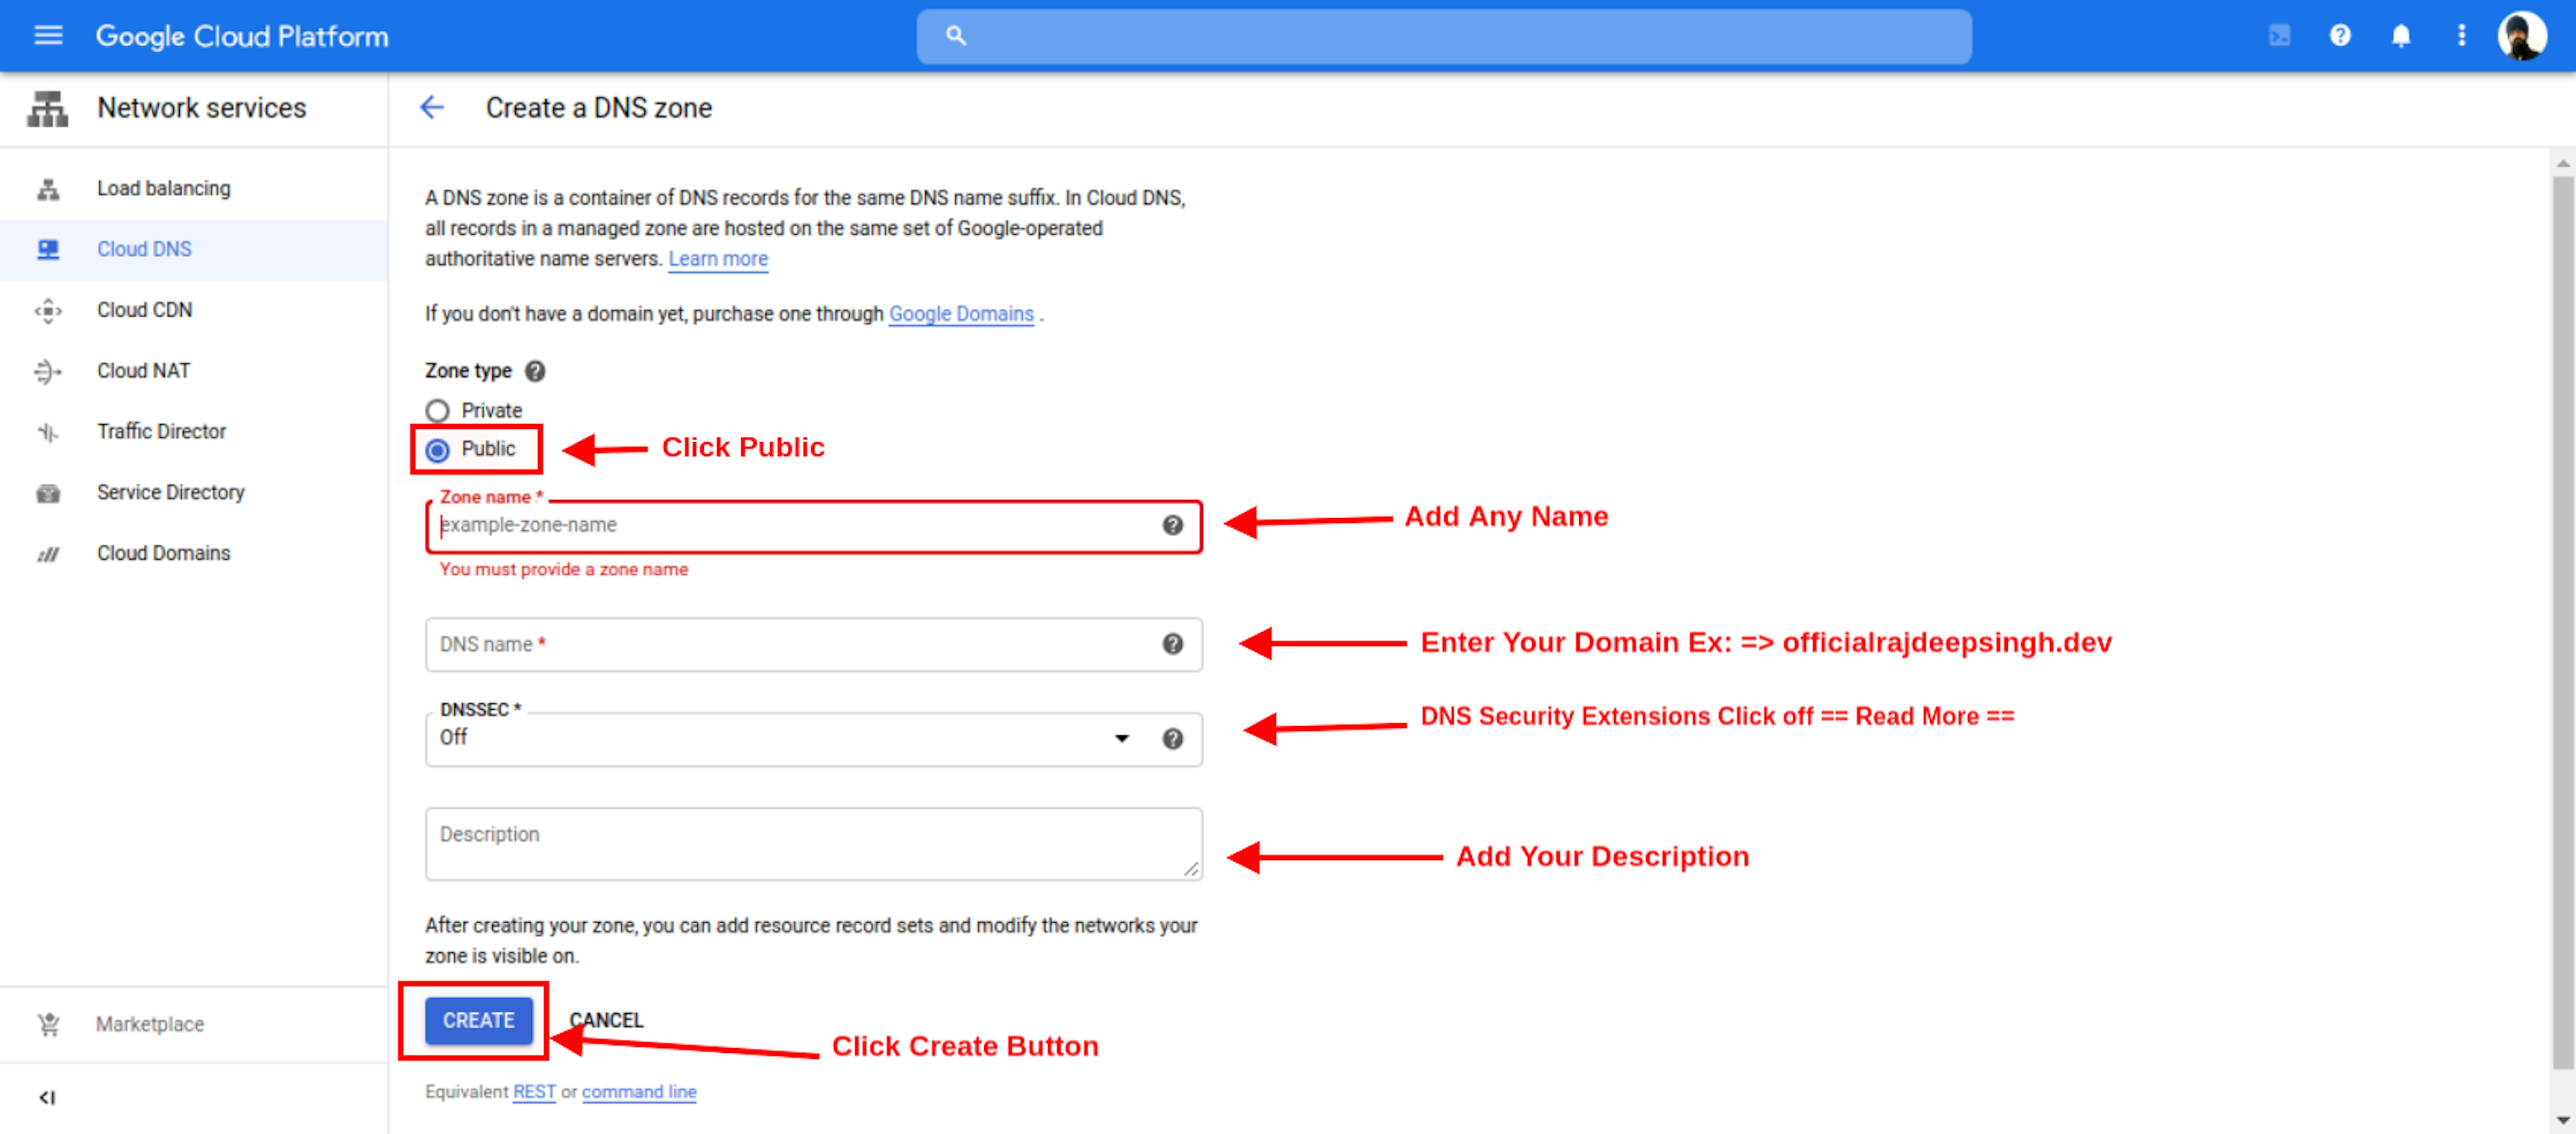
- Open Your Create DNS Zone Web Page. Fill in Any Name, Domain Name, And Description. Click To Create Button.
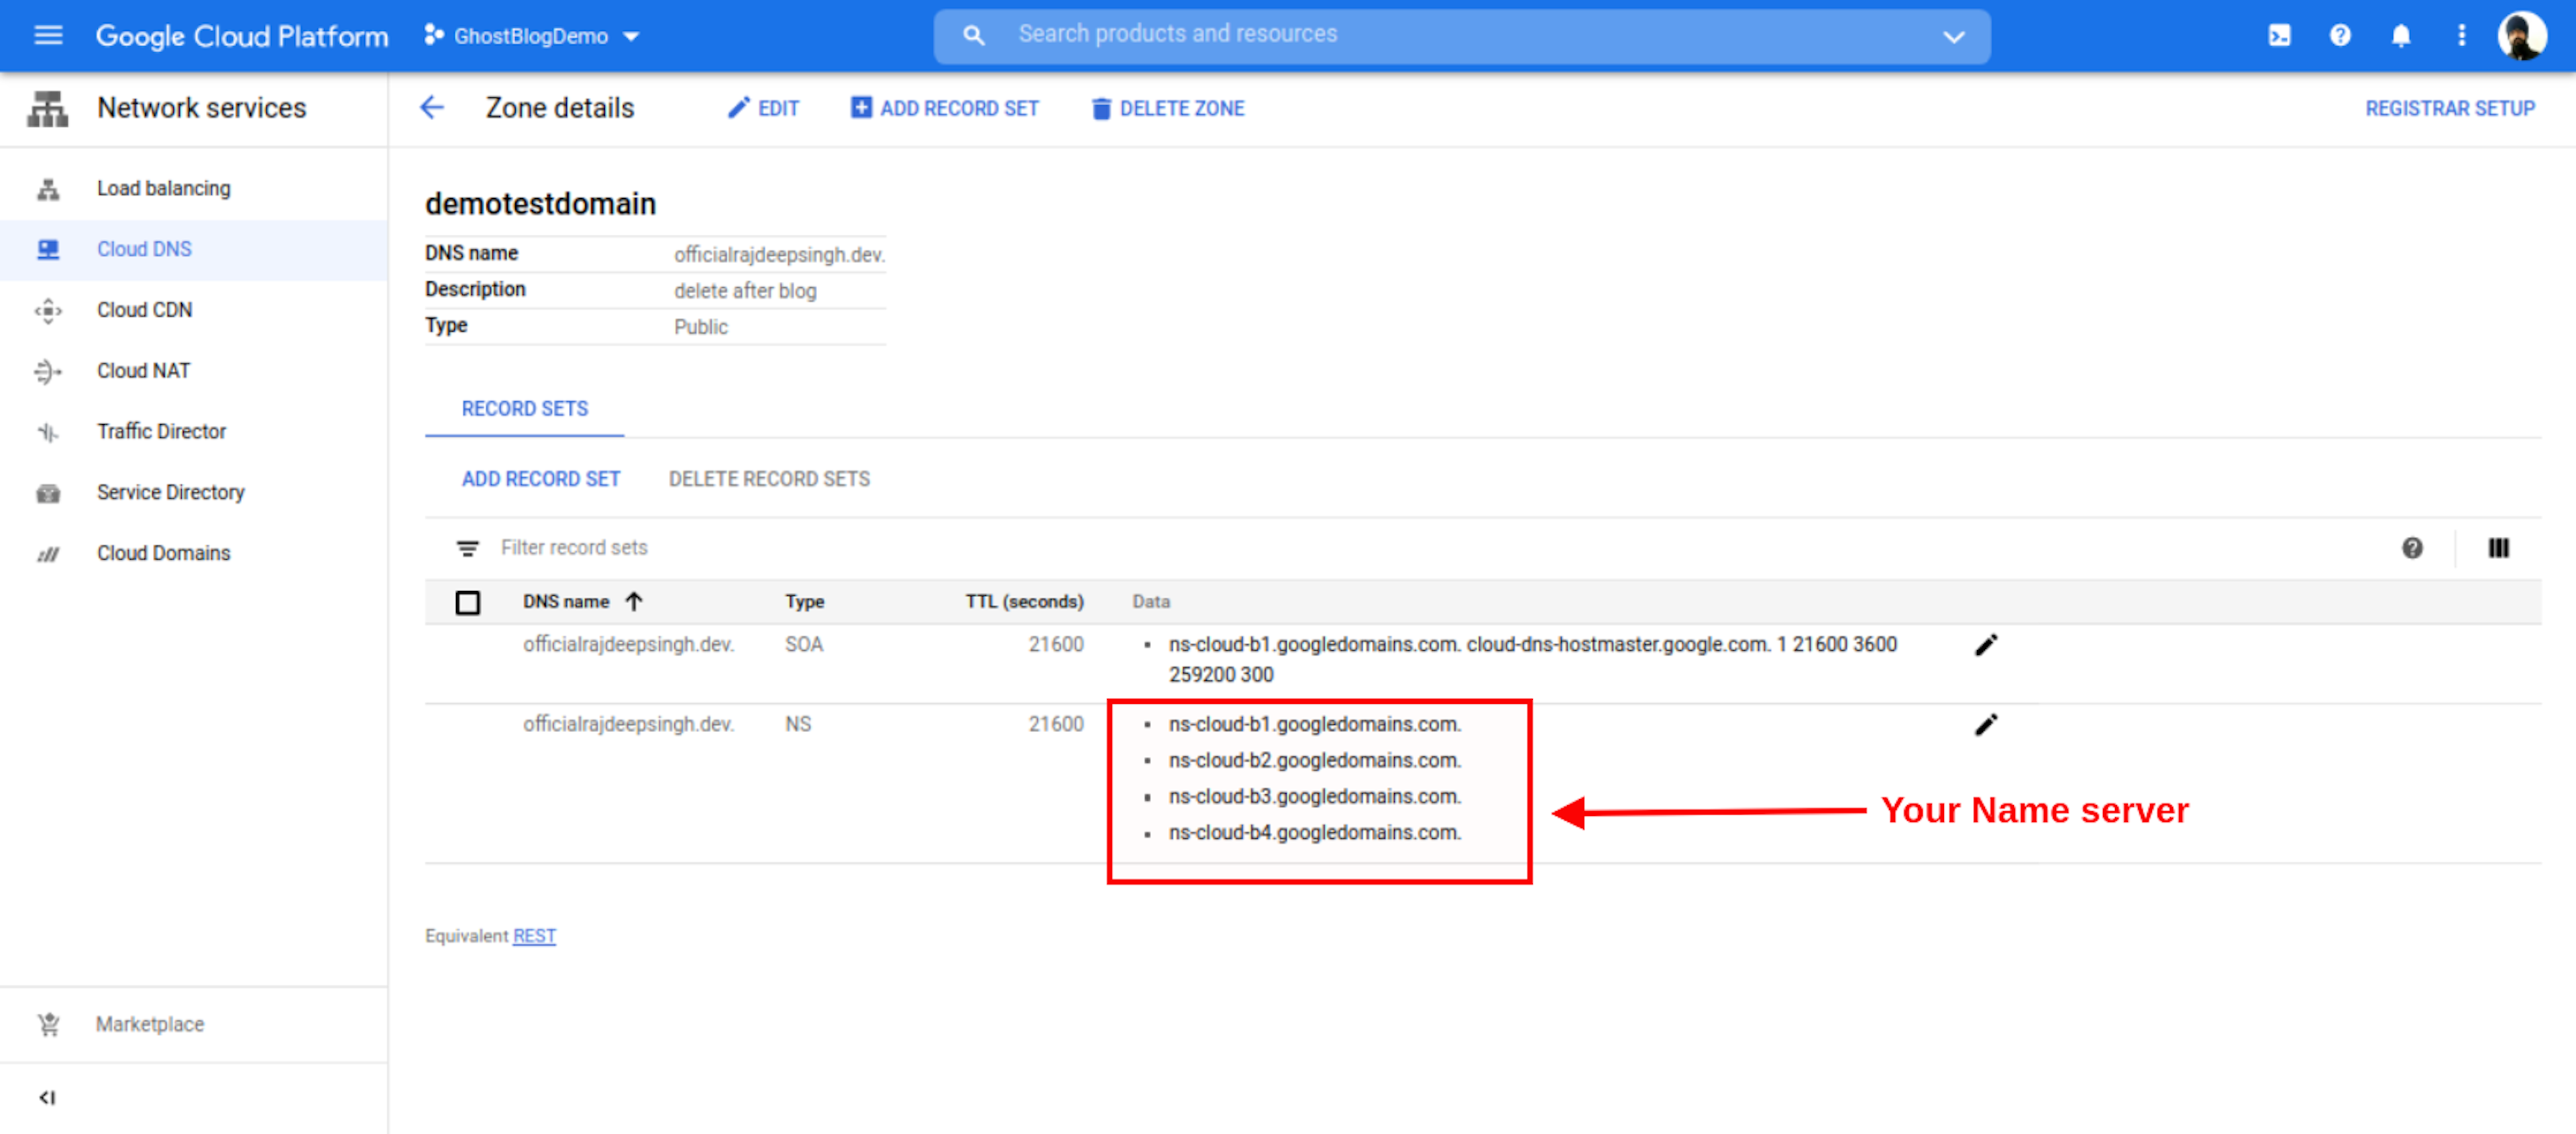
- When Your DNS Zone Create Success Full, You See Zone Details Page. By Default Look Like.
- Inside Your Zone Details Page, You See Your Custom Name Server. Copy Name Server Change in Your Domain.

- Add New Record In Your Zone So Click To ADD RECORD Button.
- You Add Only Two New Record with a or cname Record.
A Record
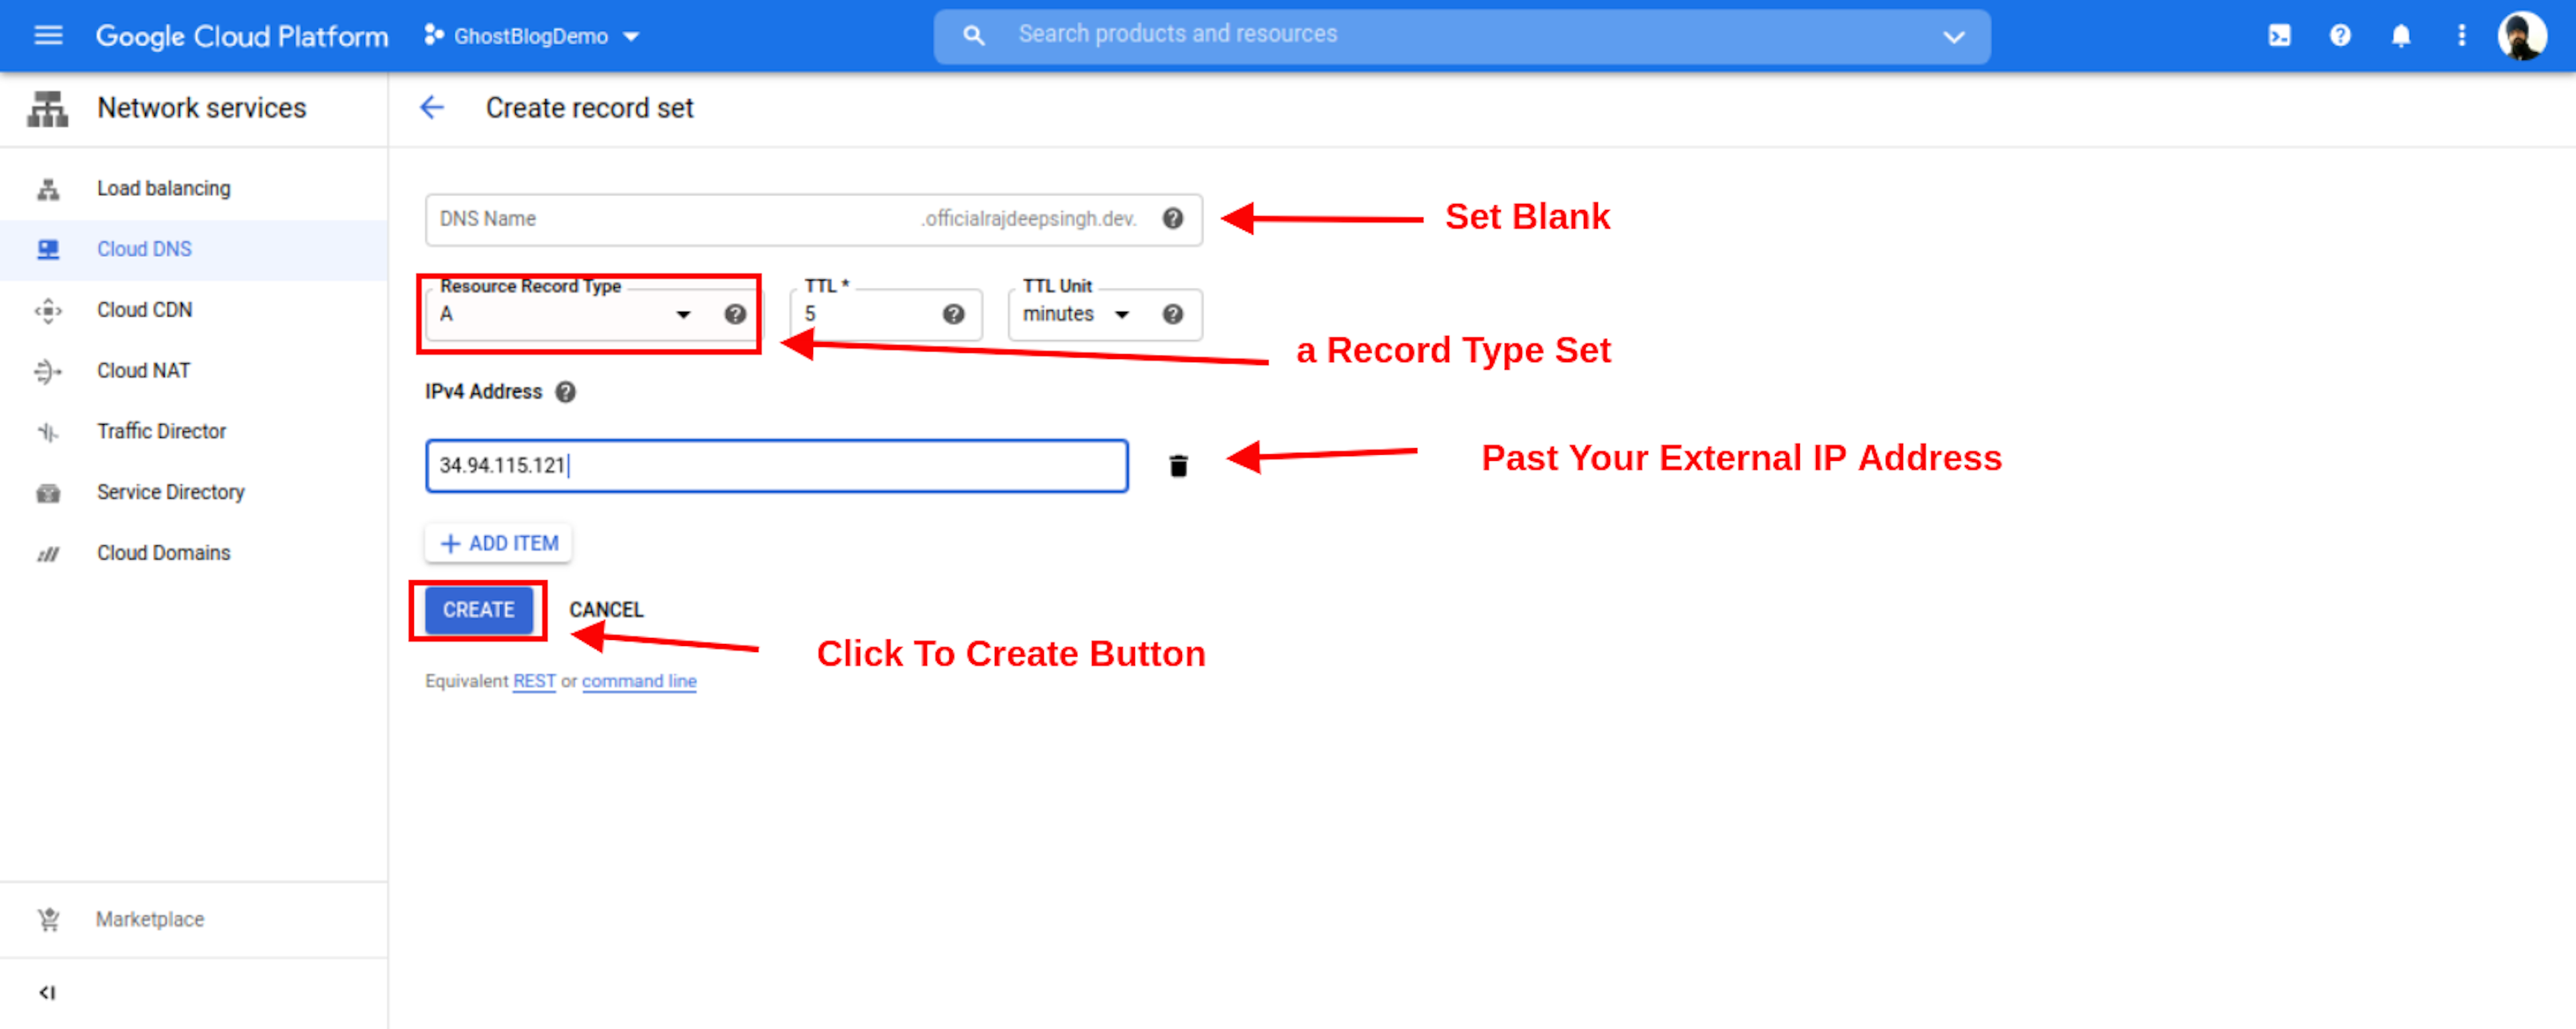
- Your DNA Name Input Always Blank In A record.
- Inside Resource Record Type always Set A Record.
- Inside IPv4 Address input, You Passed Your External
- Copy Ip Address Here
- After You Click Save Button.
Cname Record
- You Interested To Open Your Domain in Web Browser With www.yourdomain.com.
- Example: https://www.officialrajdeepsingh.dev.
If Add www On Your Site Follow This Step:
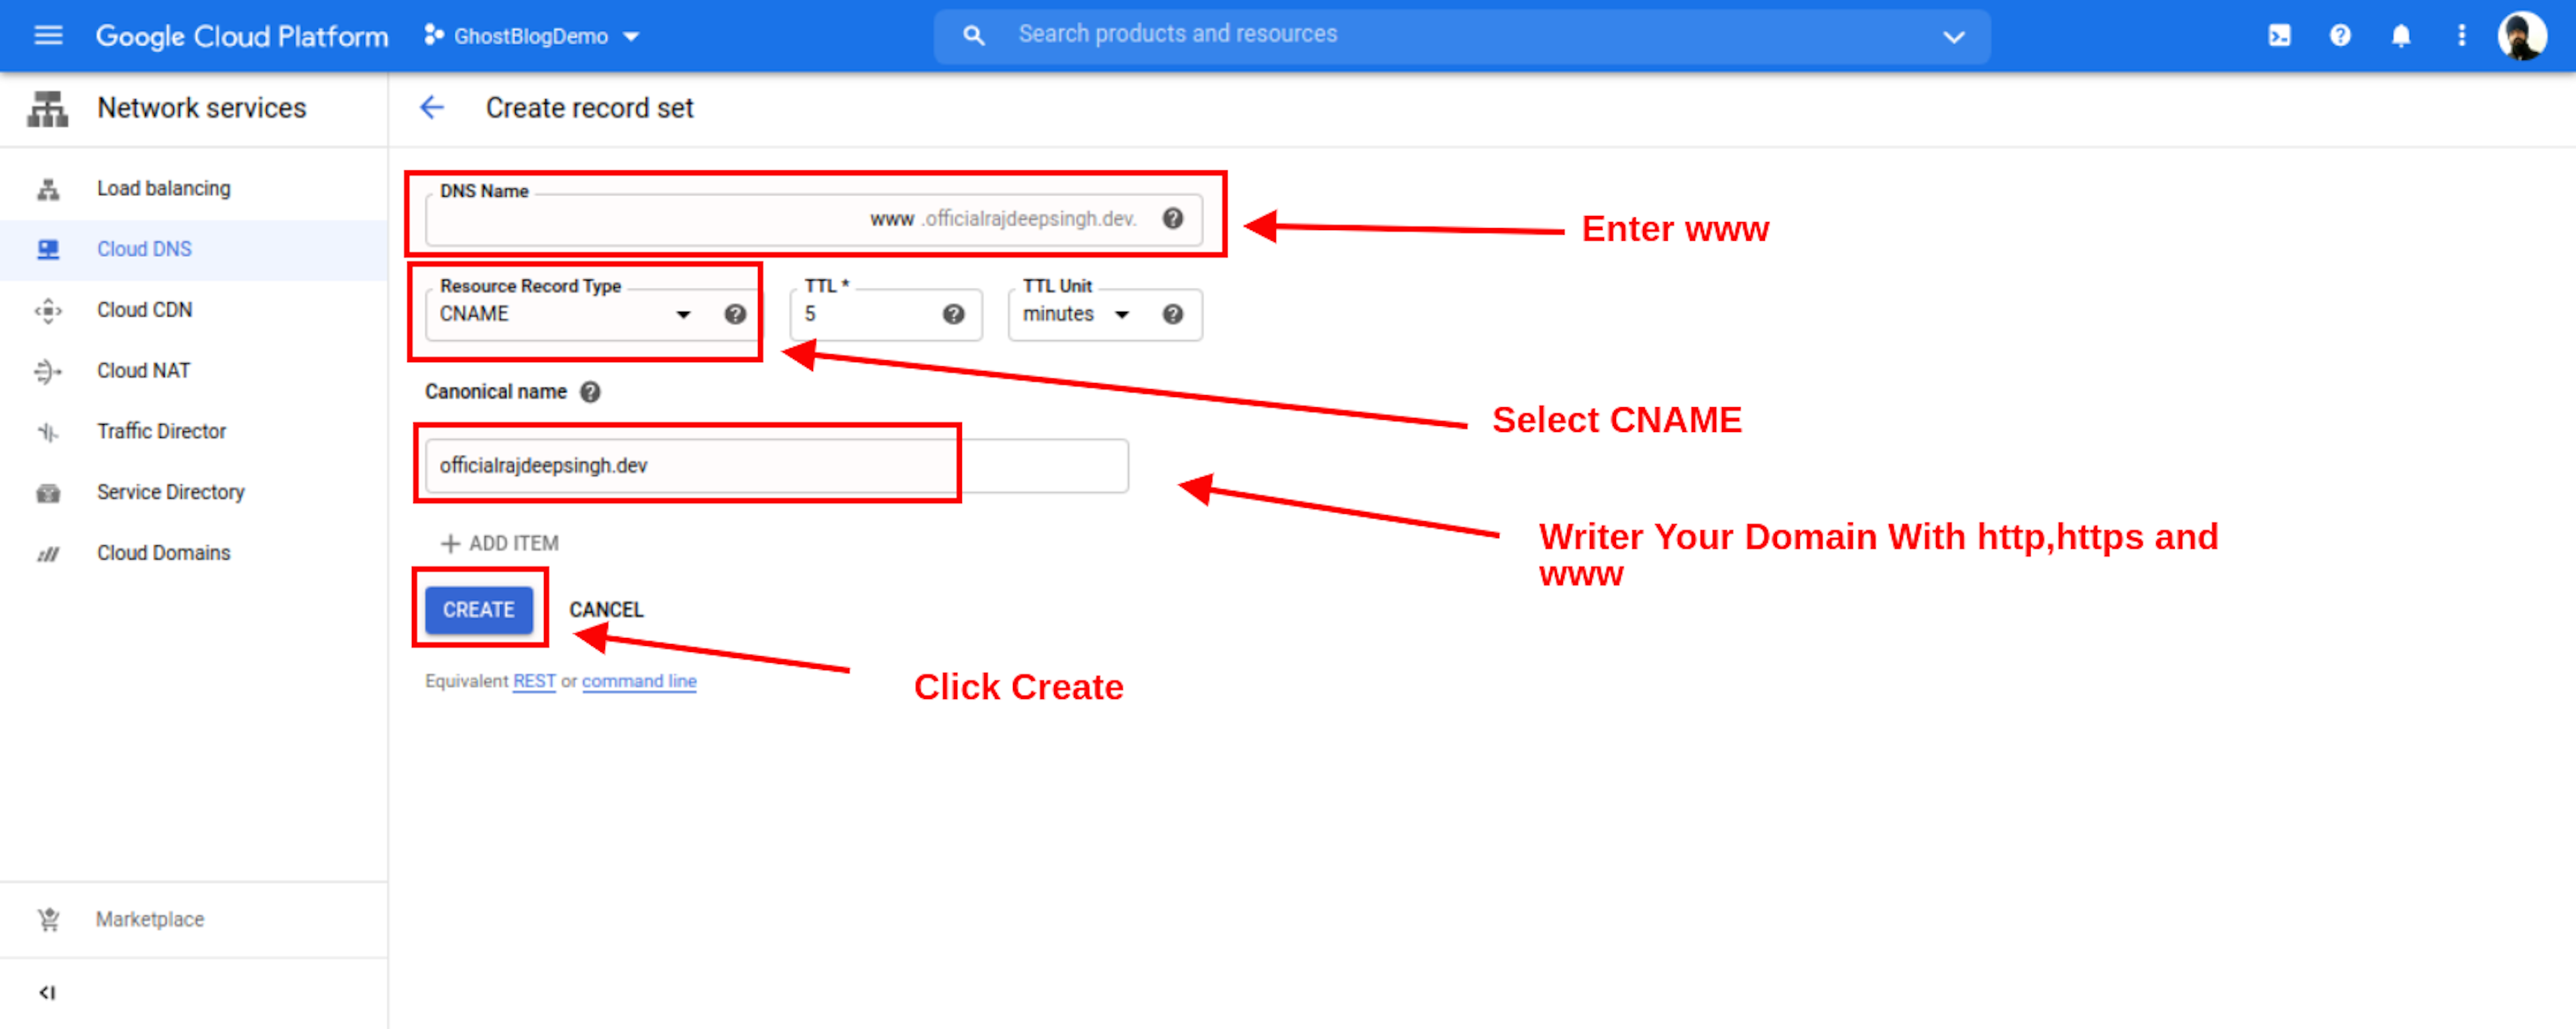
- You Enter www in your DNA Name Form Field.
- In Canonical name, Field Add Your Domain Without HTTP, HTTPS, and www.
- Example : officialrajdeepsingh.dev
- Fill All Form Then Click Create Button.
Name Server
My Domain Register In Google Domains. So I Open My Google Domain Dashboard. Enter New Name Server Provide By Google.Your Domain Register Deferent Make Sure You Change Name Server In Your Domain.
Go to > https://domains.google.com/registrar/.
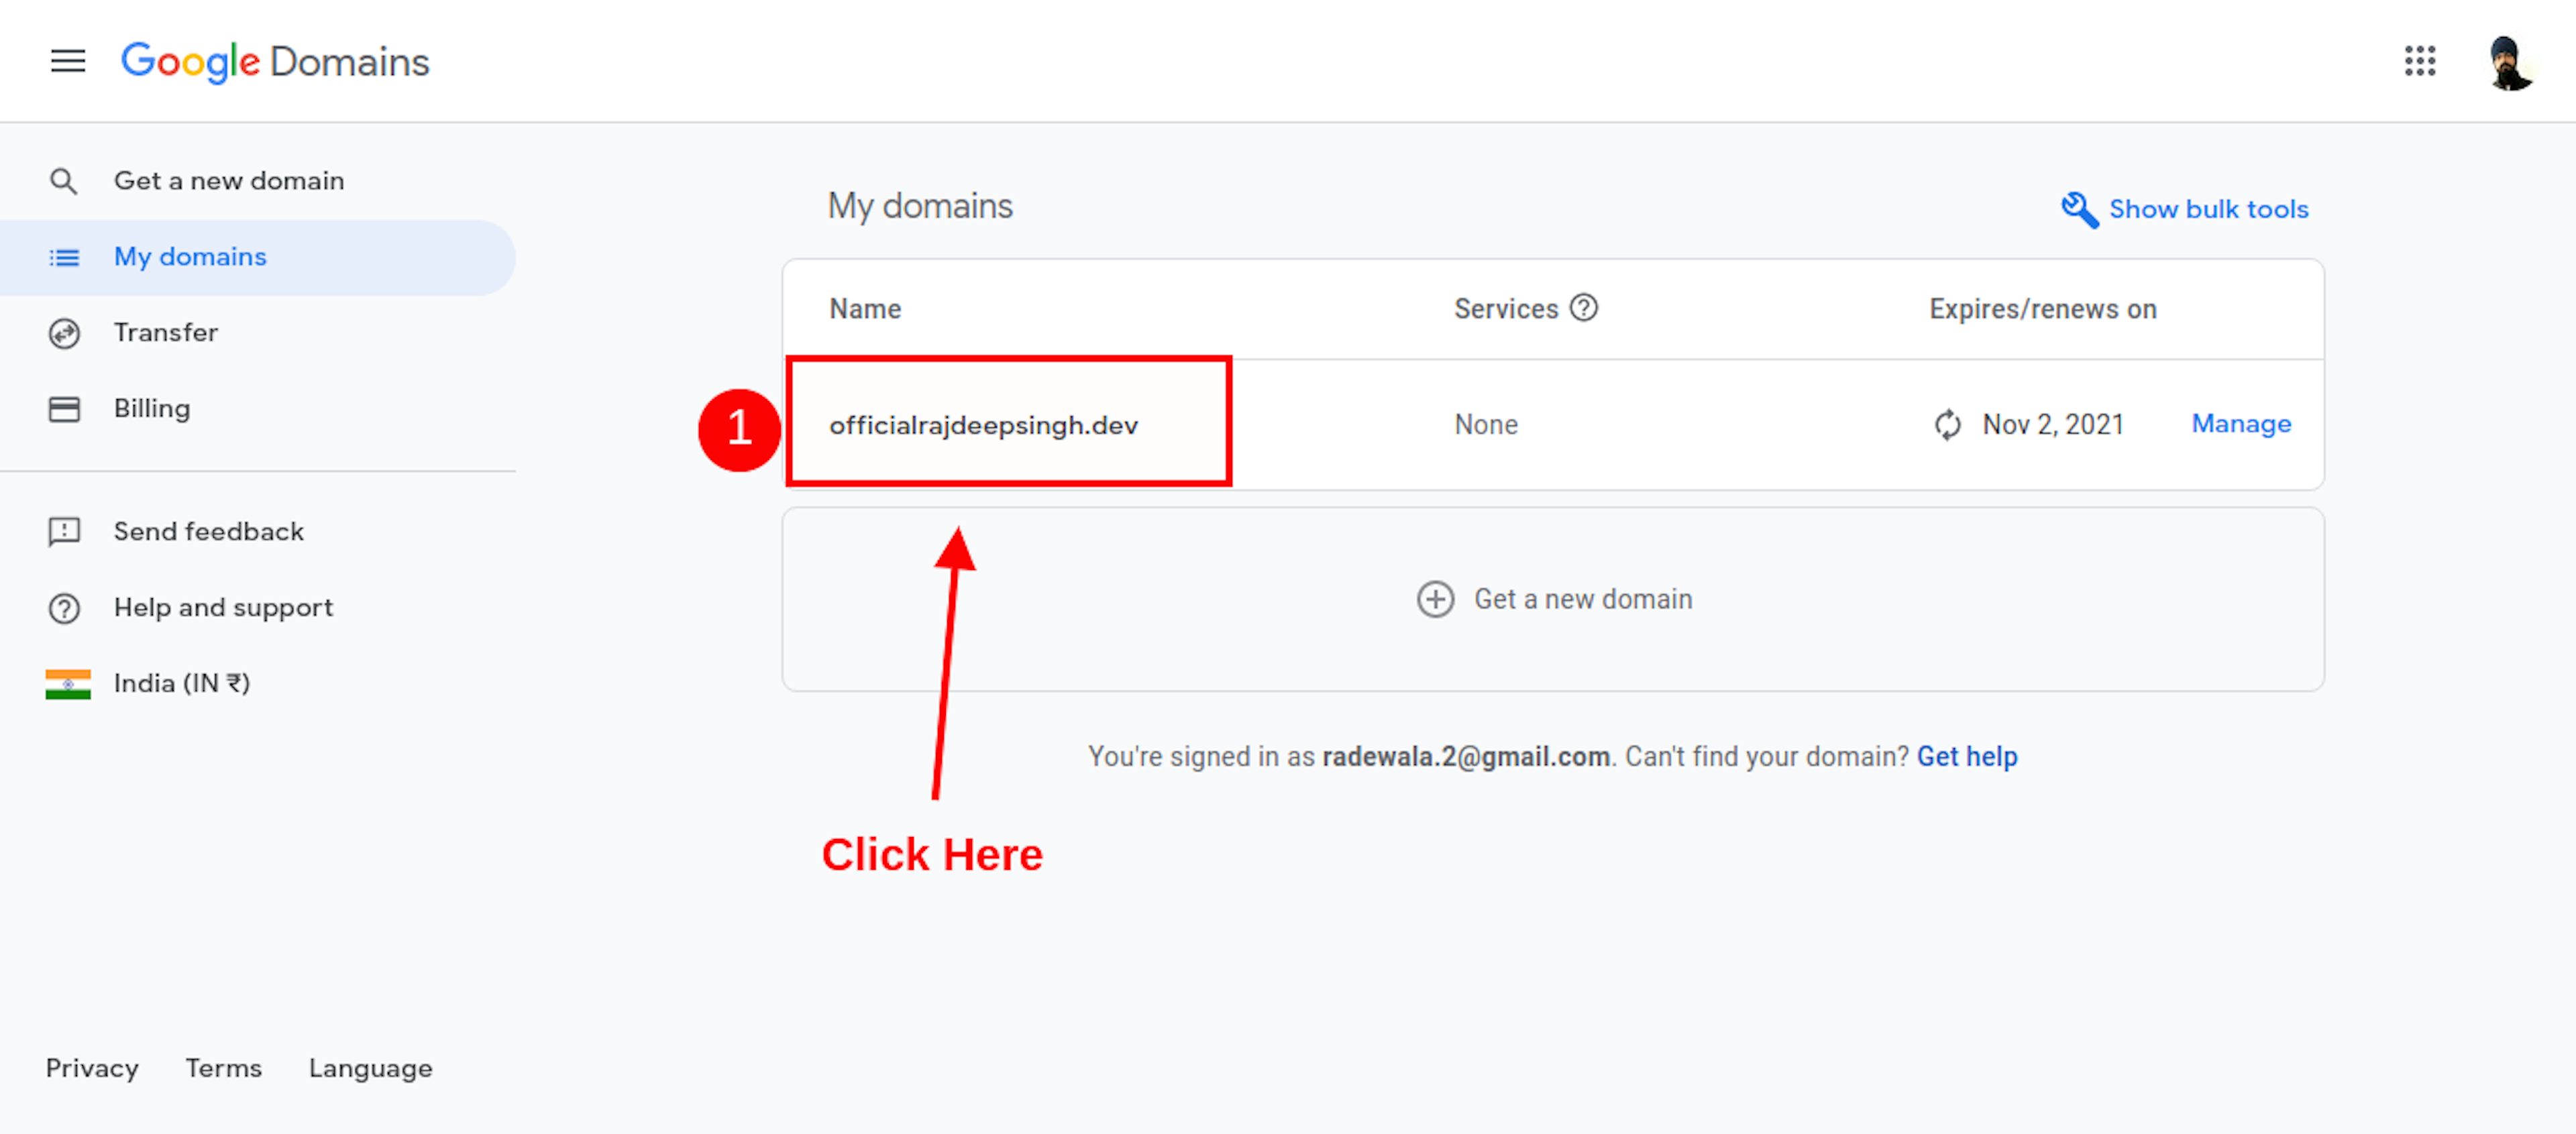
- Your Domain Dashboard Look Like. Click To Your Domain.
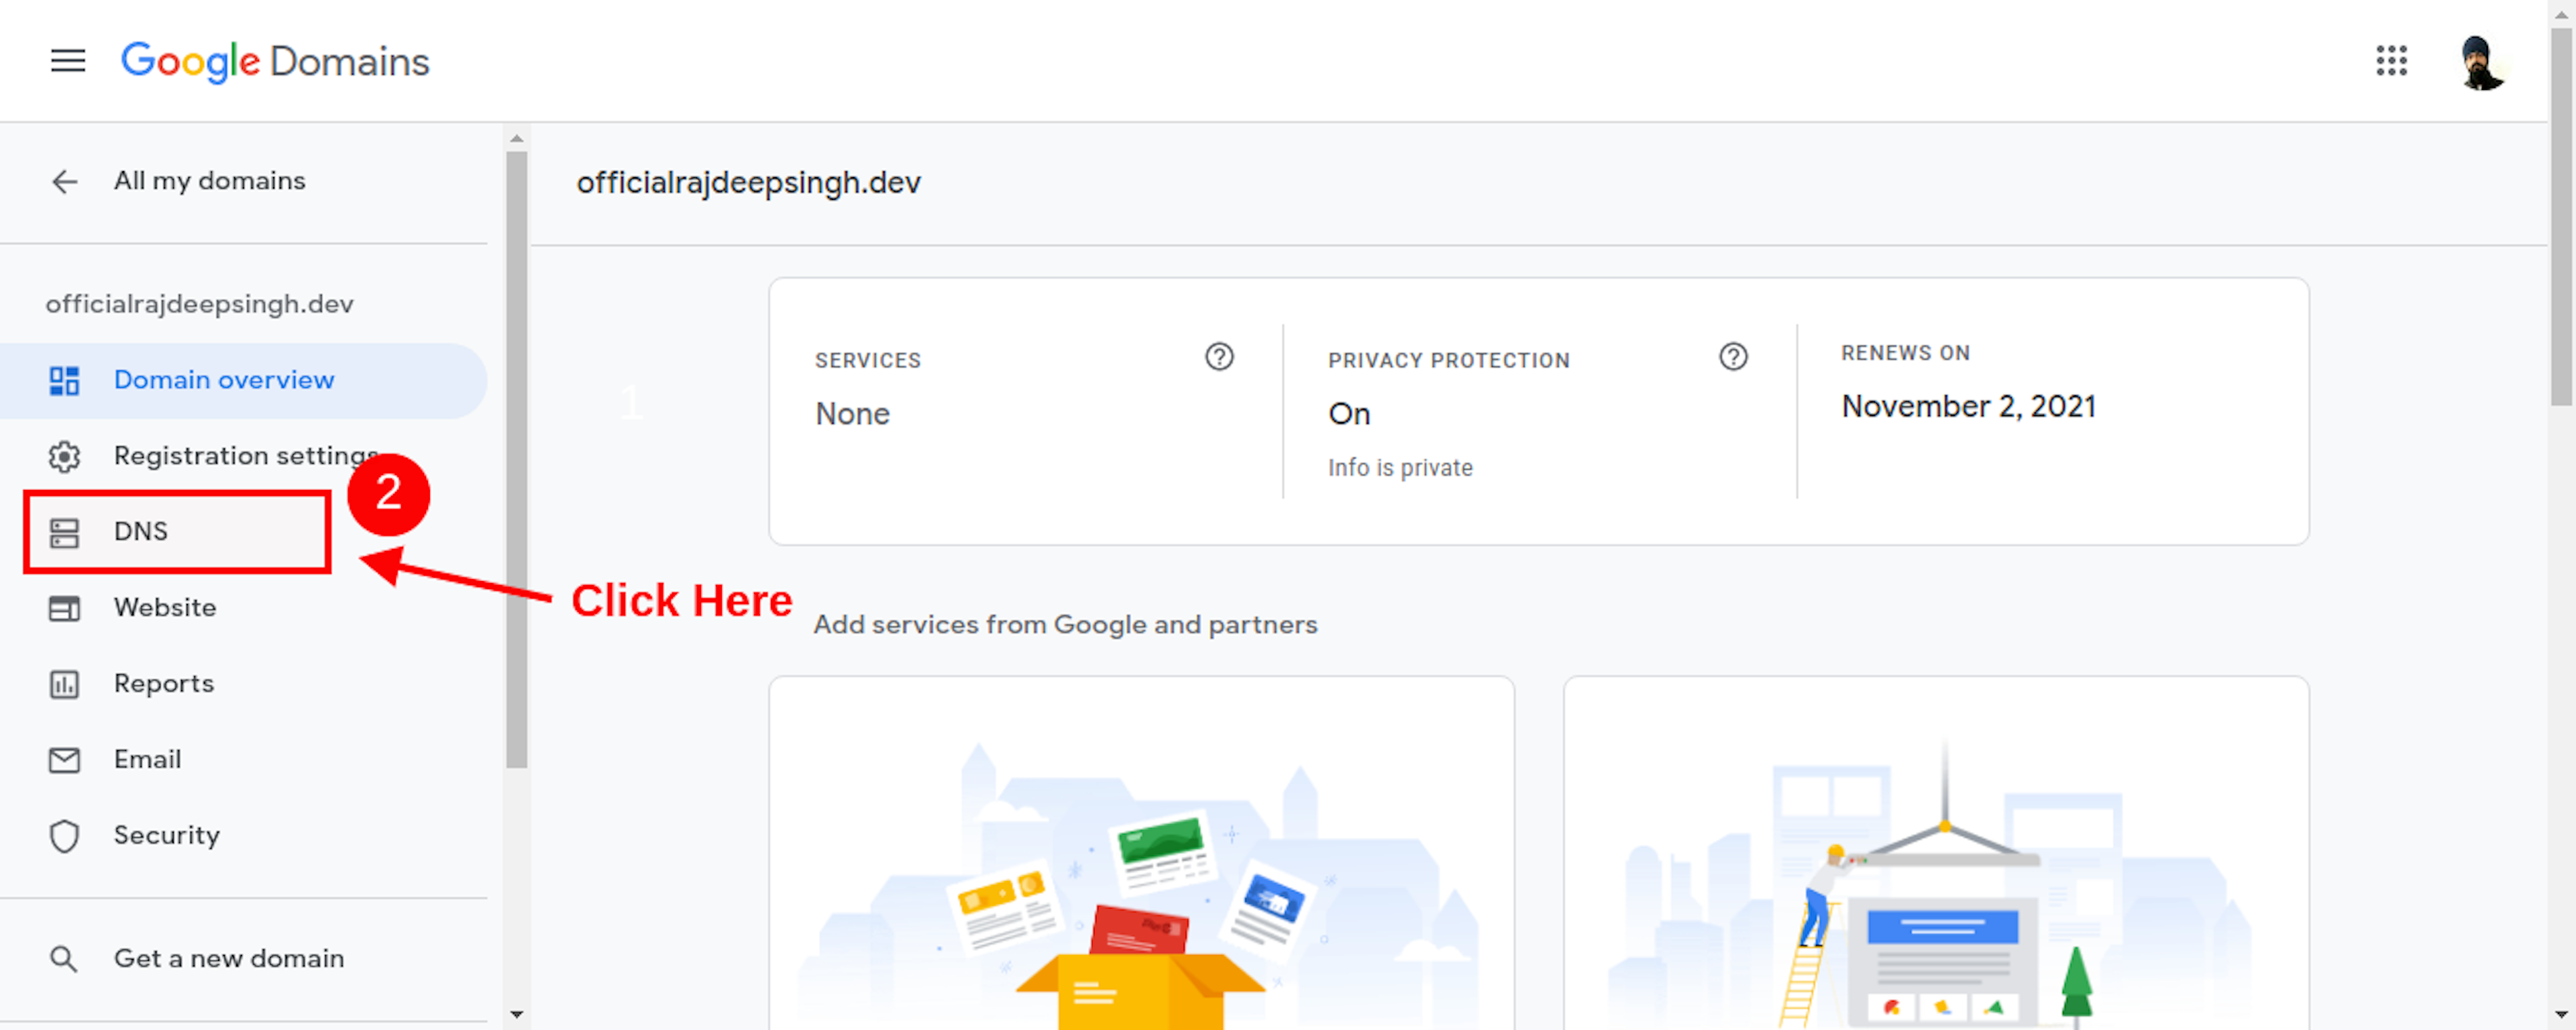
- When Select Your Domain. After Open Your Domain Page. Then Click DNS Tab
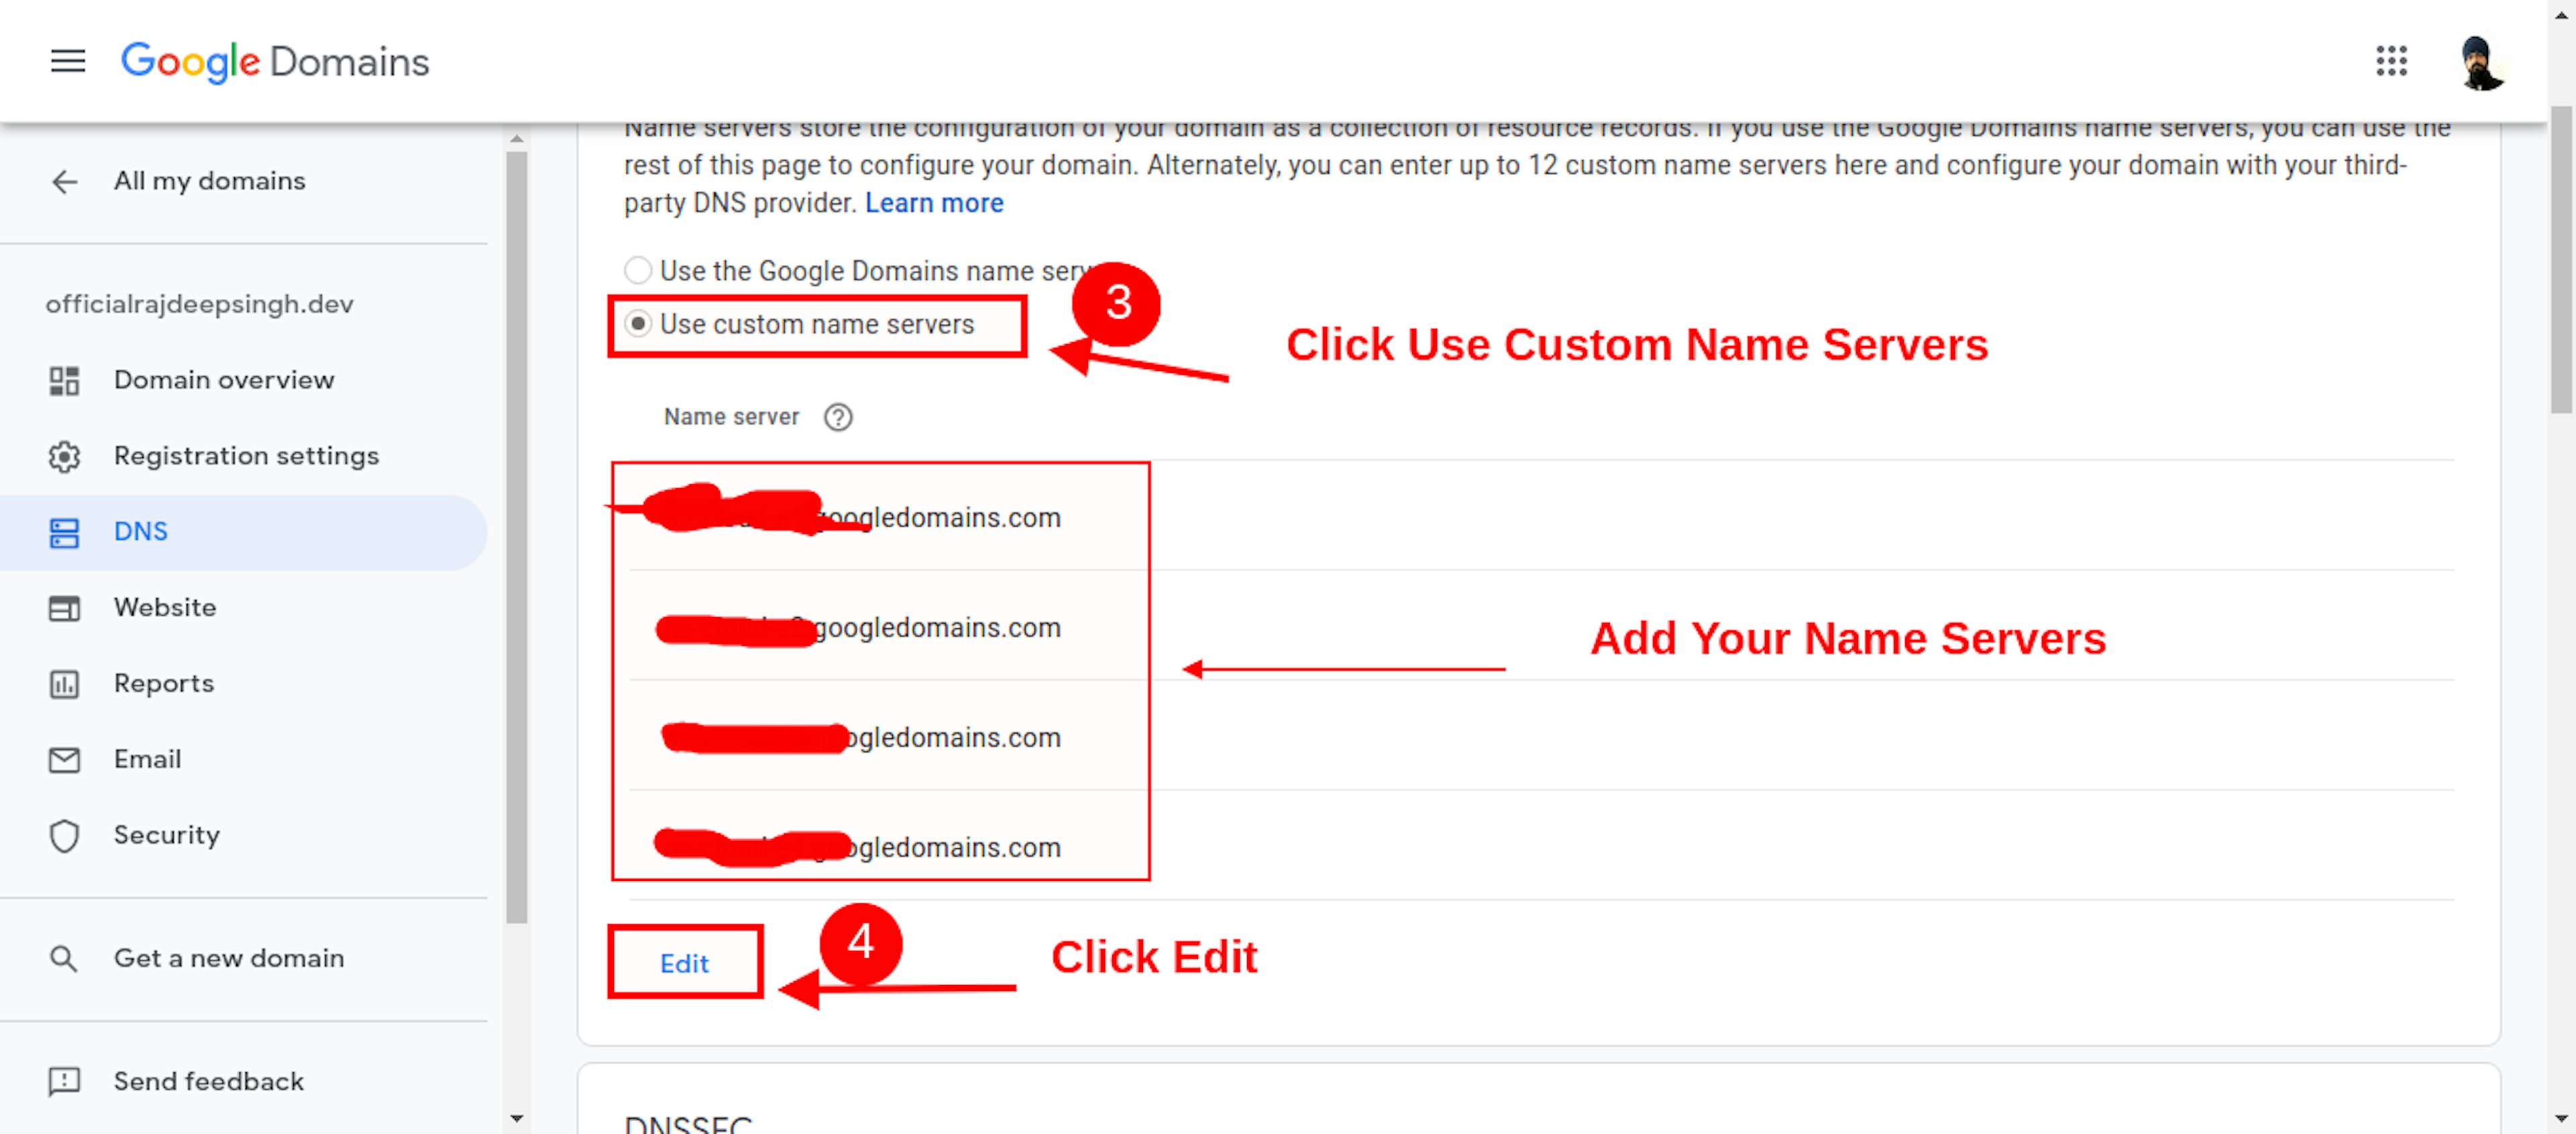
- Open Your DNS Page. Click on use custom name Servers Button.
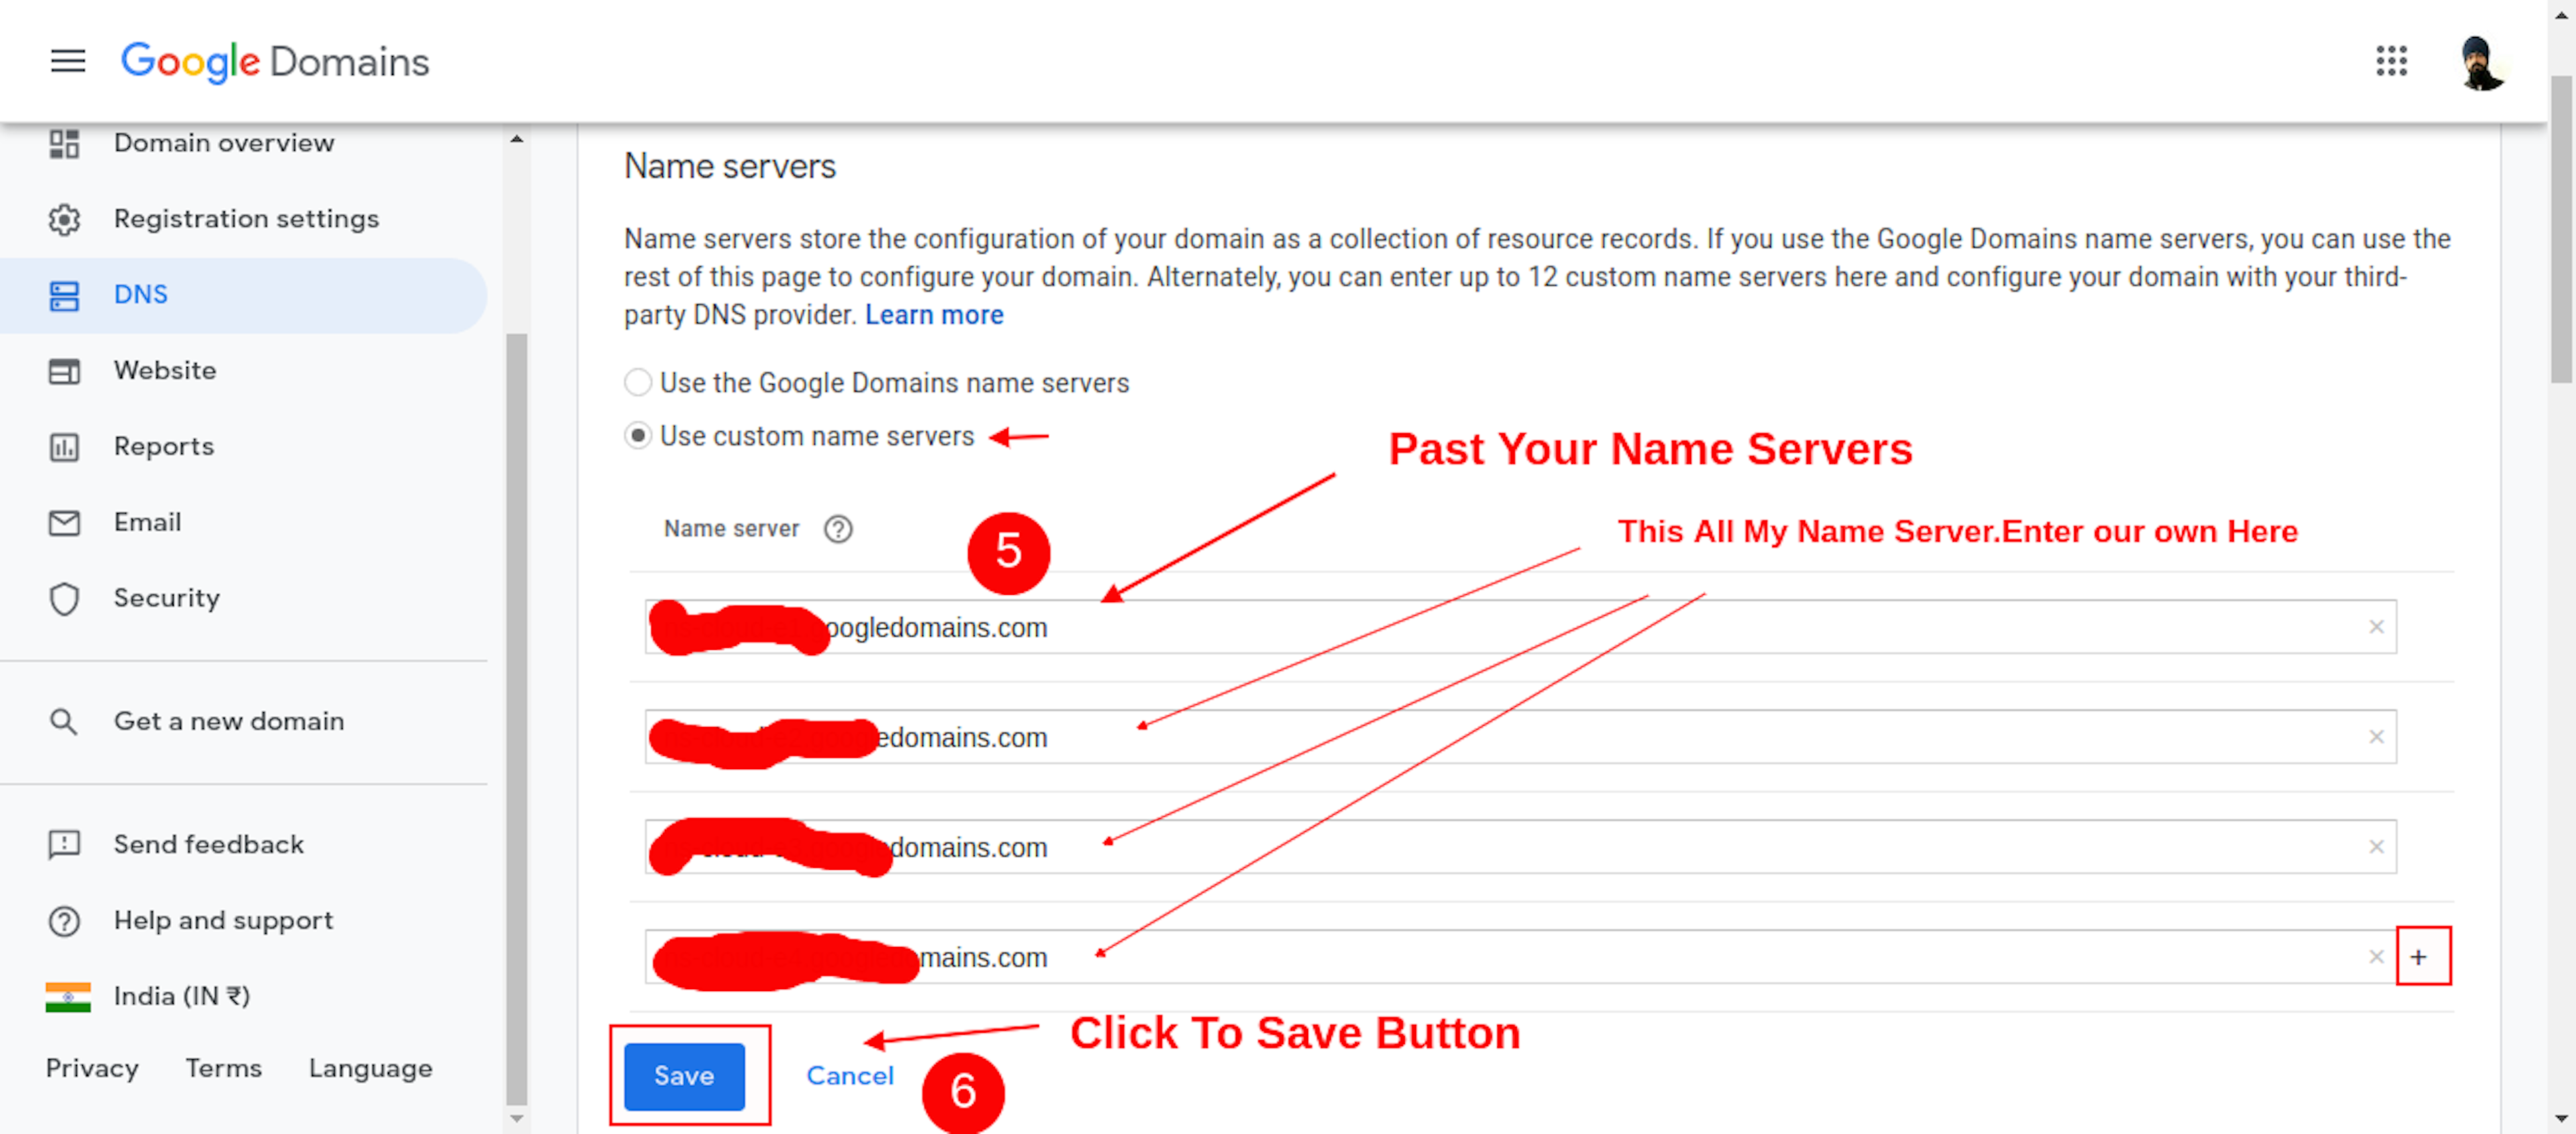
- After Paste Your Name Server Which You Copy On GCP Account.
When You Register Domain With Google. Your Name Servers change instantly.
Conclusion
If You Follow My article. You Definite Add Your Domain in GCP Account. Now Your Ghost Blog Running Your Domain Without SSL Certificate.
If you have Any Problems or Errors, Contact Me. I try to help solve your problem.