In This Article, We try to Deploy Our Ghost CMS Blog website without any information on GCP. Good News We Don't Write Any Single Code and No Use Command prompt(cmd).
Step
- Create a Project
- Launch Ghost With Bitnami
Firstly You Go to Google Cloud Console.
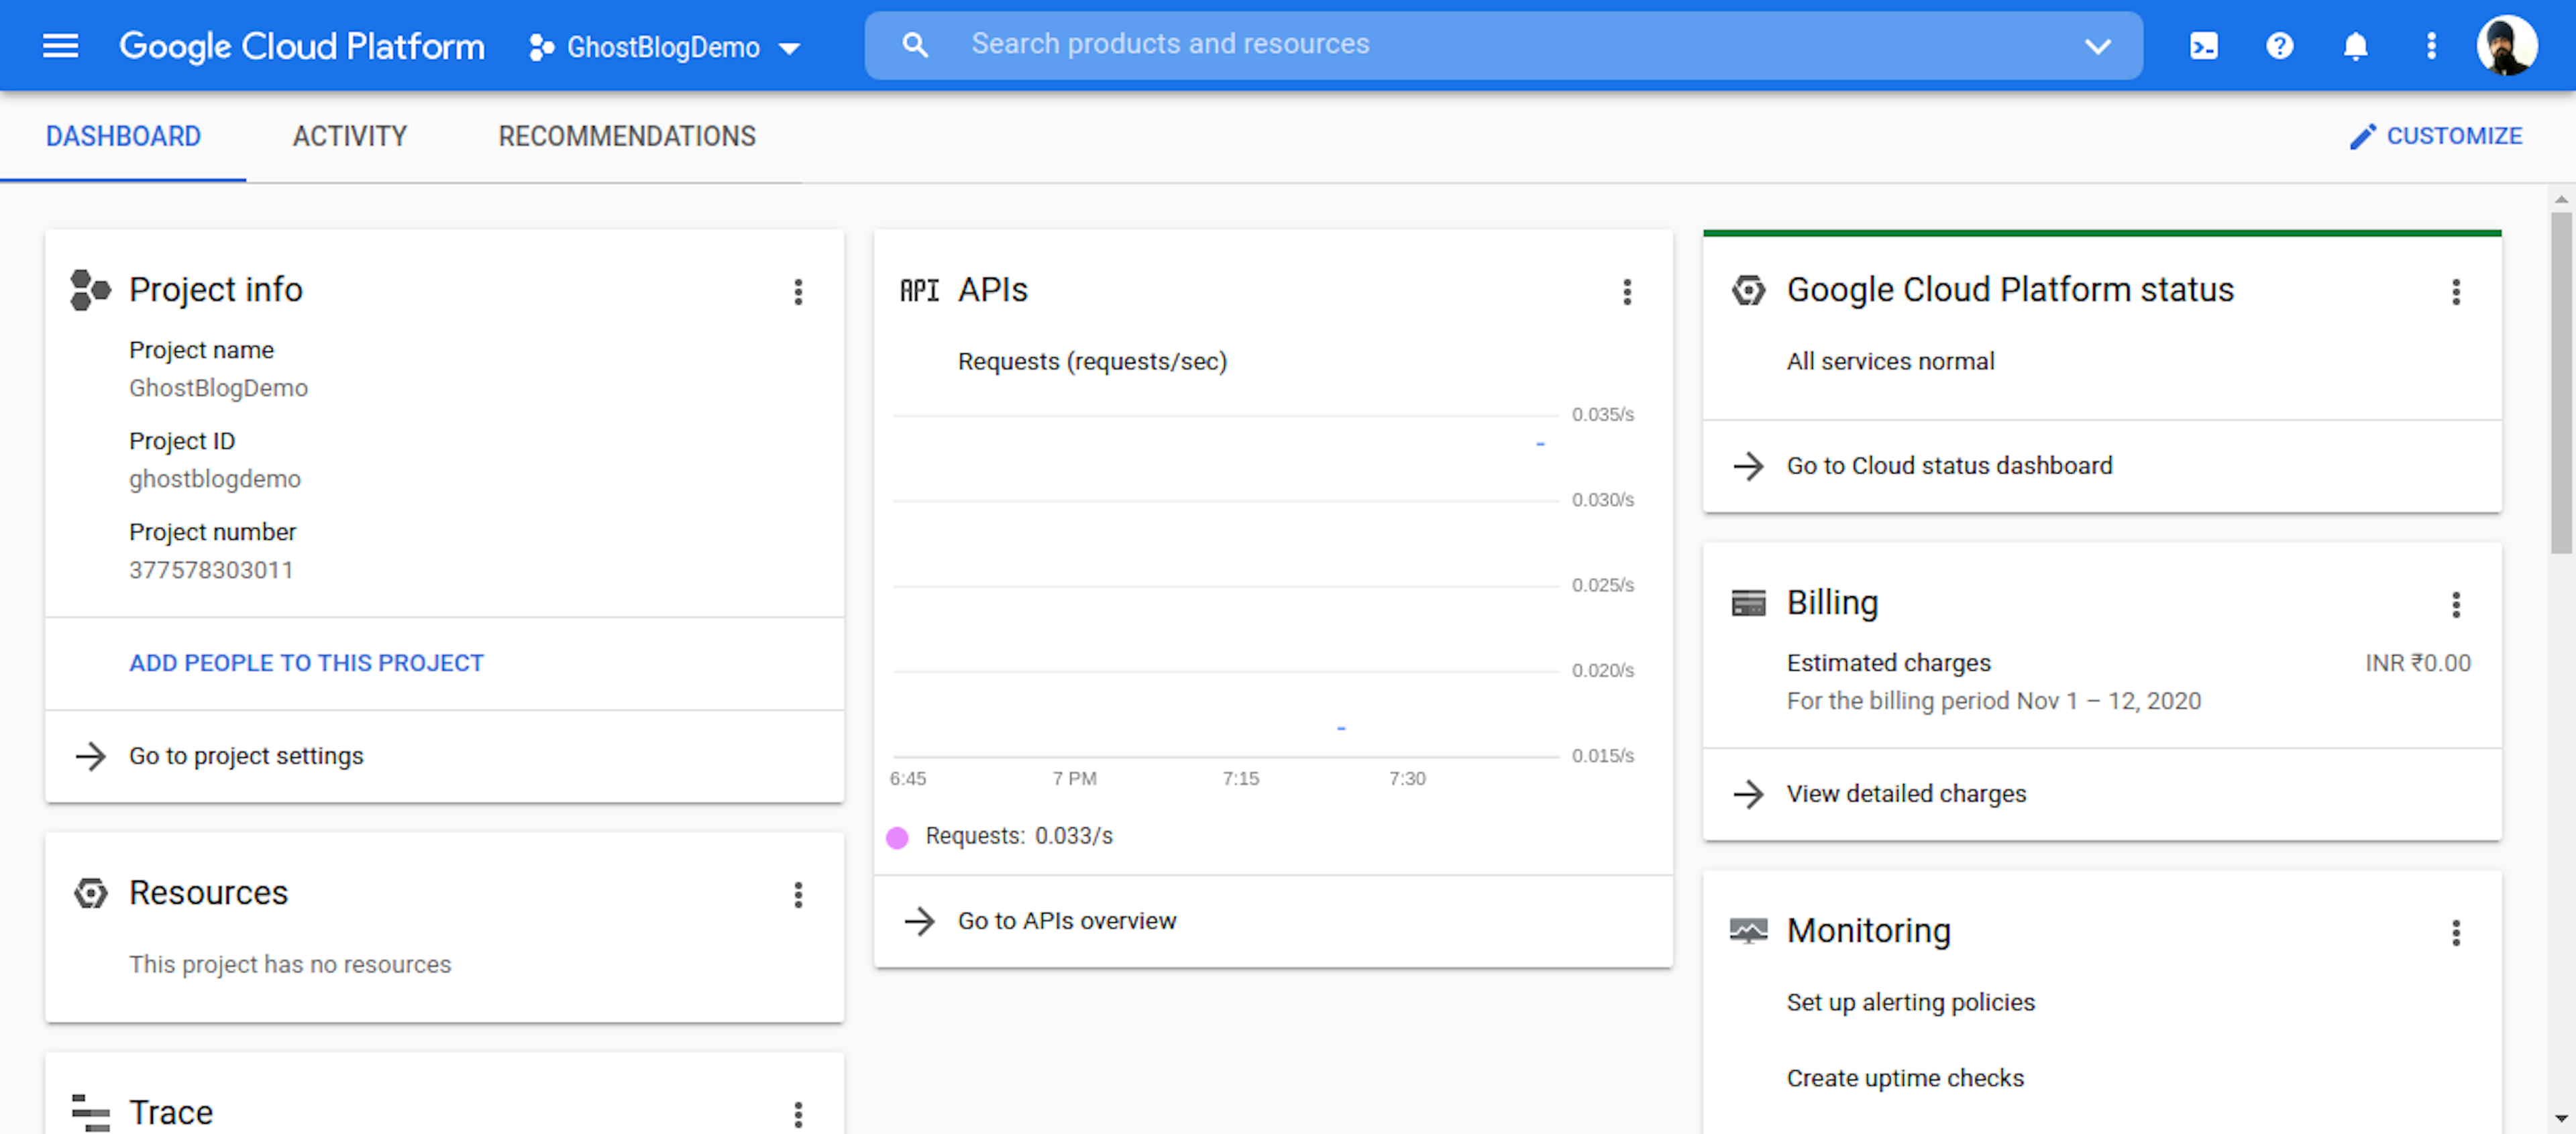
https://console.cloud.google.com/home
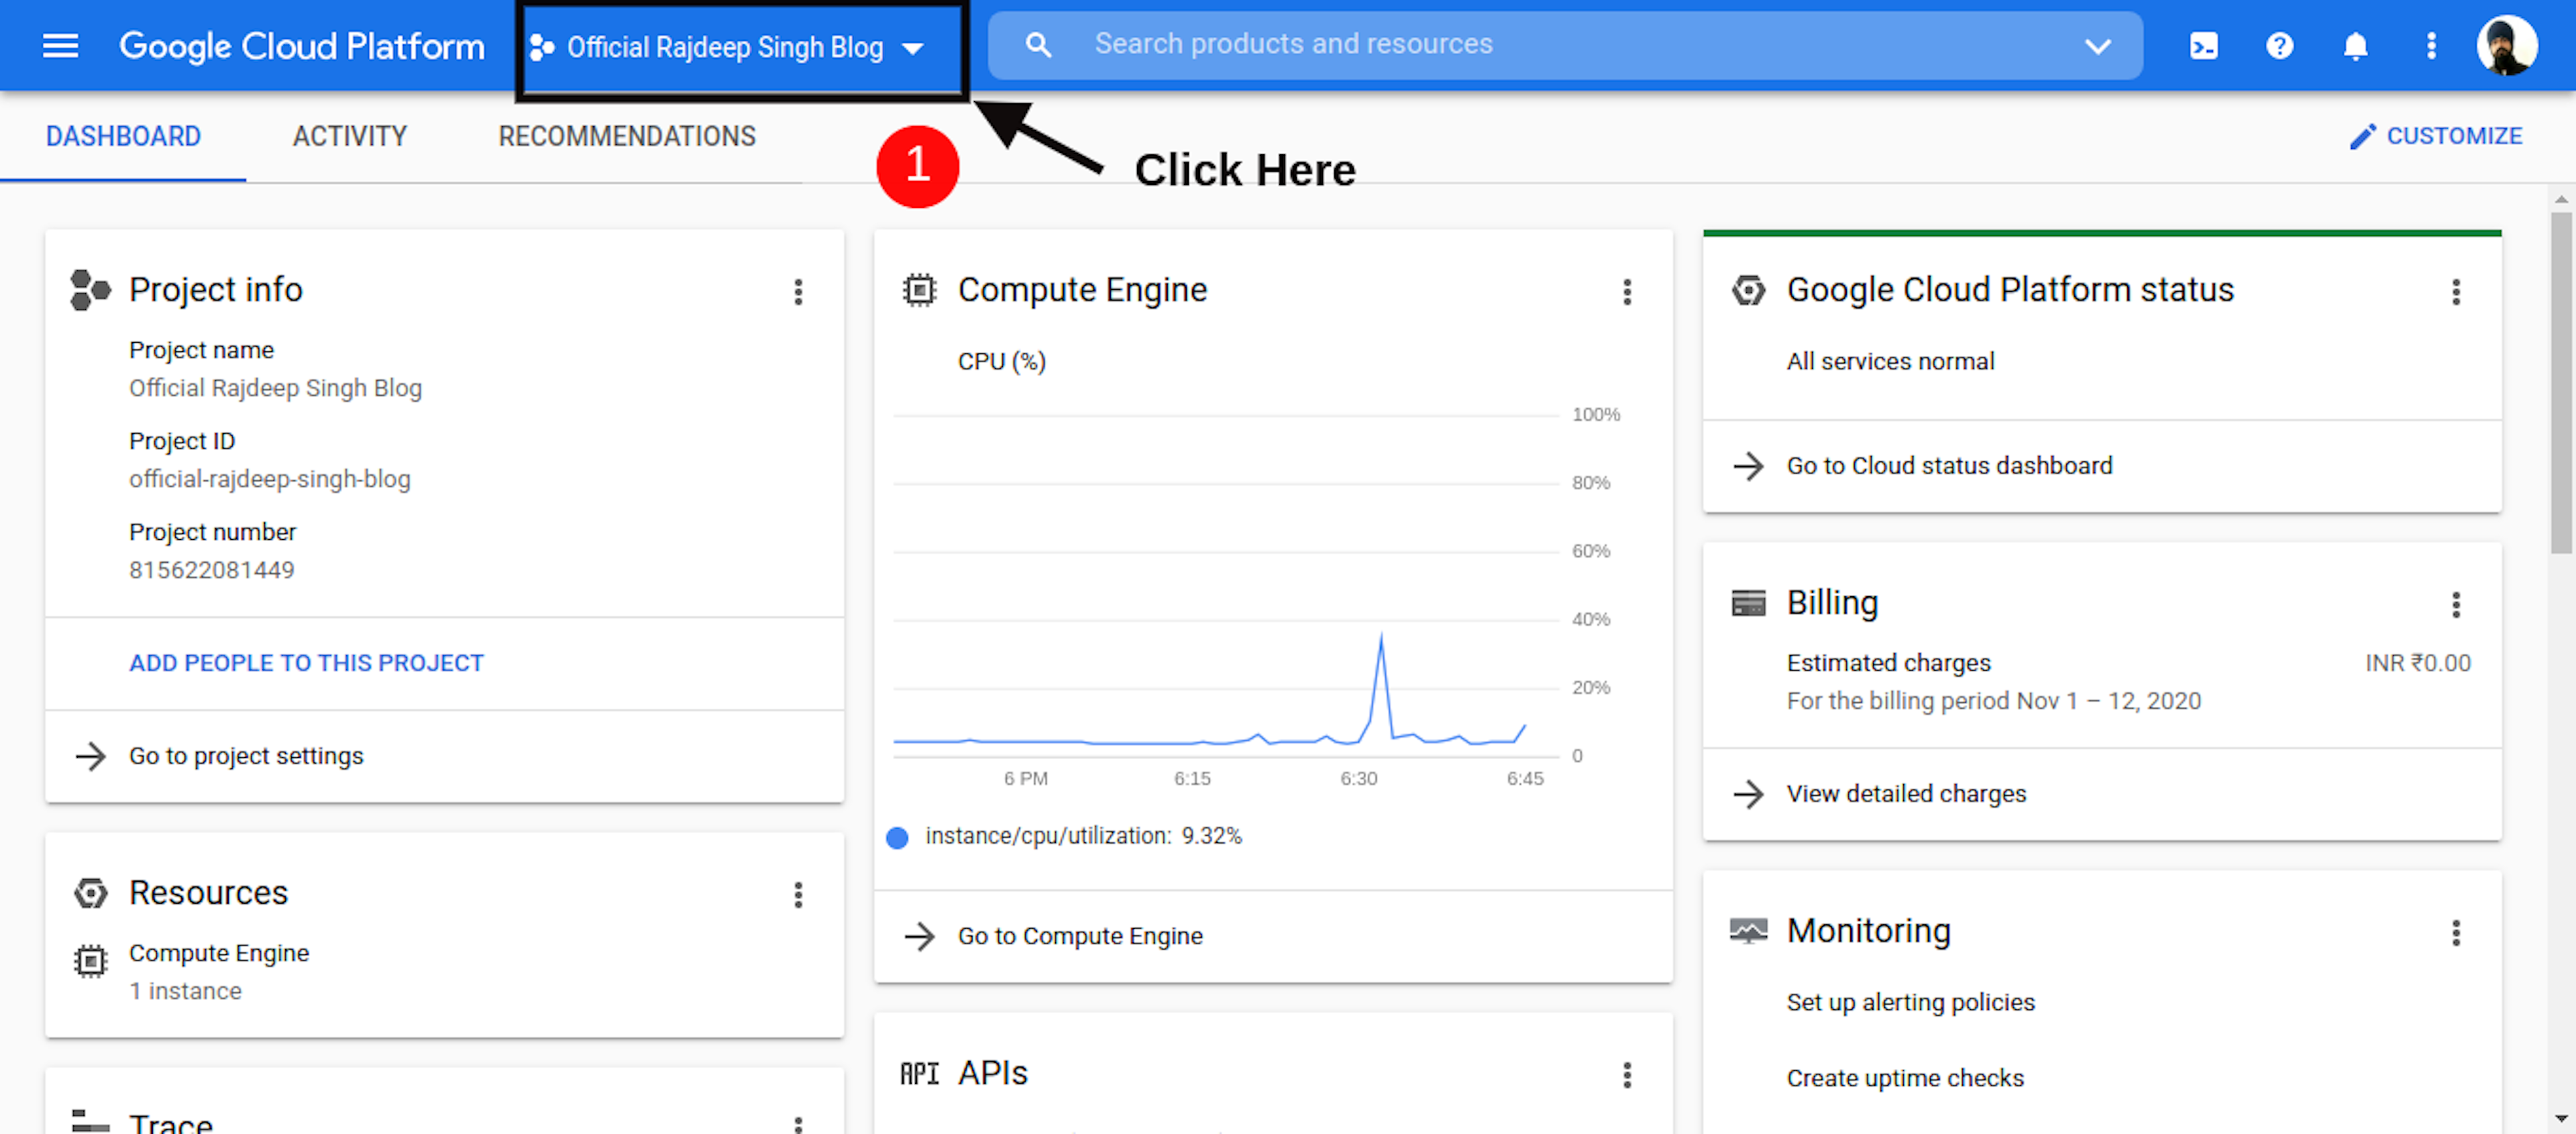
Click Top NavBar DropDown Icon after open New Page.
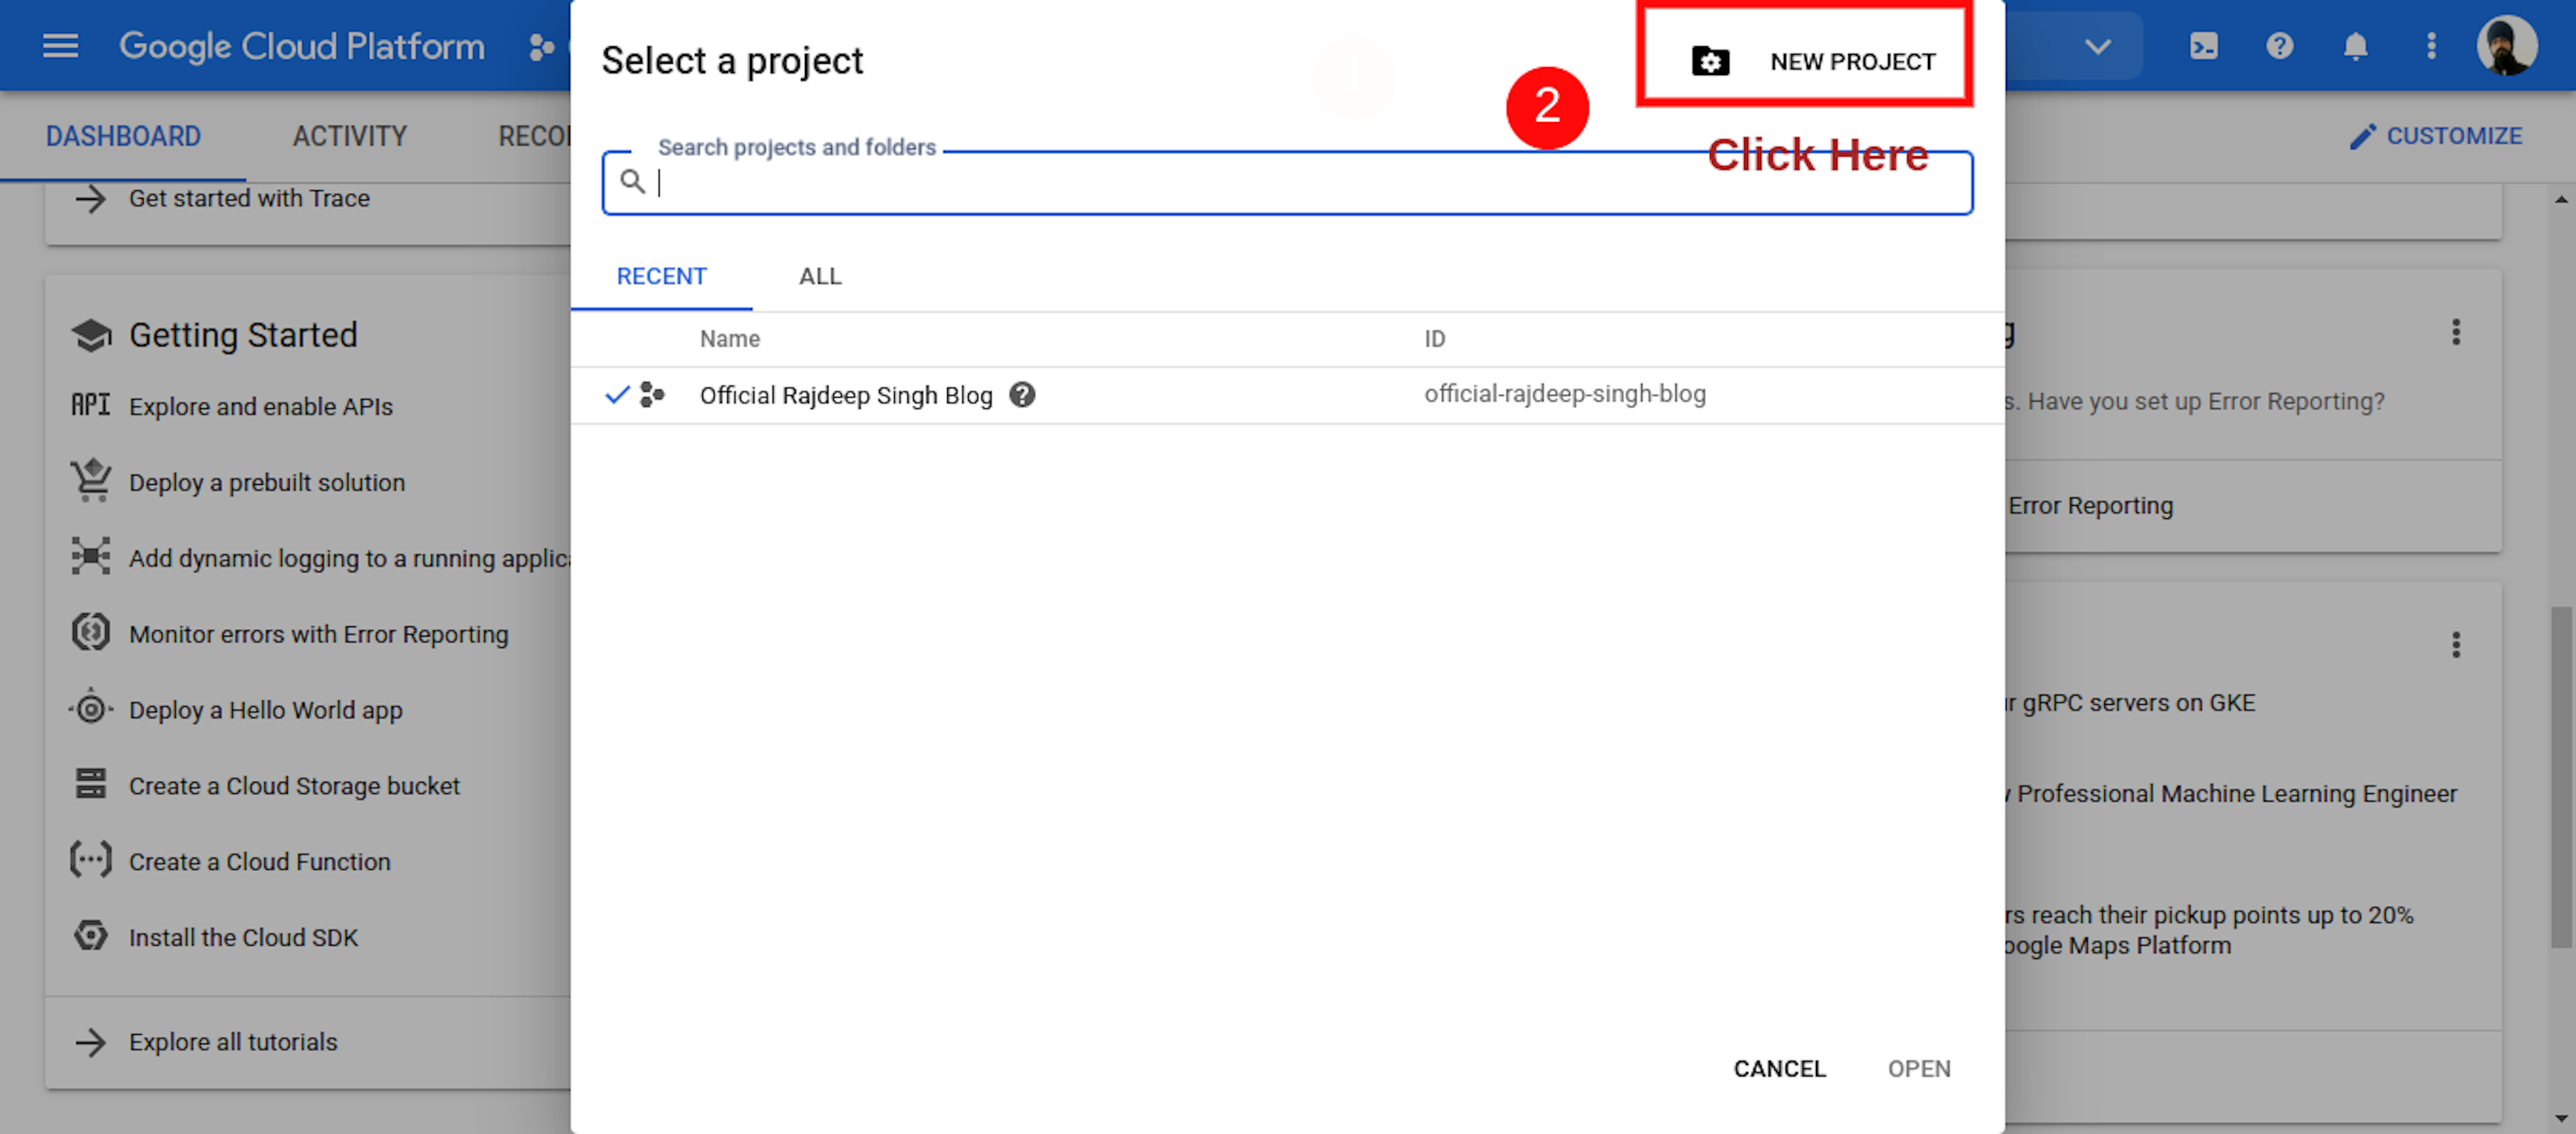
When Open New Page Click Right Conner Create New Project Icon.
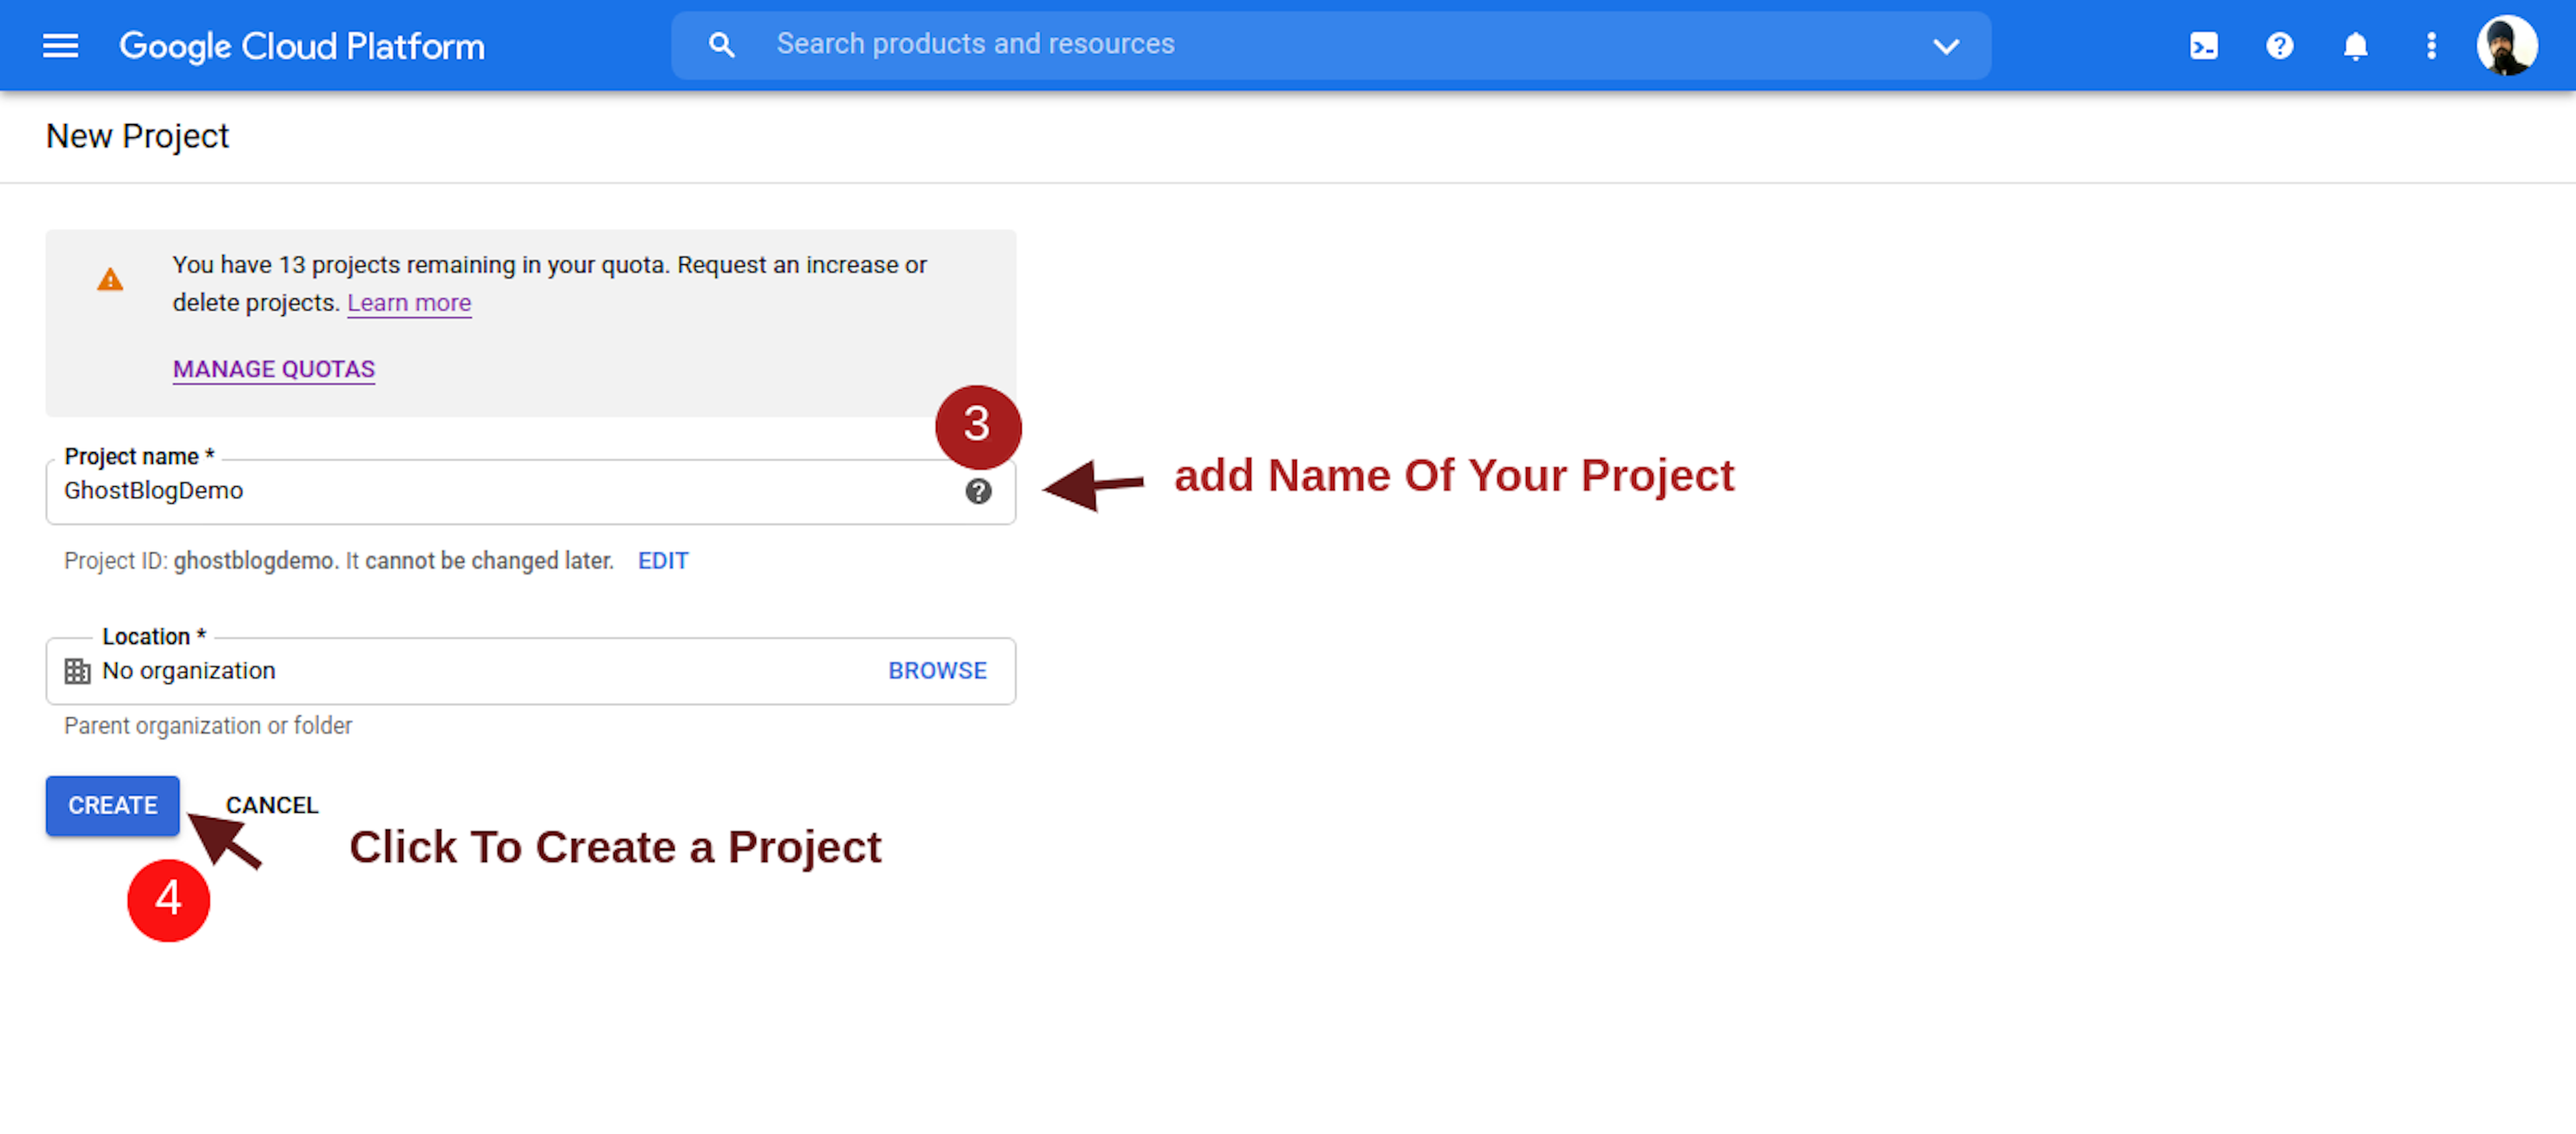
Click New Project After Open New Project Create Page Add Your Project Name and location. Location Optionally. Fill in Your Project Name, Then Click To create. some Second GCP Create Your project and show notification bar
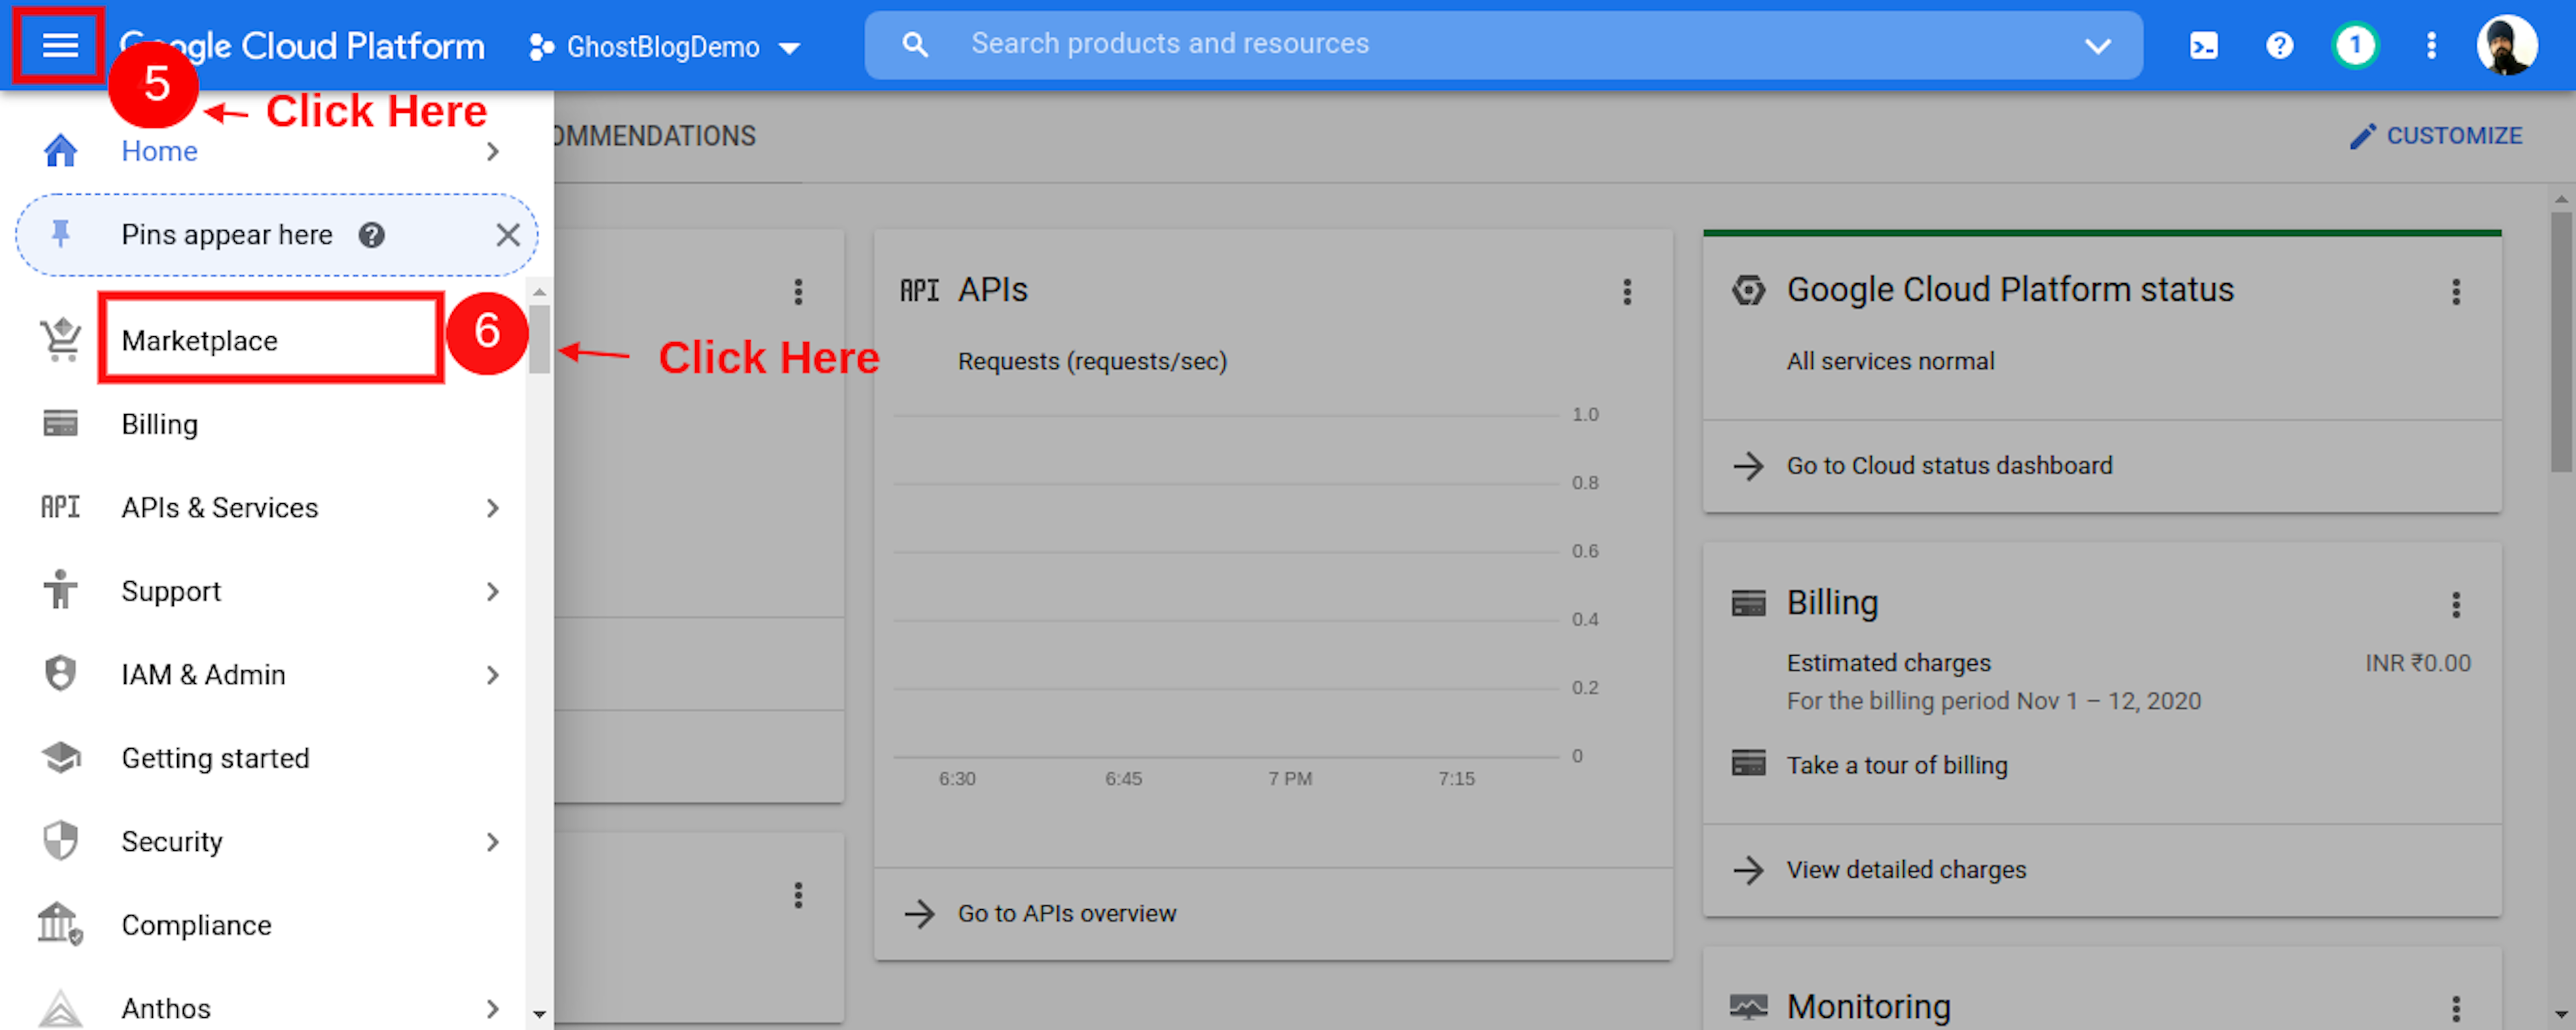
Click To Left Top Handbag Icon To Open Navbar Menu and Click To Marketplace Tab.
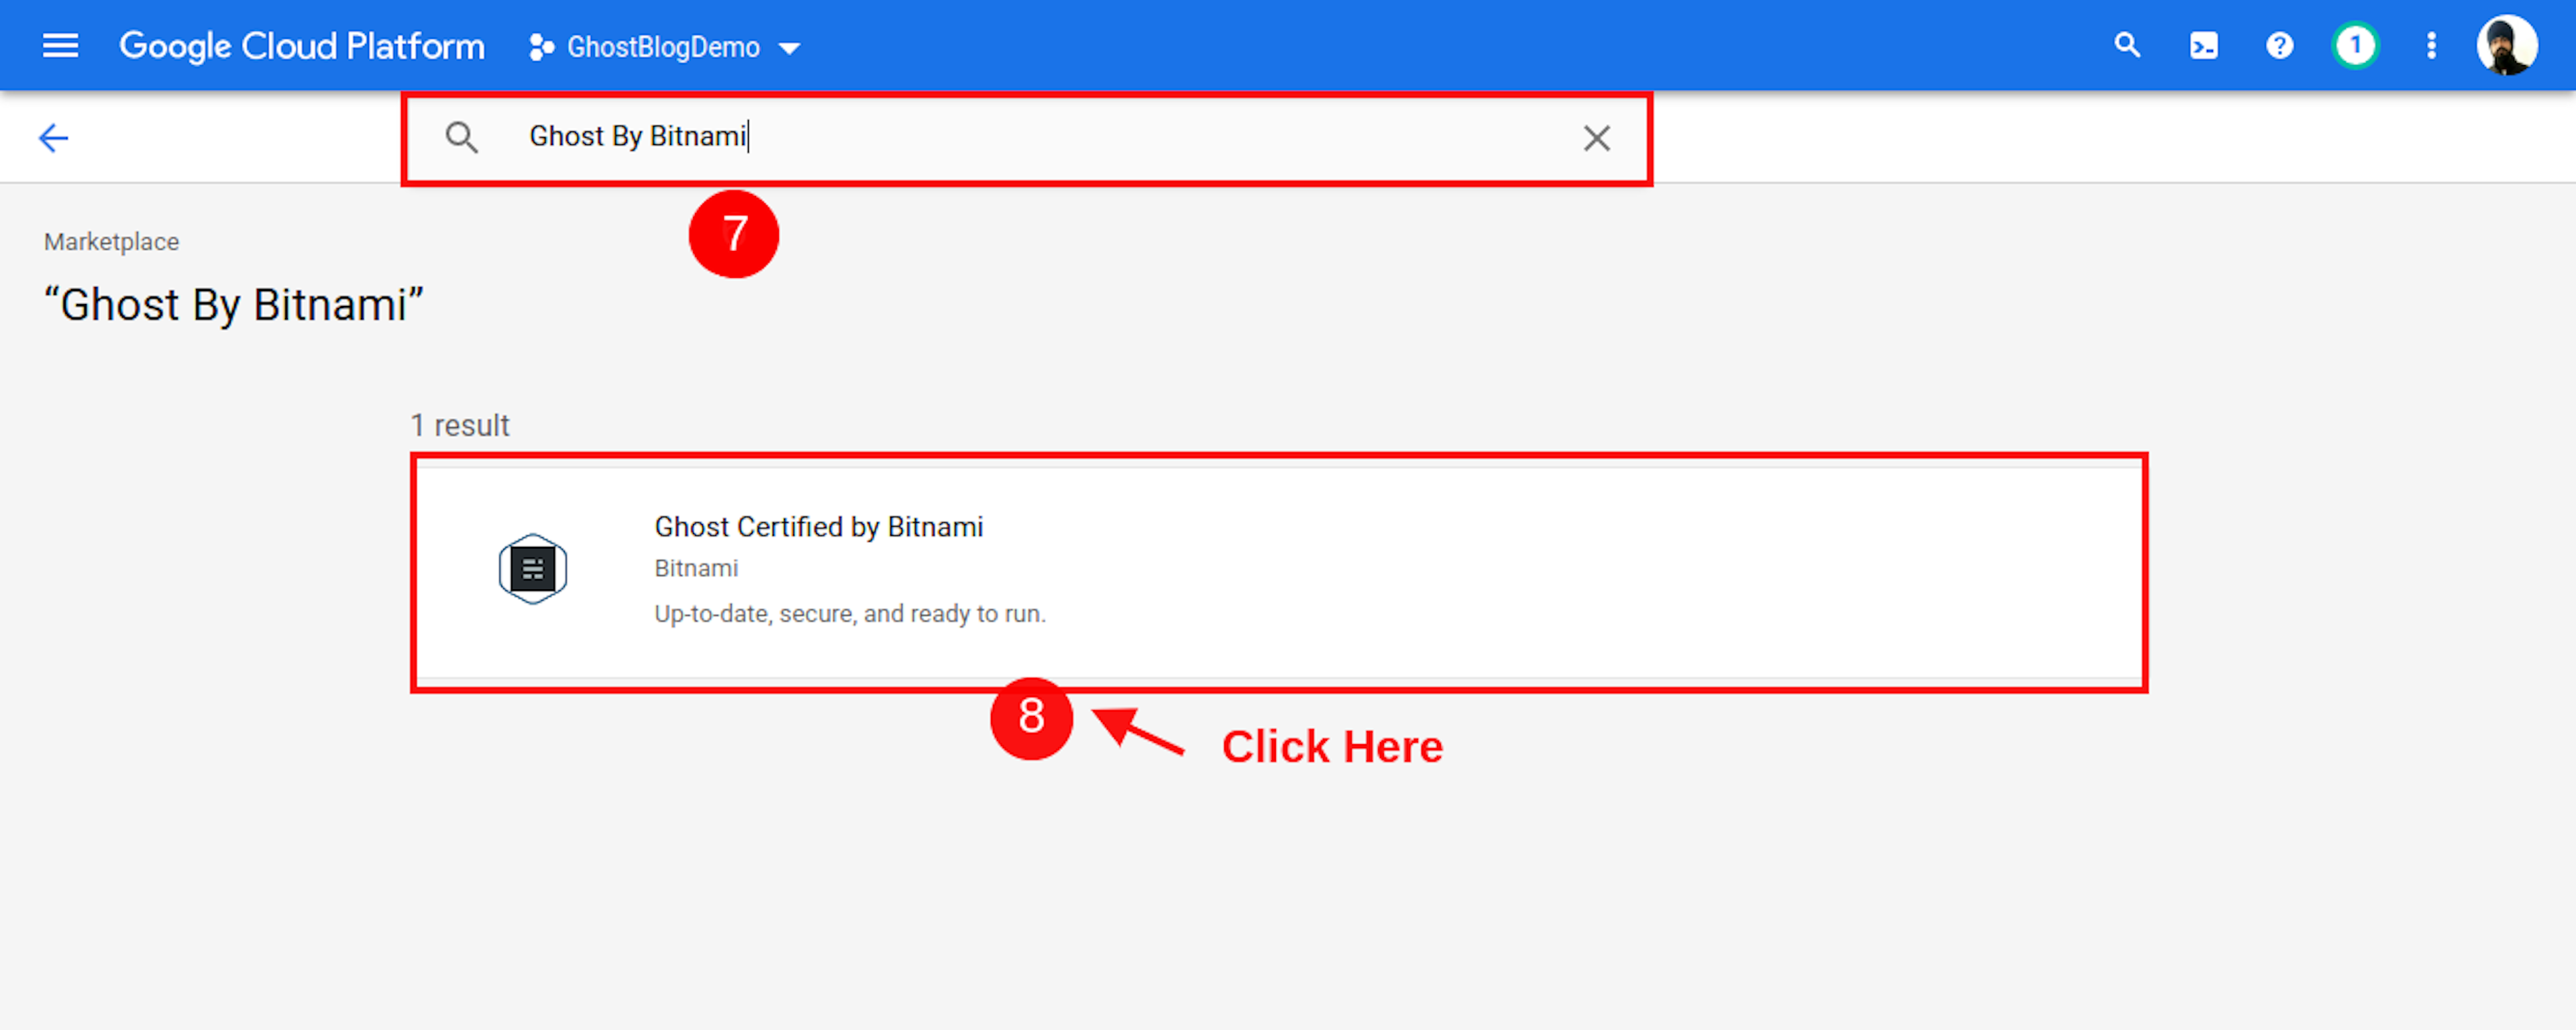
When Open marketplace, Then Find Ghost Cms. The help of the Search bar Finds Ghost By Bitnami.
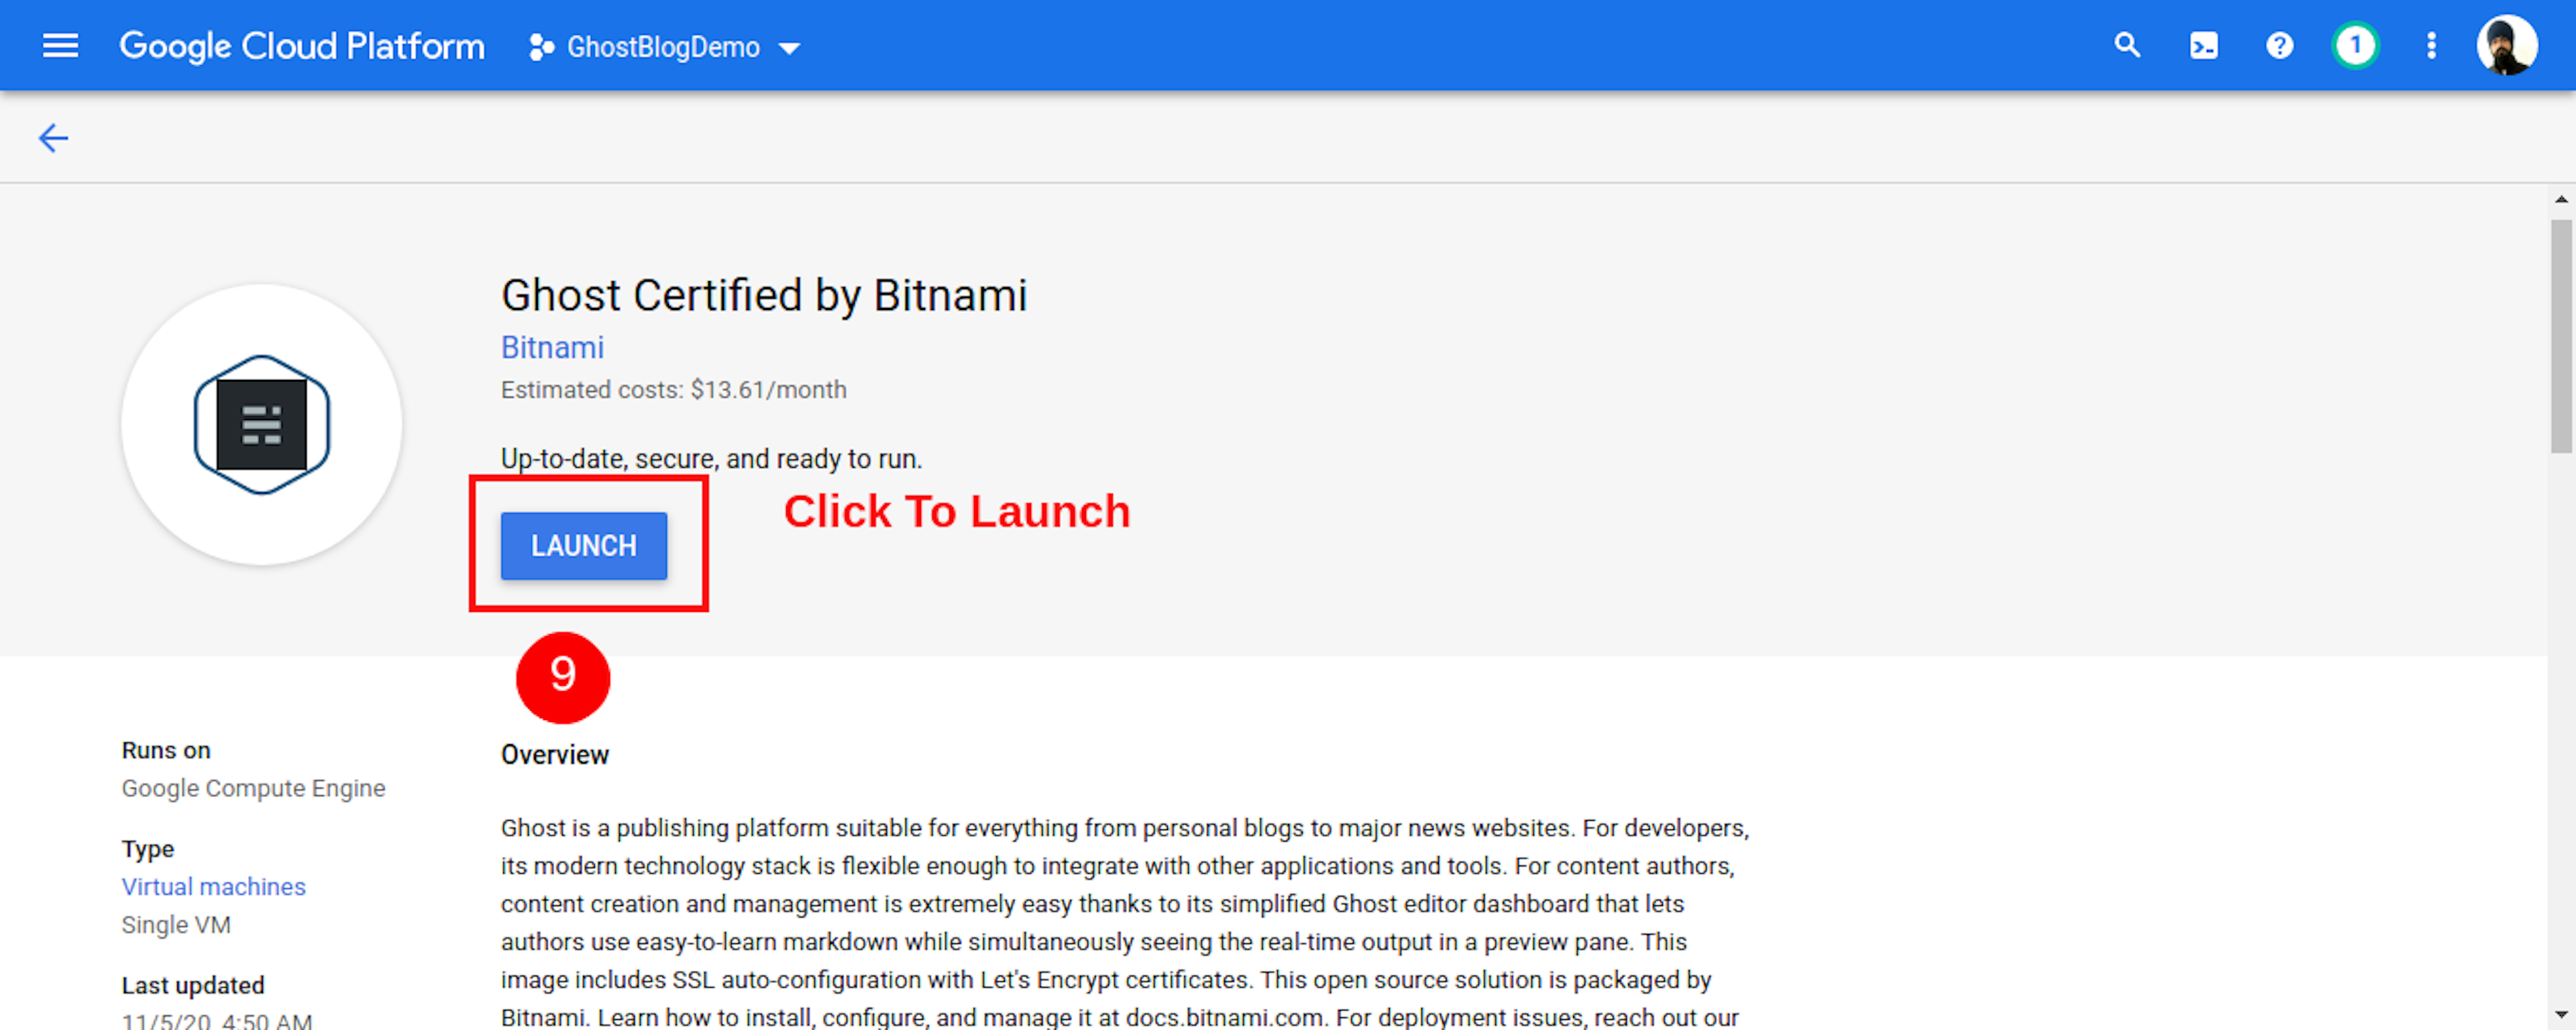
Click To Launch Button.
Warning: Make Sure You Read Pricing about Ghost Cms
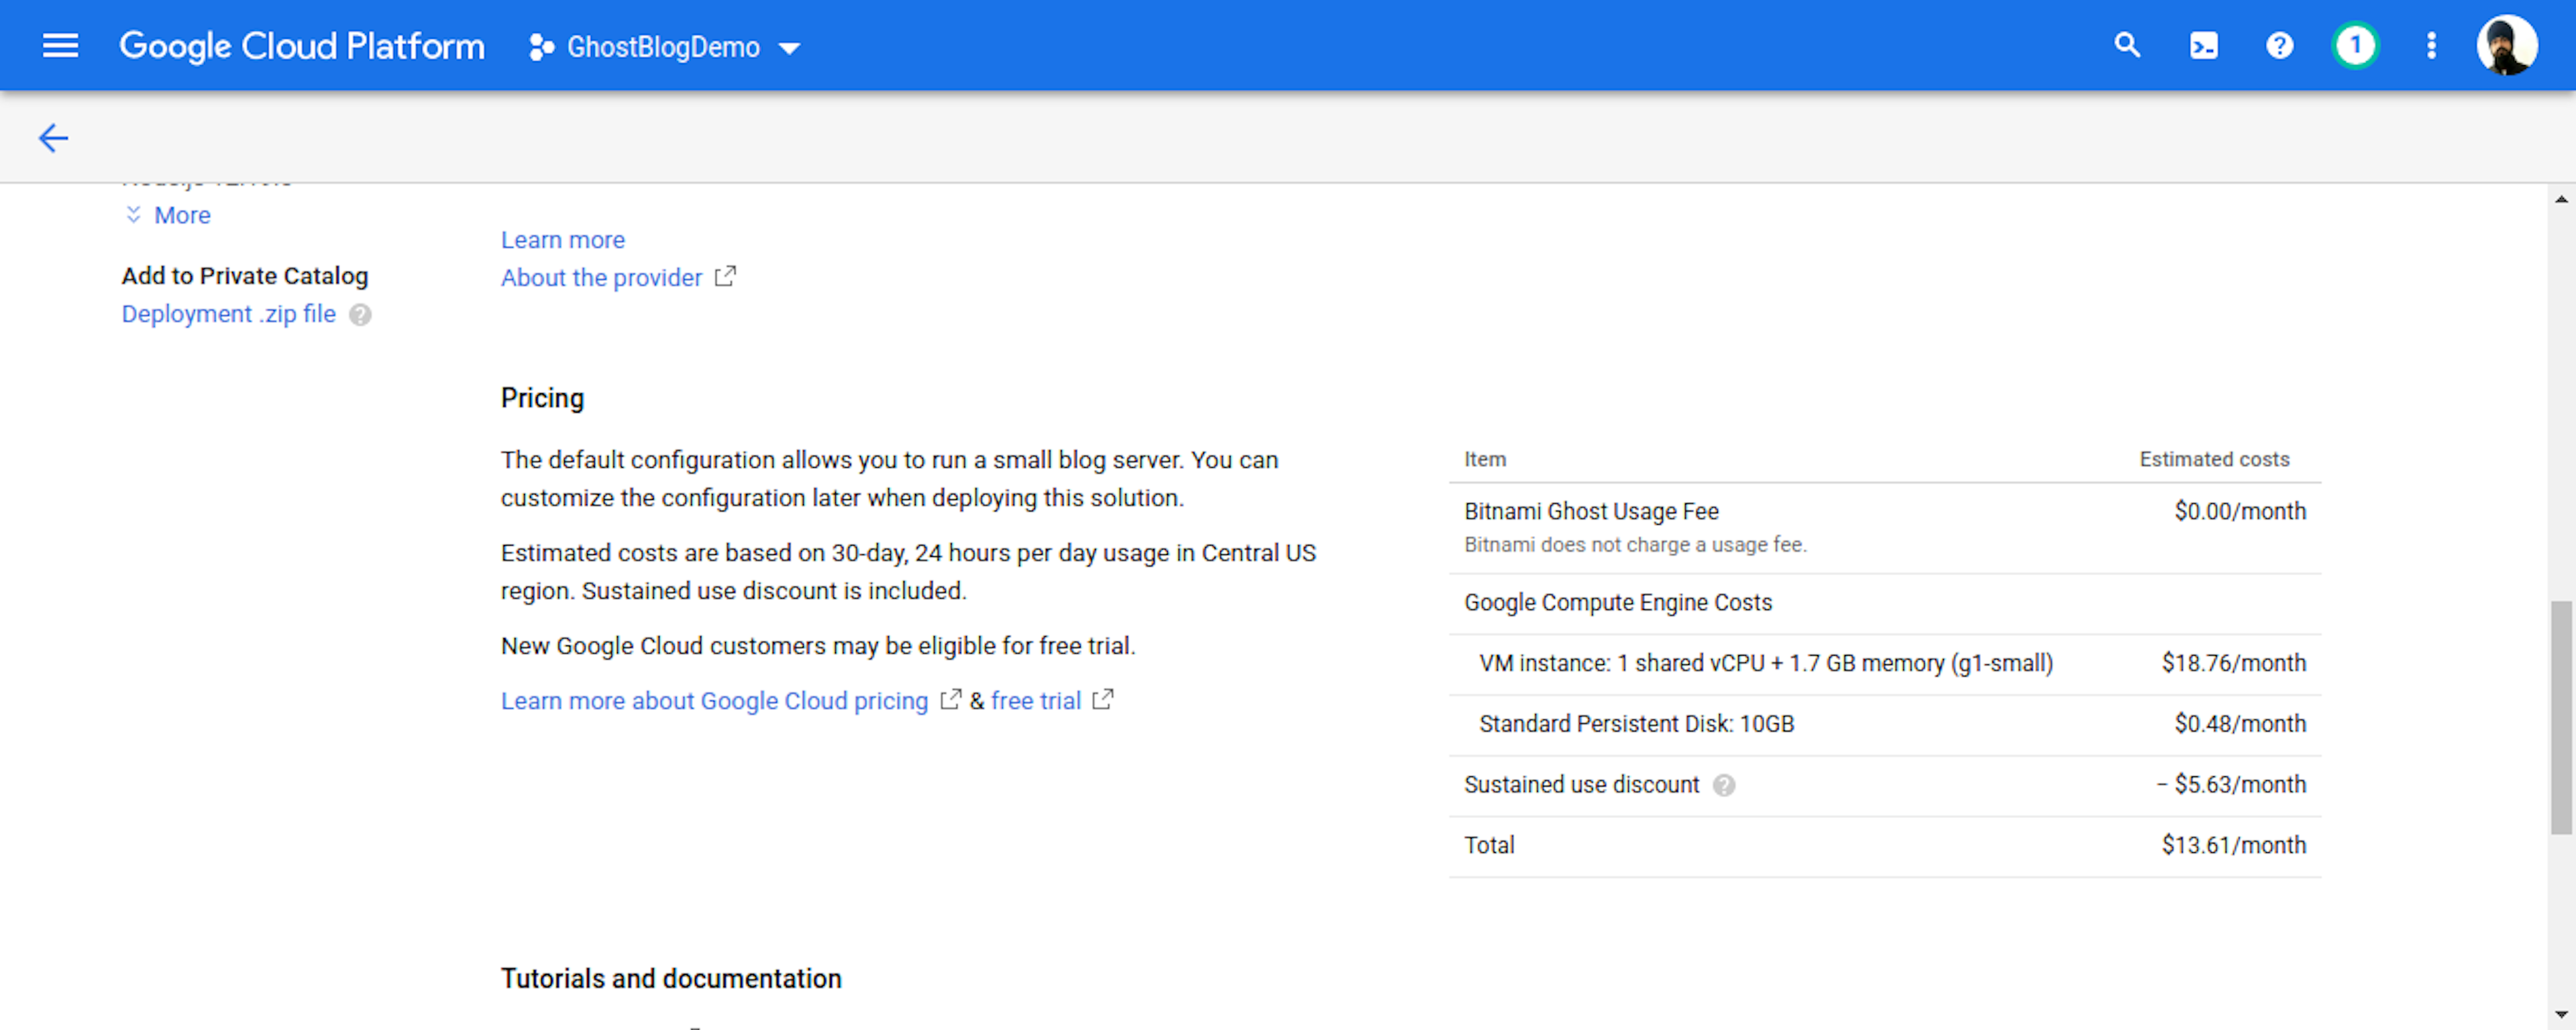
Make sure check pricing check care-full then click on Launch Button
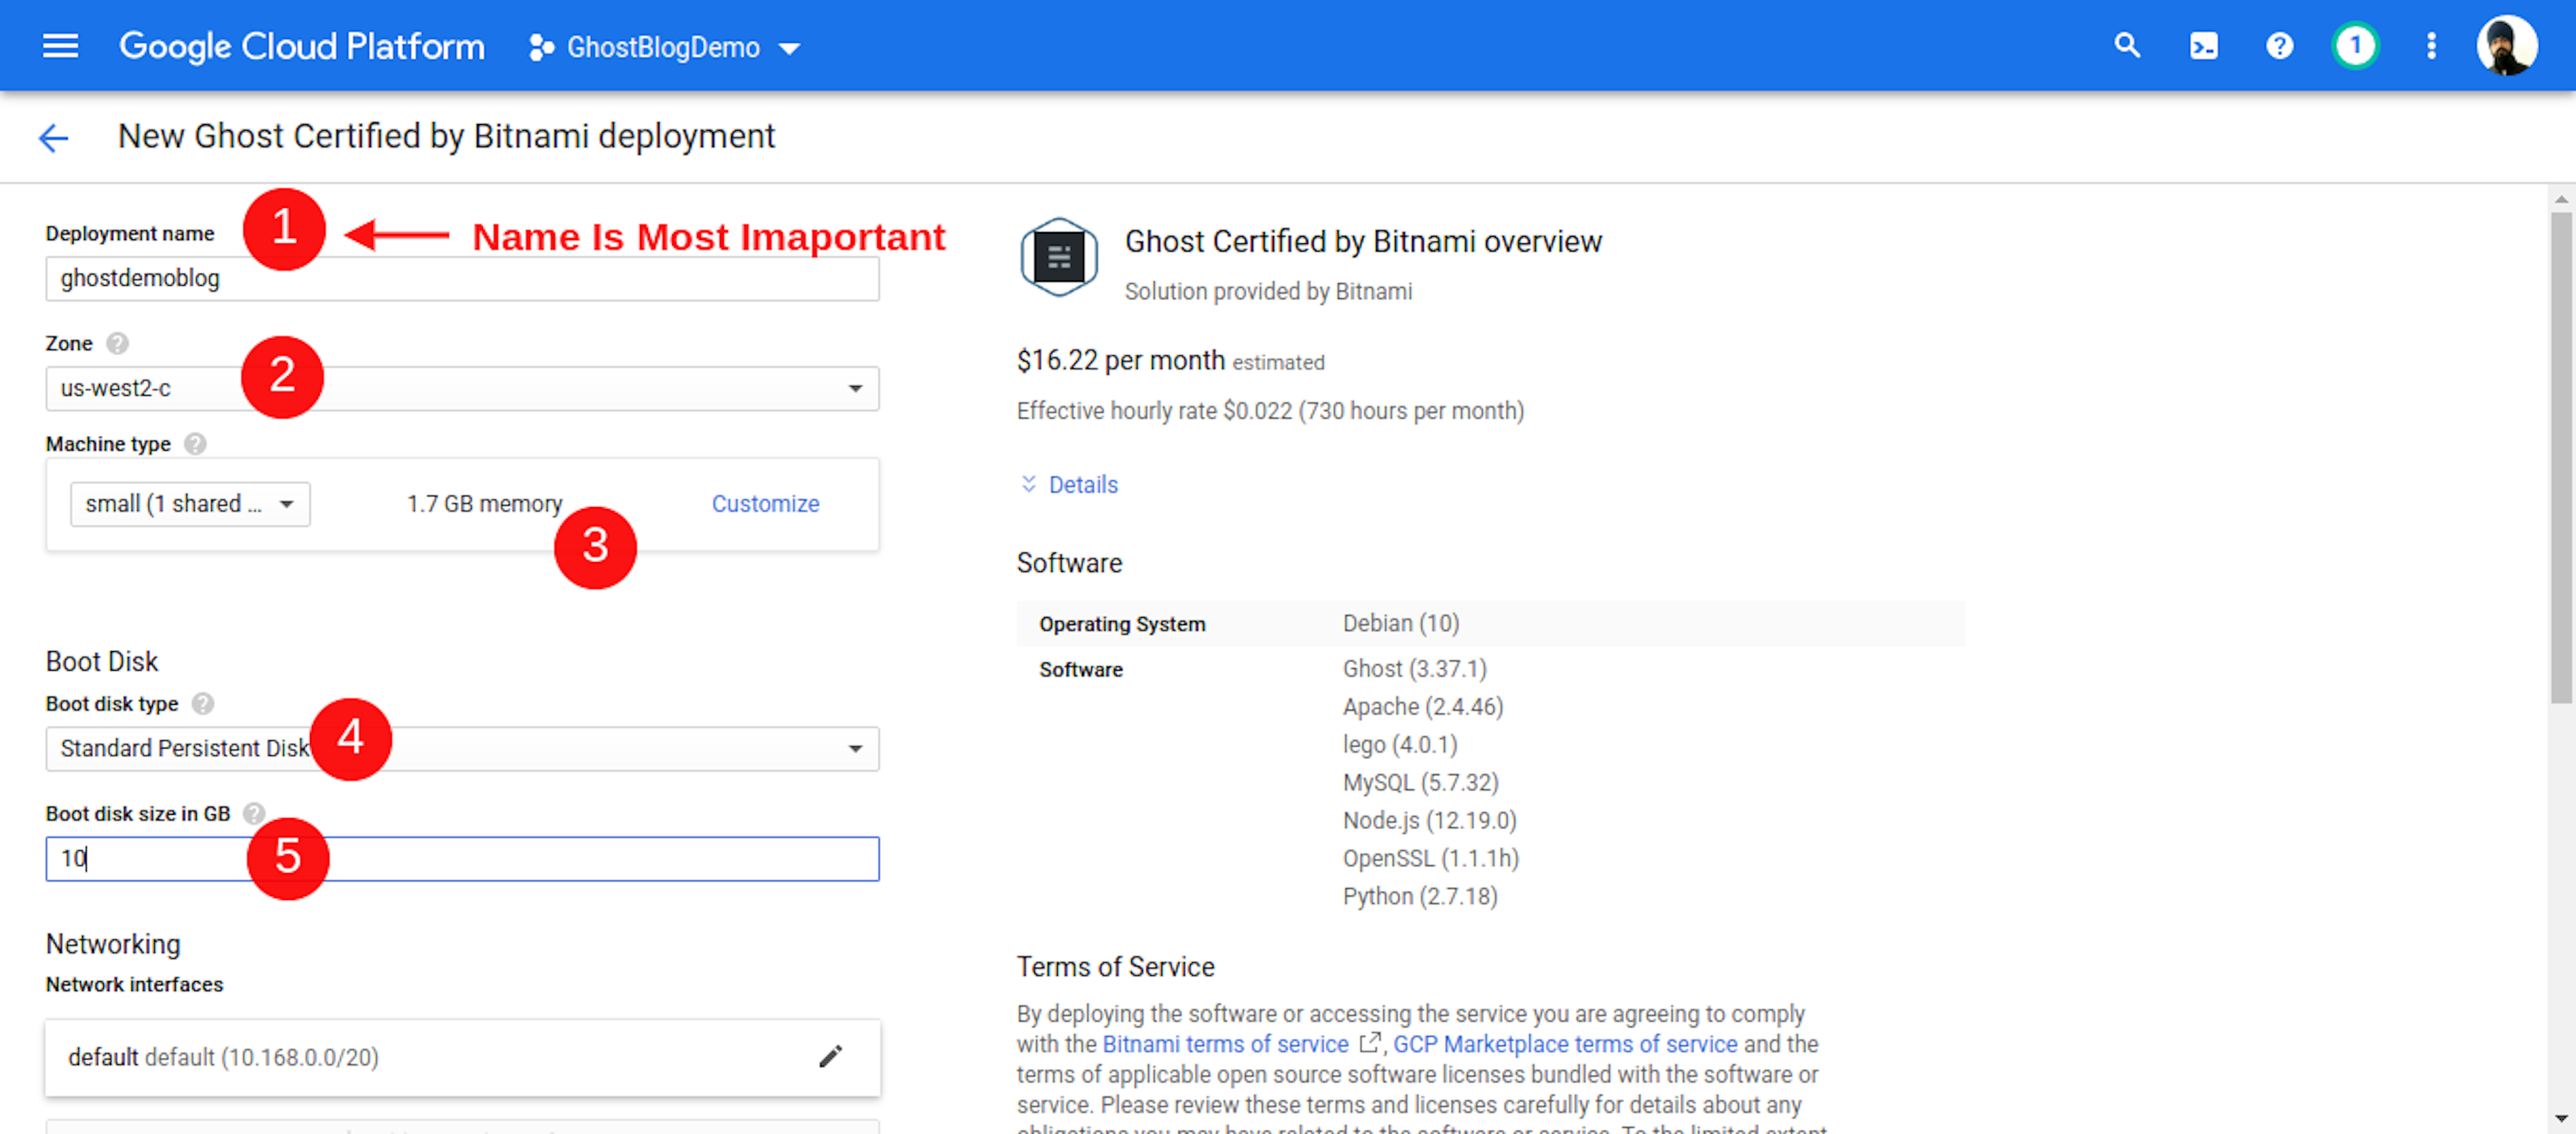
After Click On Launch Button, You See A Deployment Page. Deployment name is Most Import Then Rest of Set default Setting.
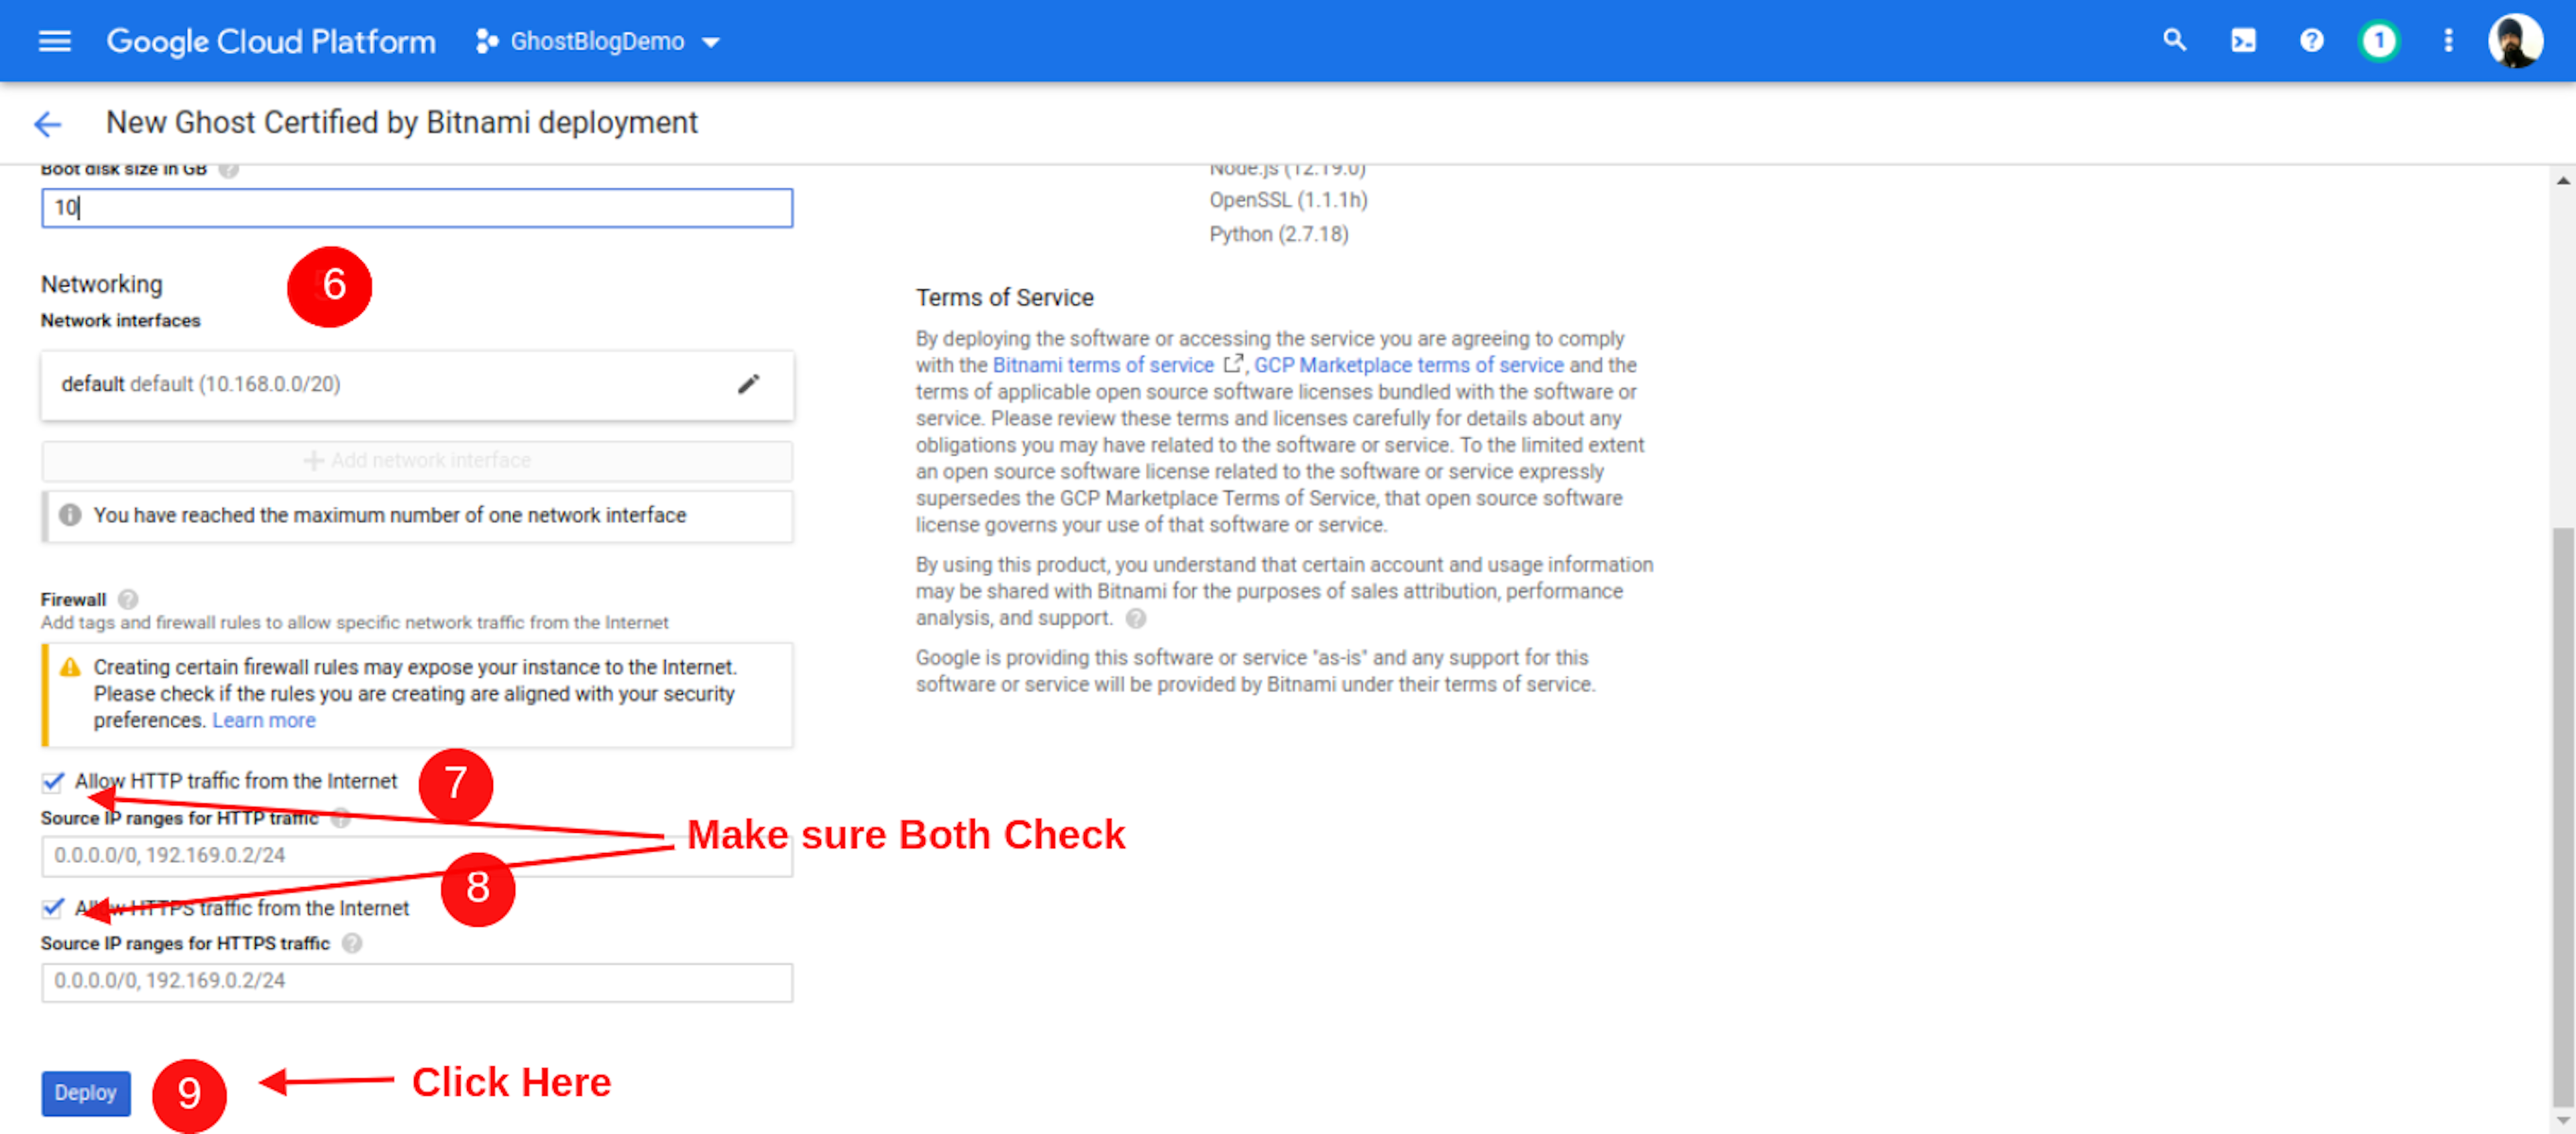
http or https Traffic Allow on your Site after click deploy Button. Rest setting set on default
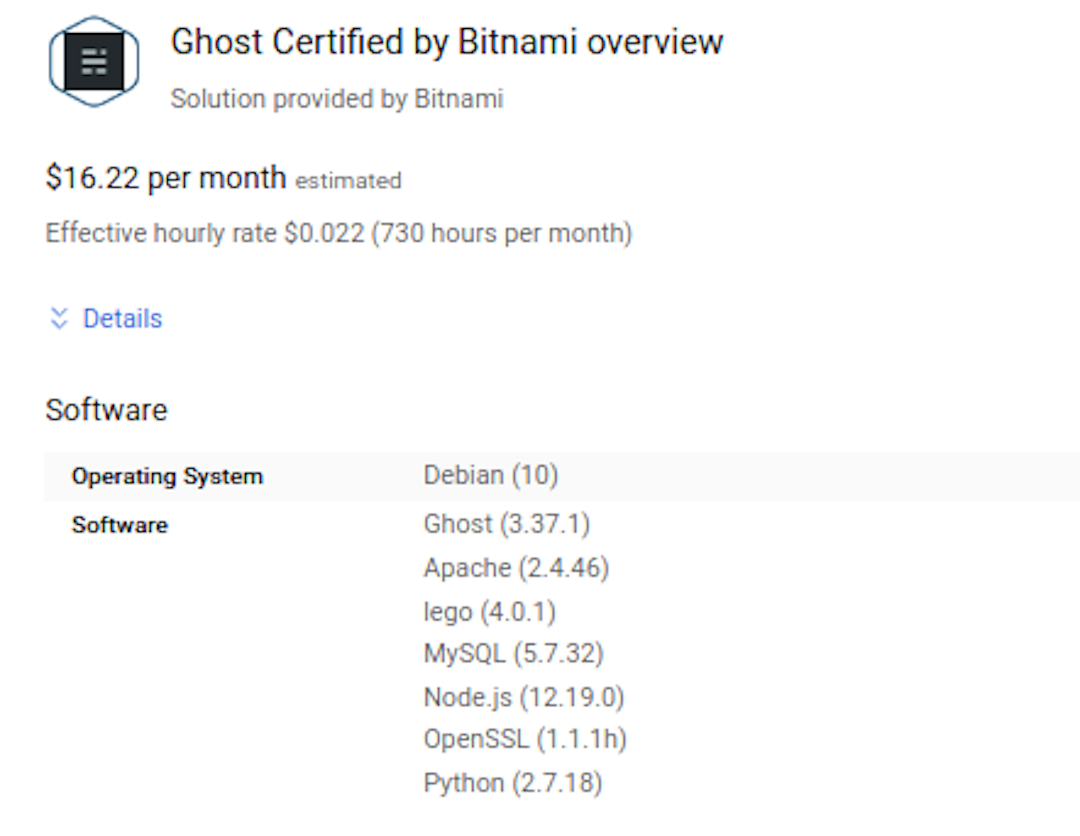
Read Basic about Ghost Pricing And Software Information.
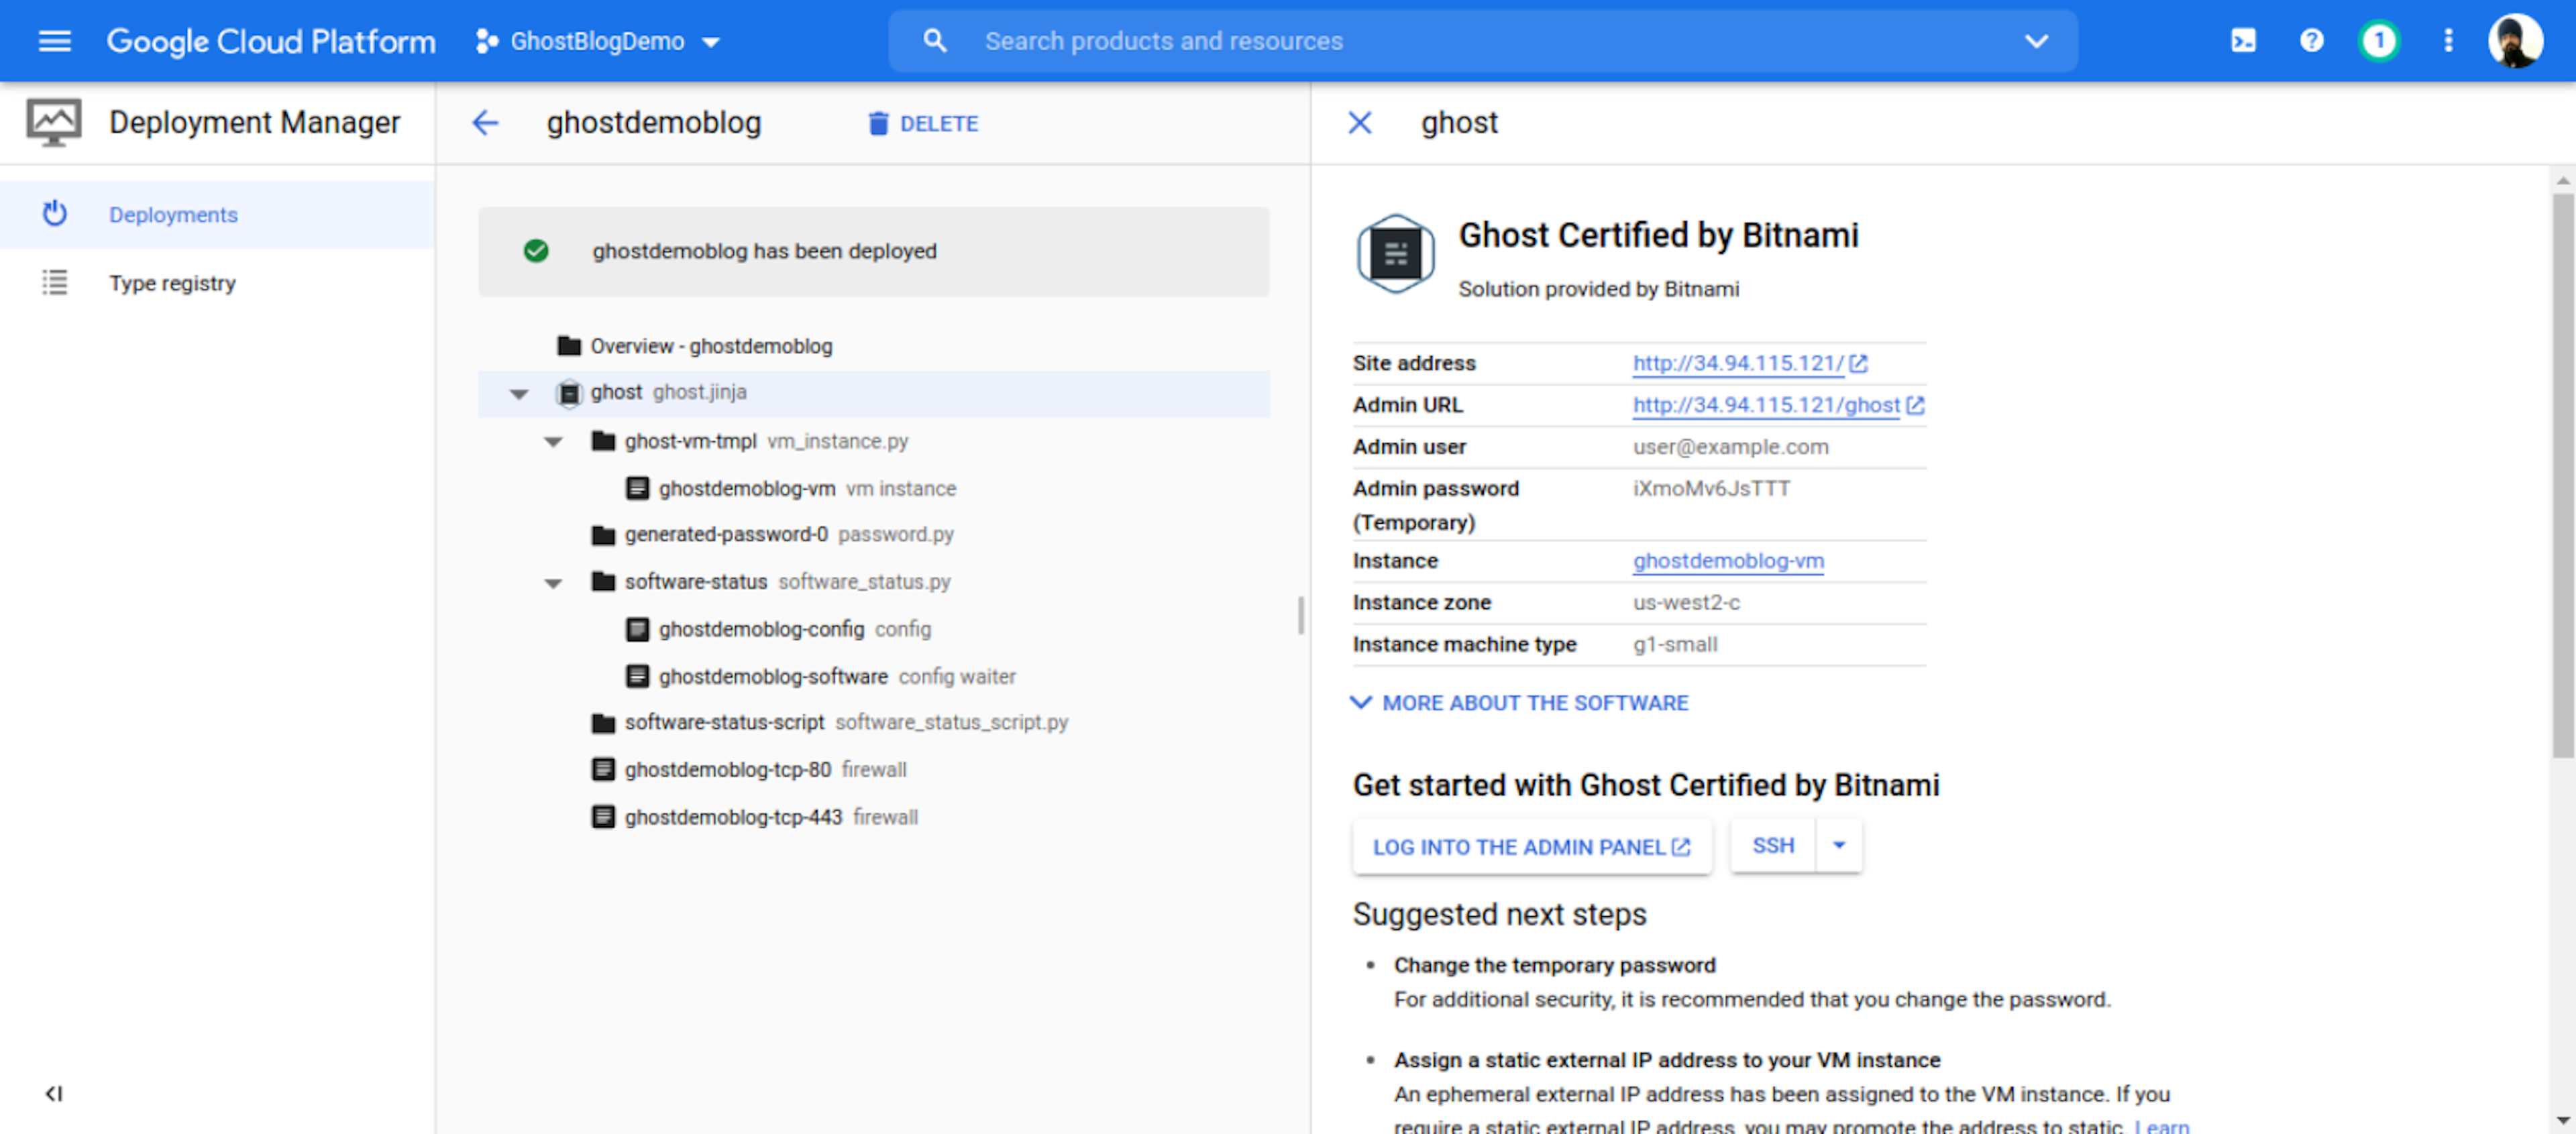
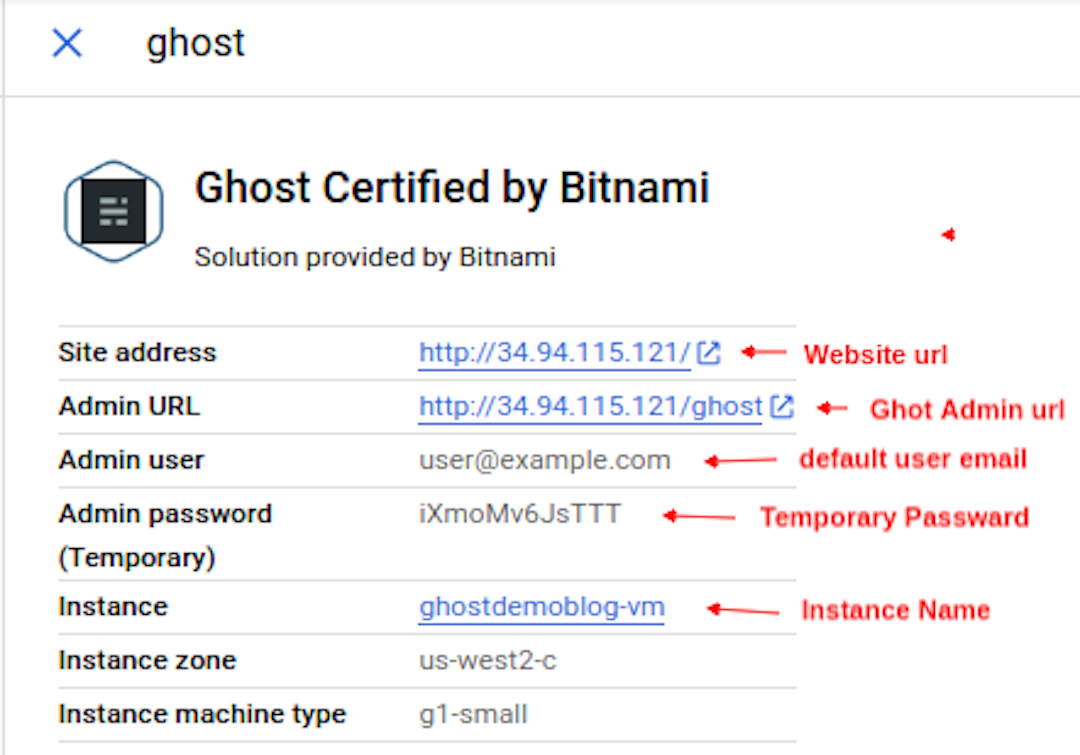
Successful Show deploys Message Then click Site address your website IP address and Admin URL your ghost Cms dashboard URL.Admin user your default user email and Admin password your temp password for your Ghost CMS.
Conclusion
Suppose You Follow My article You Definite Launch Your Own Website With Ghost CMS on GCP. If you have Any Problems or Errors, Contact Me. I try to help solve your problem.